Focus Peaking
Categories:
Focus Peaking: The Laplacian of Gaussian Method
Note: To obtain the most optimal results in Focus Peak view (extract), it is recommended to extract the JPG file from the ARW file. While it is possible to view Focus Peek by creating thumbnails, the mask is more effective when applied to JPGs. To access Focus Peek, double-click on the image in main view. In the Settings menu, Thumbnails tab, disable the “Use Thumbnail for Zoom” to use JPGs as base for Focus Peak.
What Is Focus Peaking?
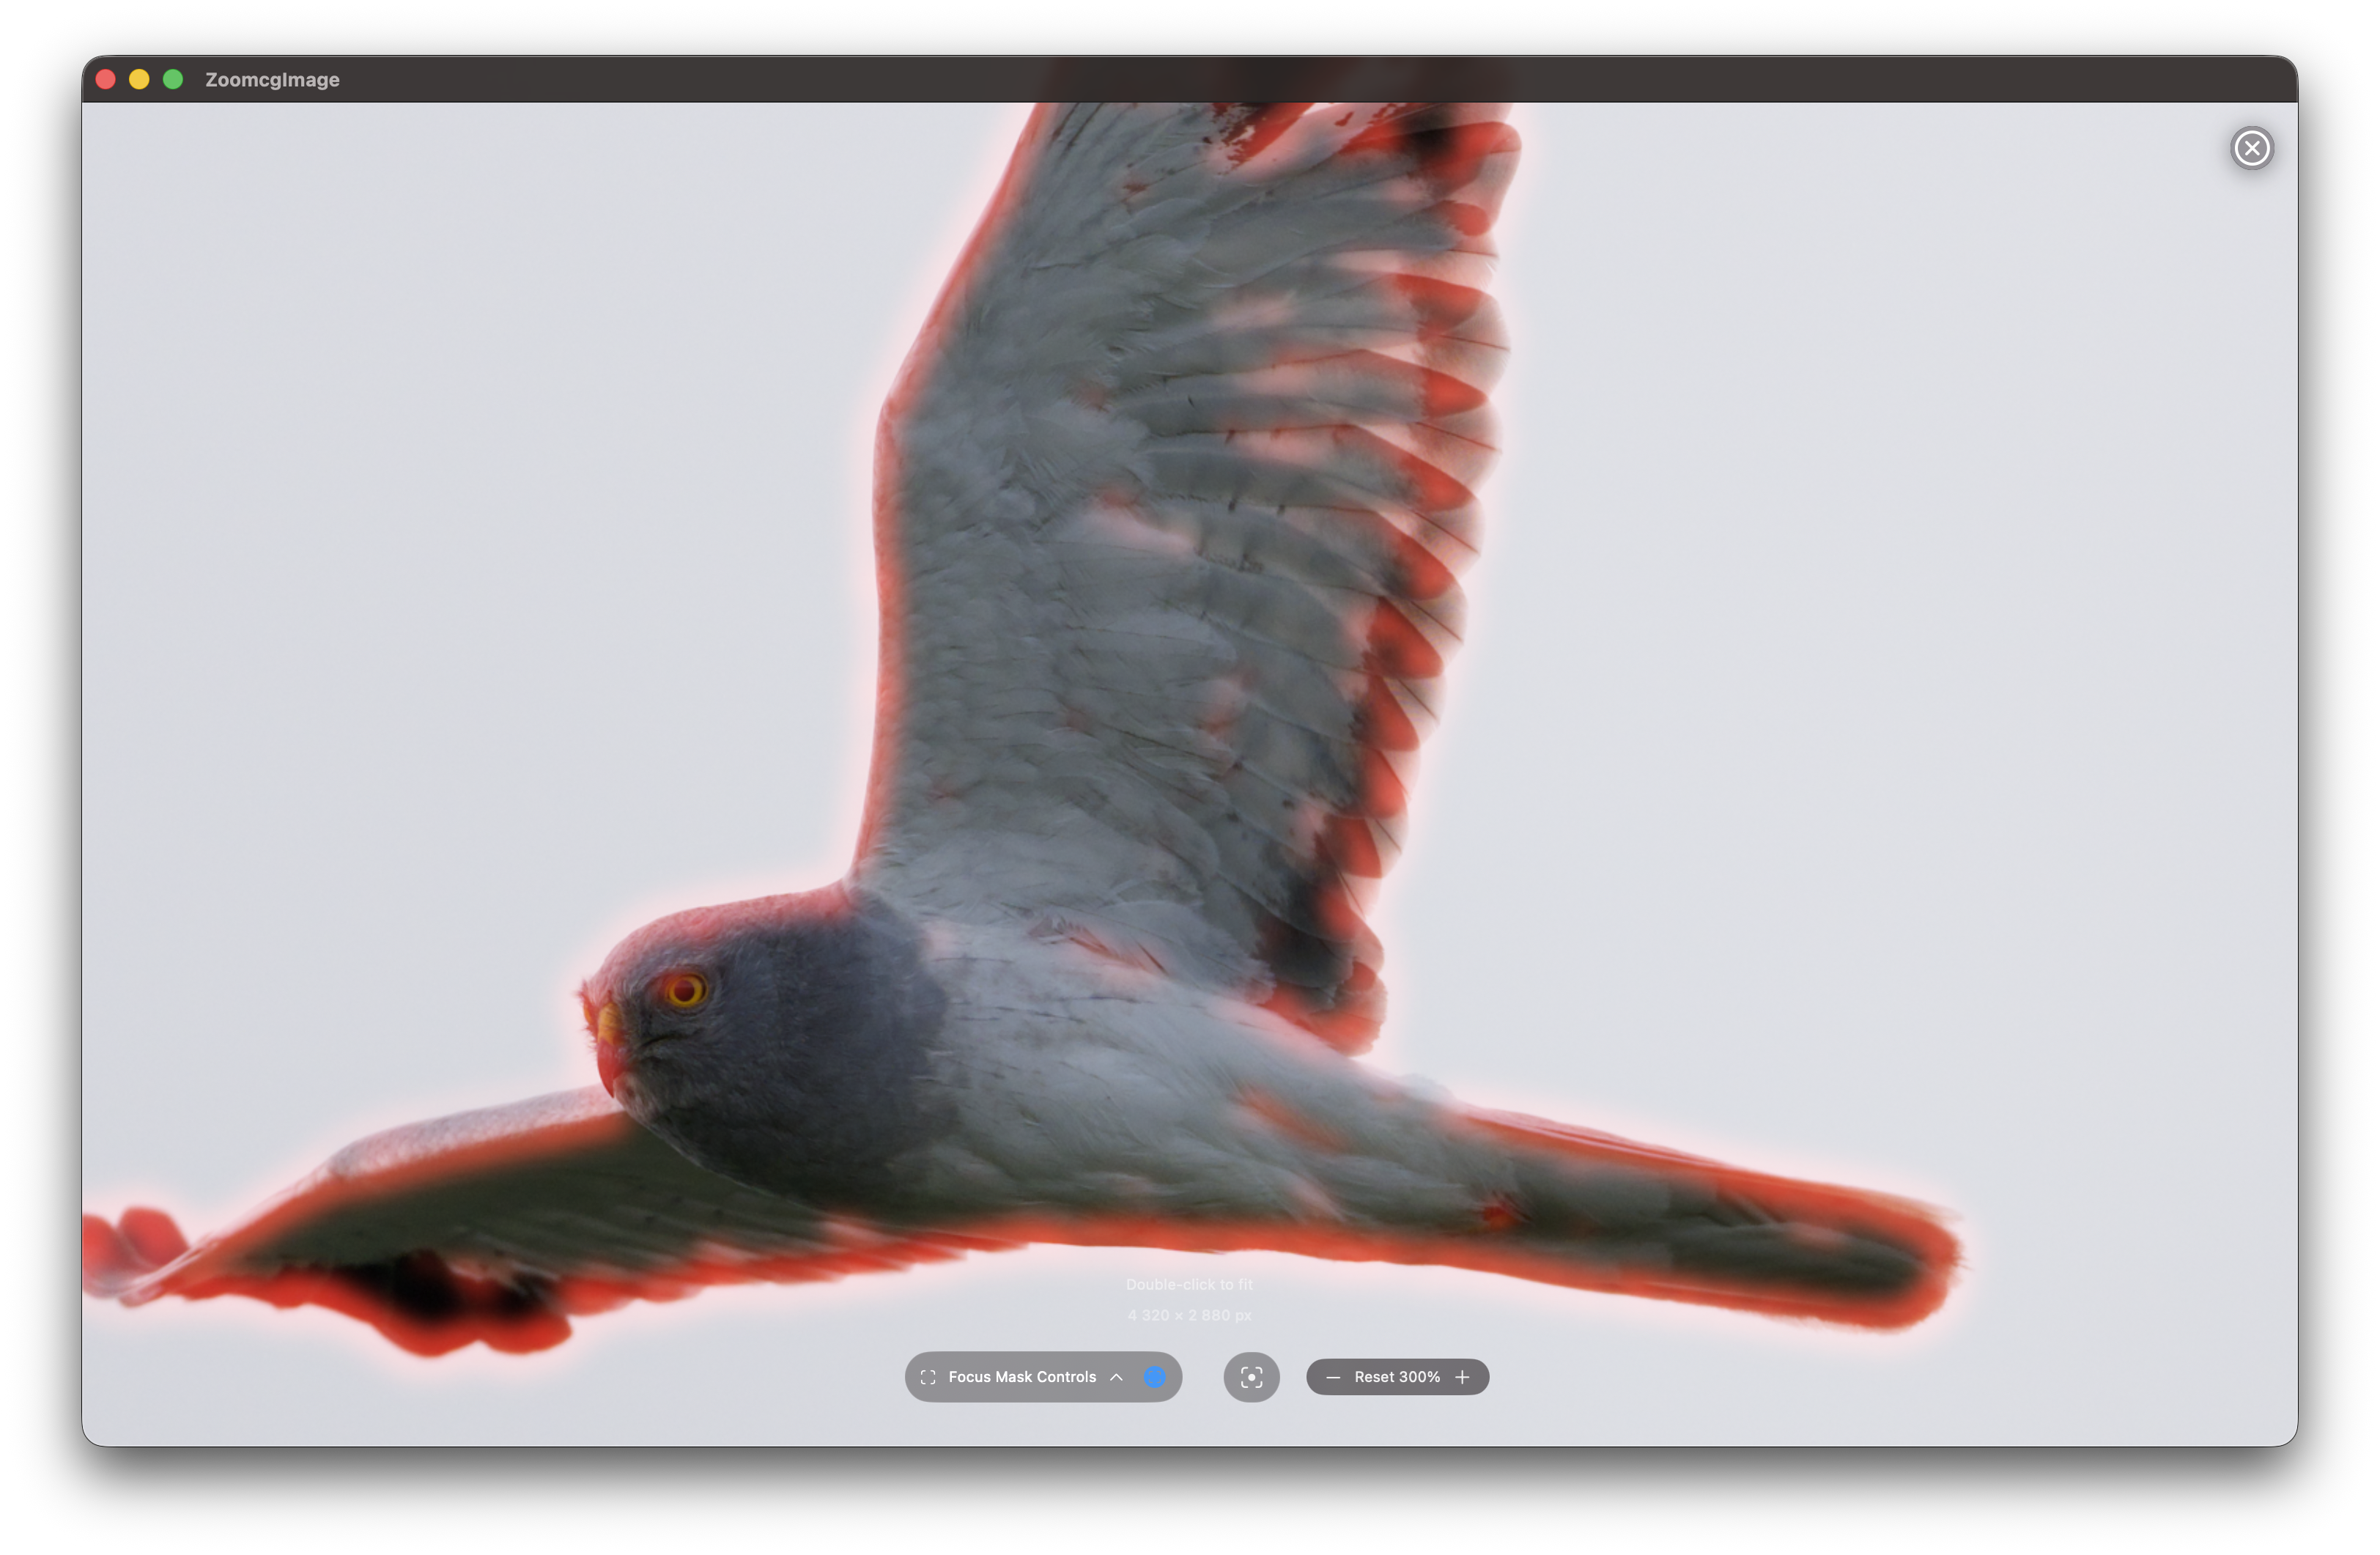
Focus peaking is a visual aid that highlights which areas of a photograph are in sharp focus. Rather than relying on your eye alone to judge sharpness, focus peaking overlays a red highlight on pixels where edge detail and contrast are strongest. Those highlighted pixels are the ones in sharpest focus — everything else stays unchanged.
The Focus Peak is computed by the GPU on your Mac, making it a fast process even when the mask is generated on the fly.
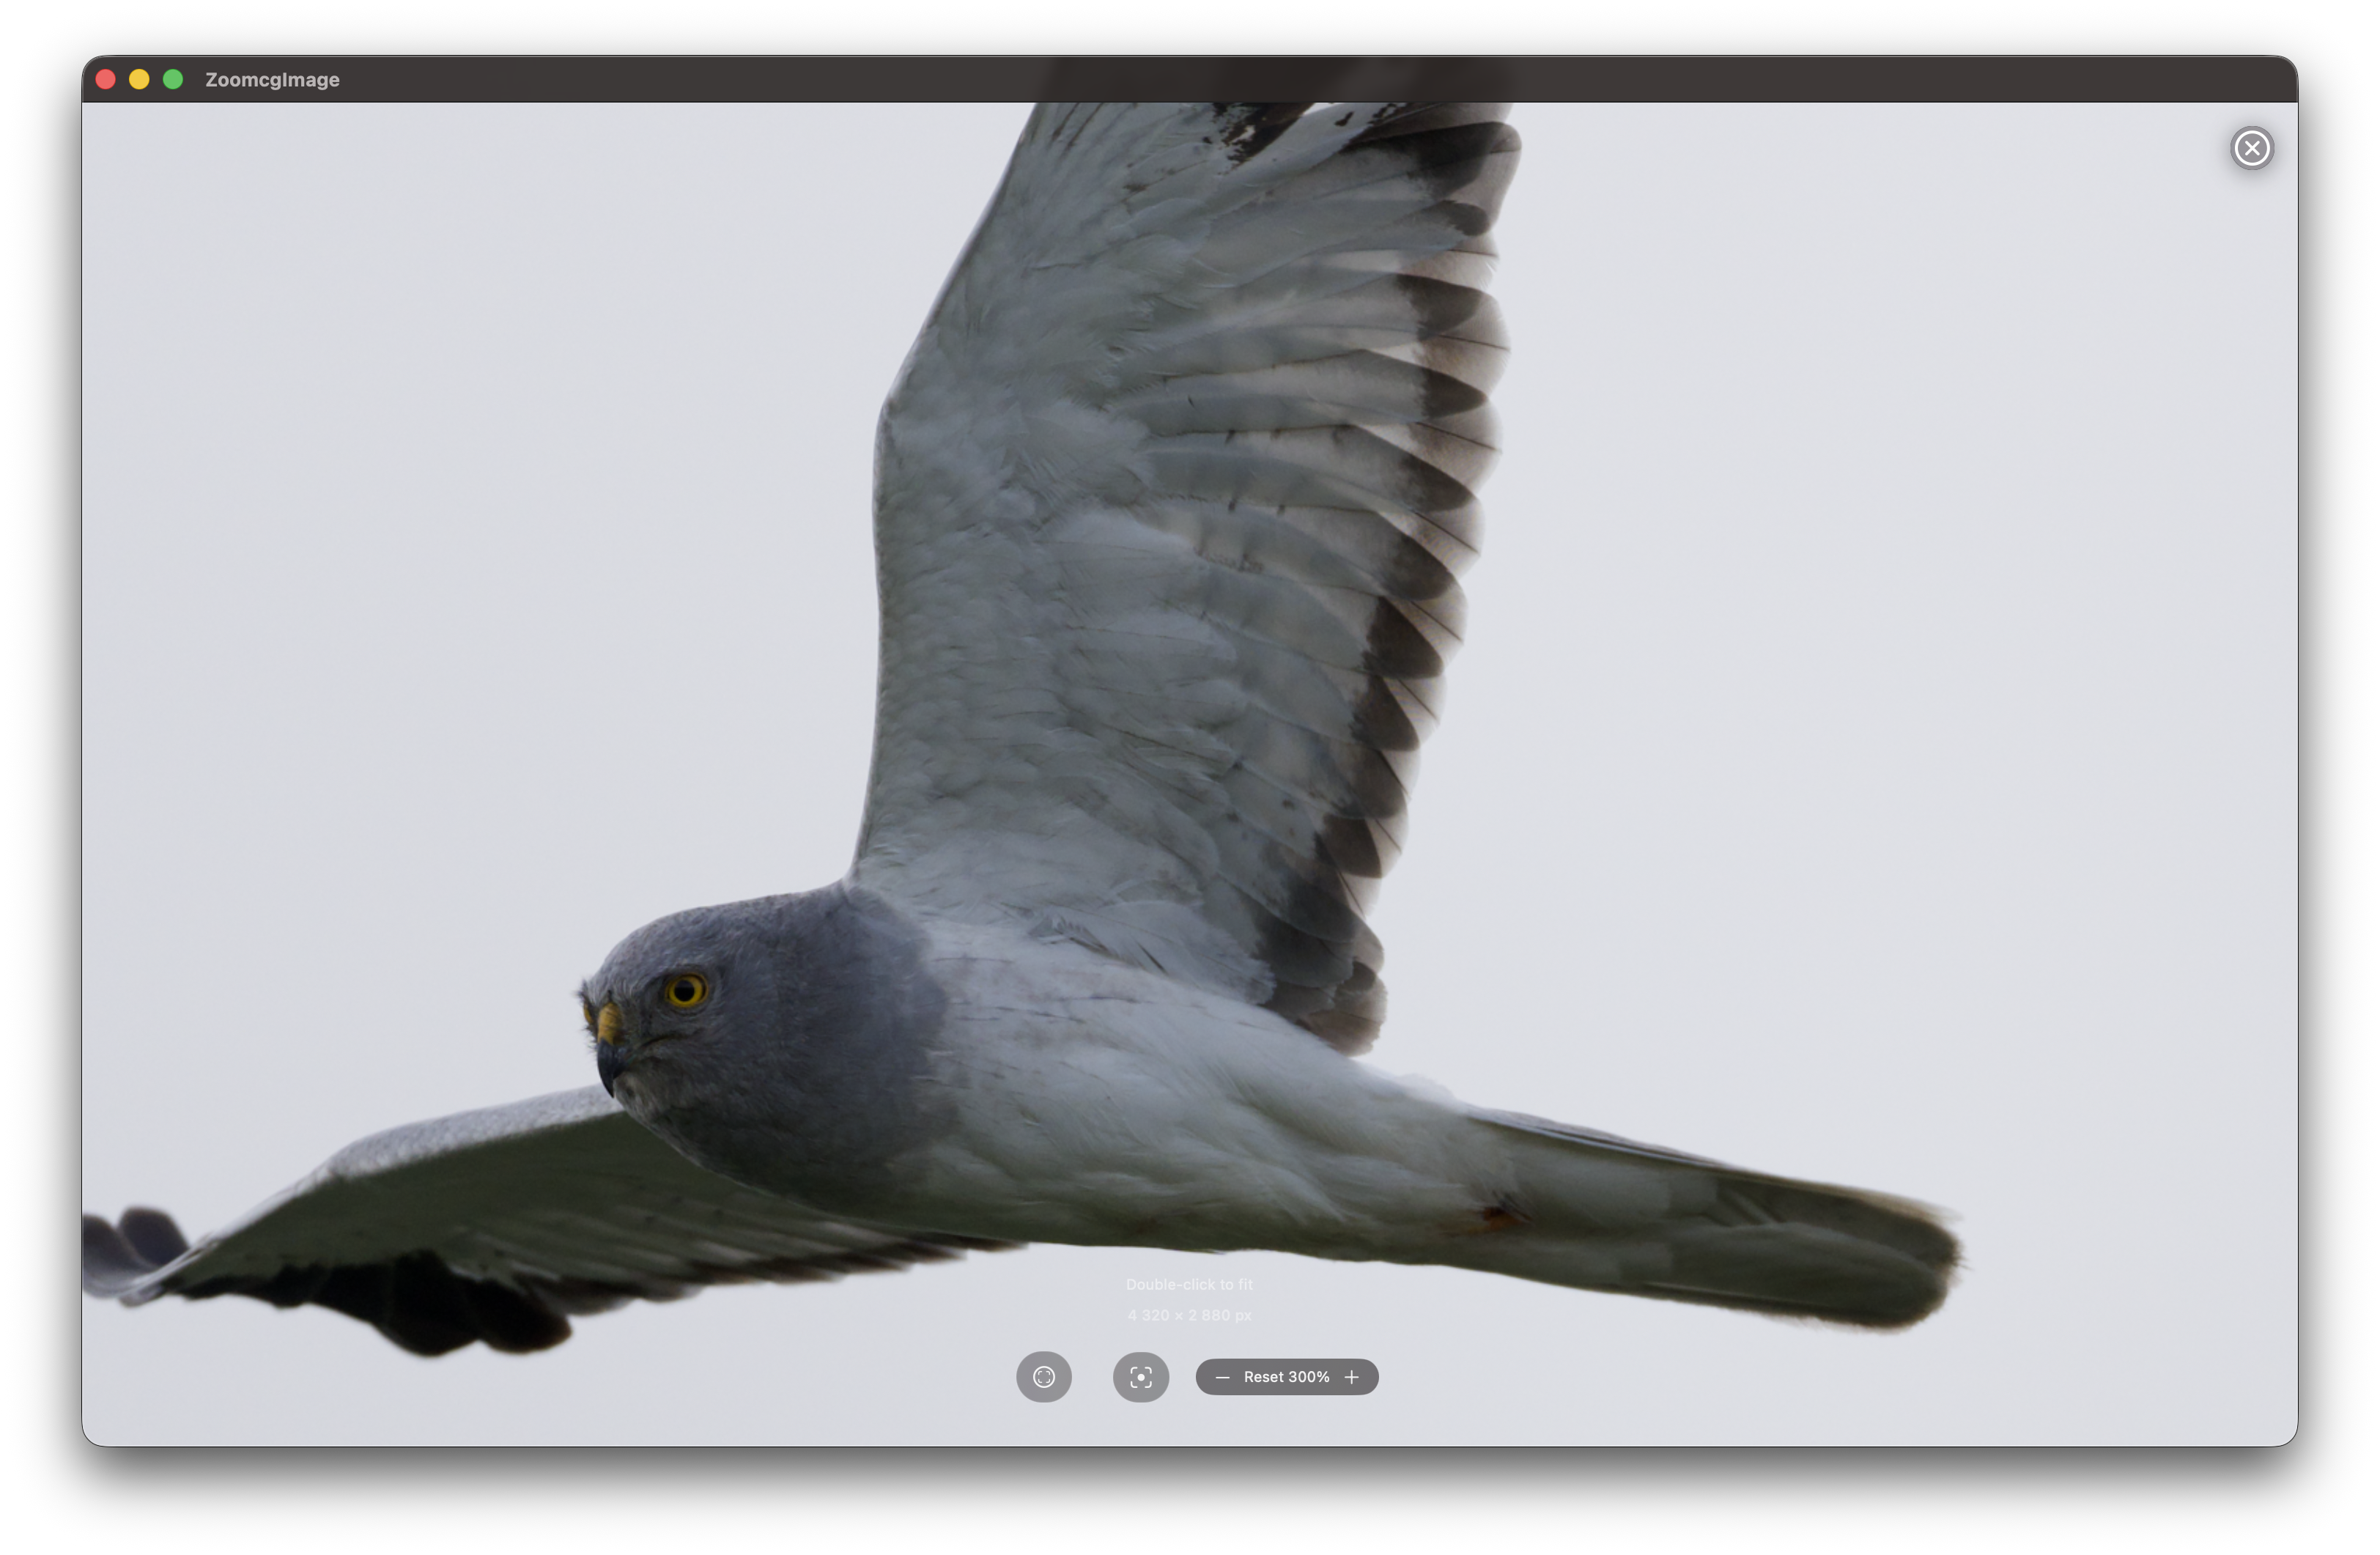
Focus Peak off:
Focus Peak on:
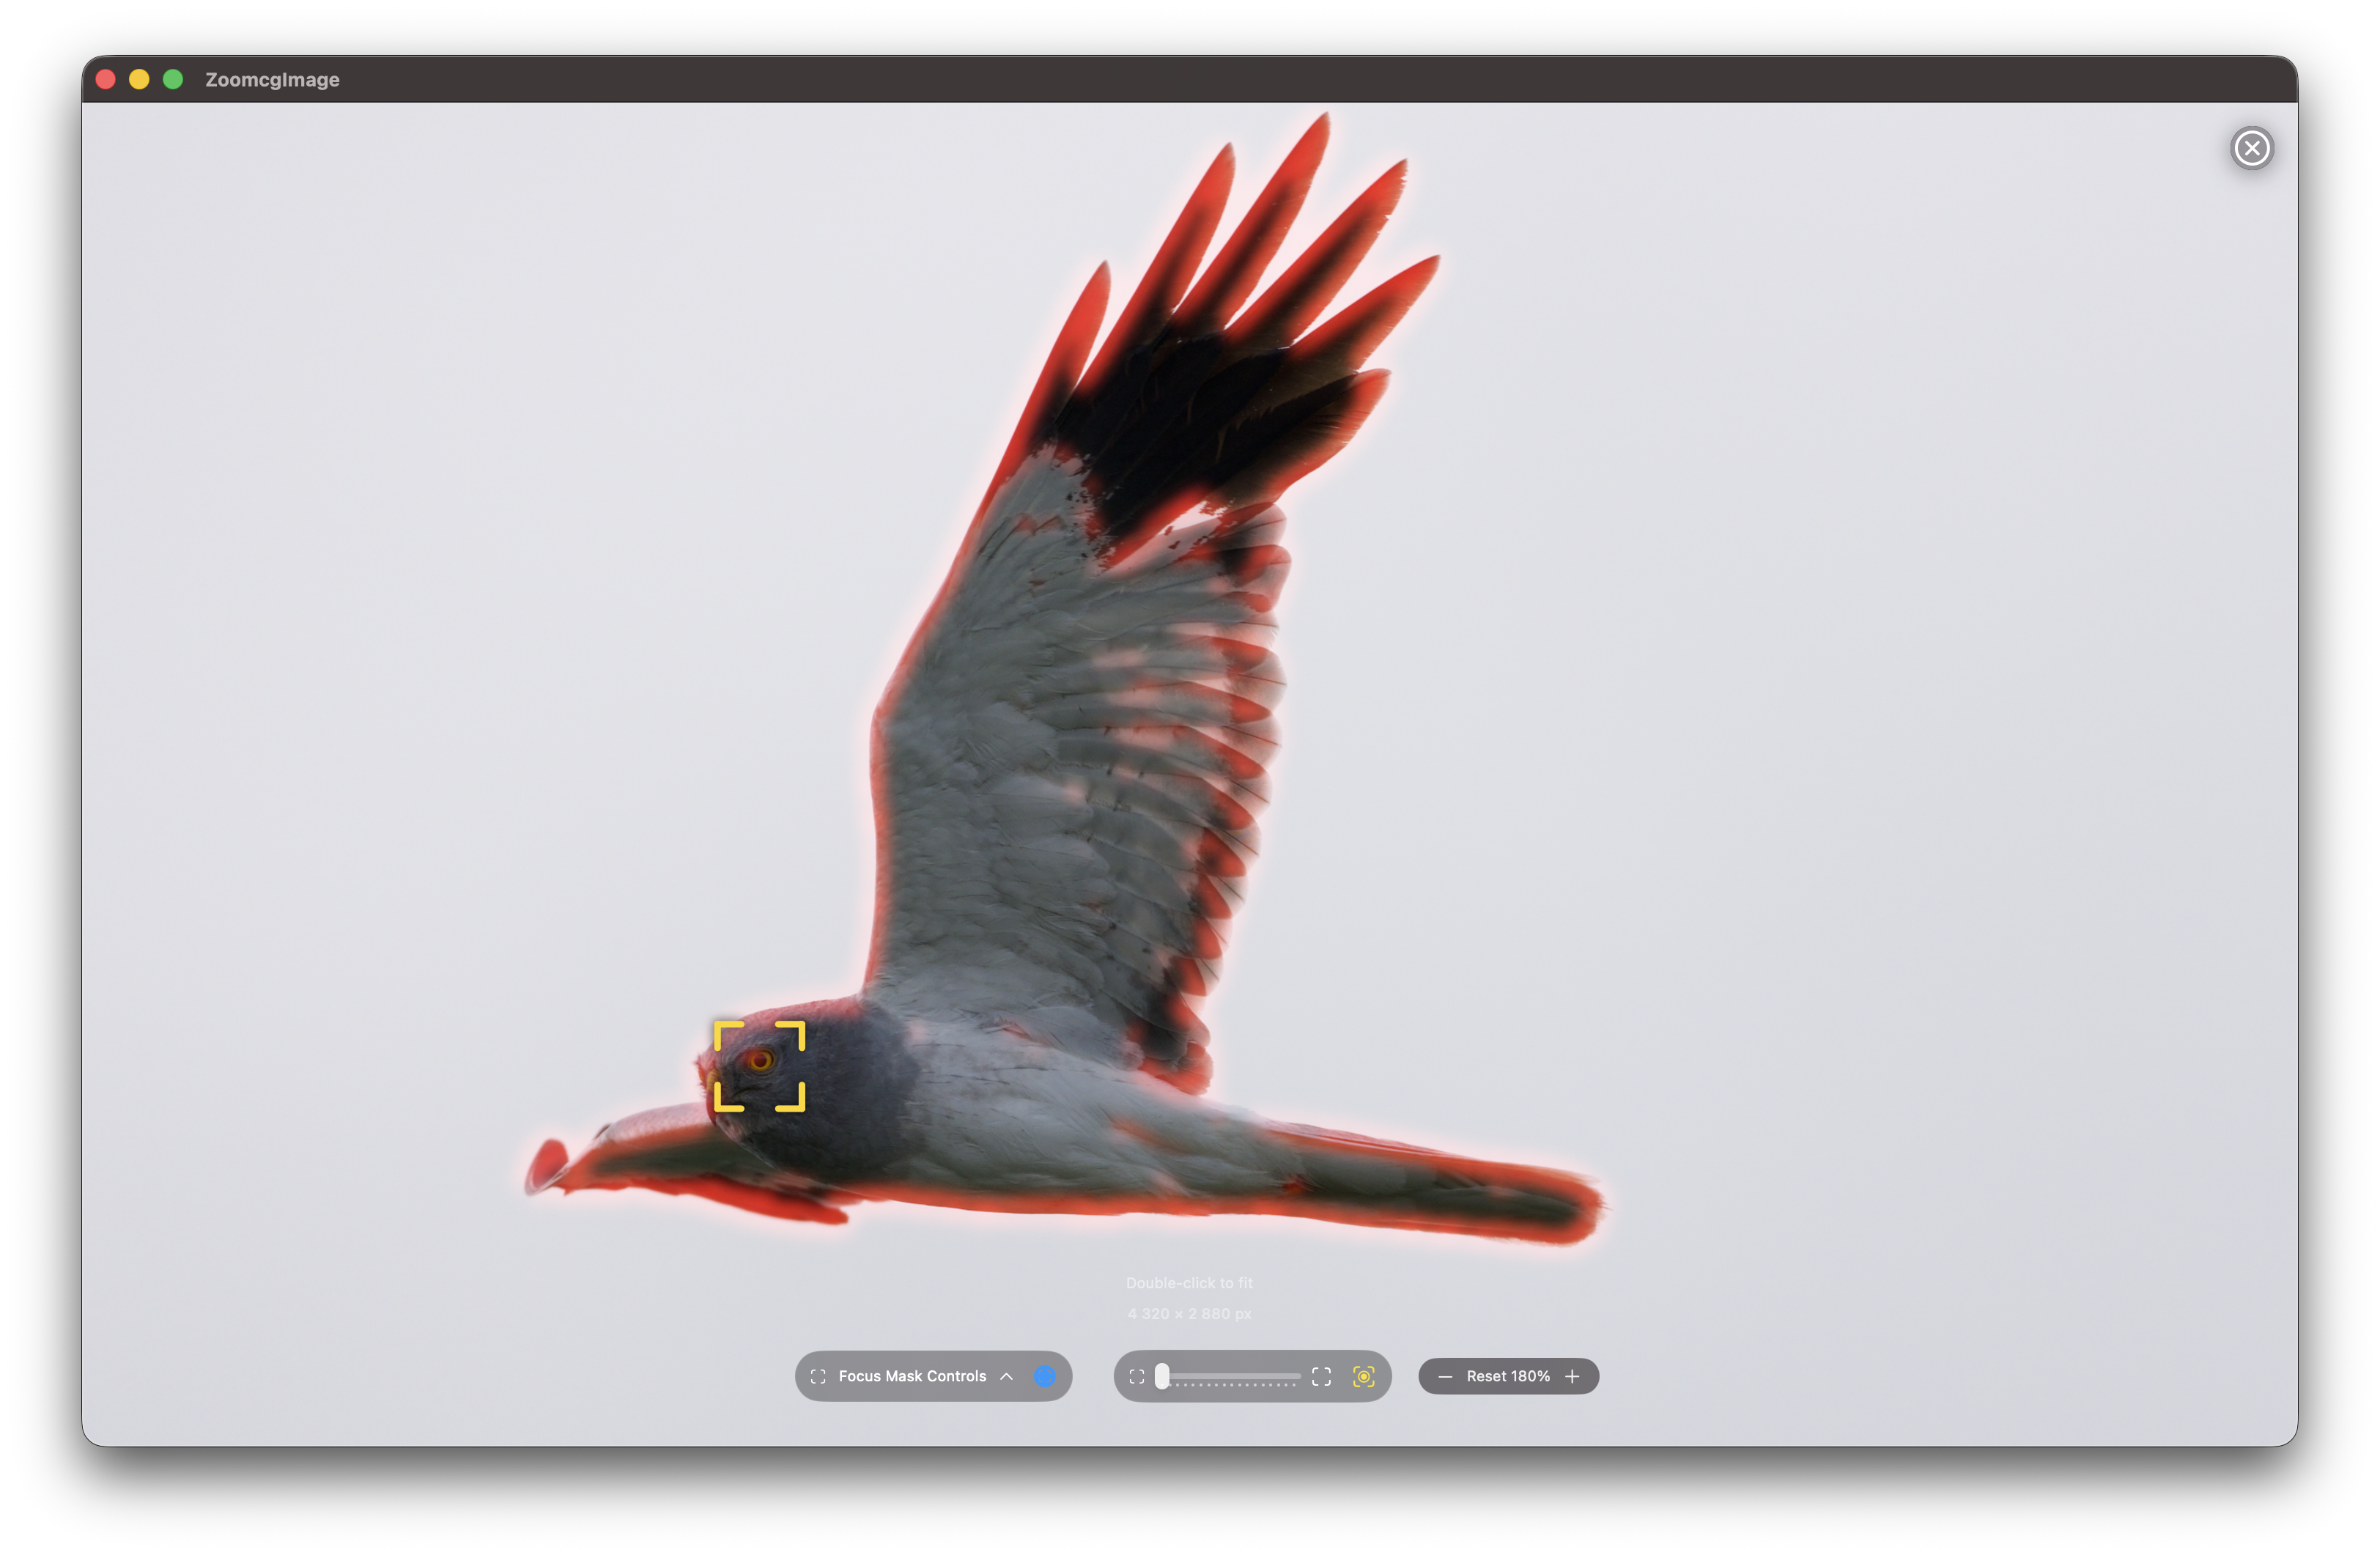
Both the Focus Point and the Focus Peak can be applied simultaneously.

Why the Laplacian of Gaussian?
Several mathematical approaches can measure local sharpness, but the Laplacian of Gaussian (LoG) is one of the most effective for focus peaking because it combines two complementary operations.
The Gaussian blur is applied first, suppressing sensor noise and low-amplitude out-of-focus texture — water ripples, skin, smooth backgrounds — before sharpness detection runs. Without this step, the Laplacian would flag noise and soft texture as “sharp.”
The Laplacian then computes, for each pixel, how much its intensity differs from its immediate neighbours. In a blurry region those differences are small and smooth. At a sharply rendered edge they spike. The key insight is that the Laplacian measures second-order intensity change — it responds to genuine focus-induced contrast spikes rather than gradual gradients, which blurred regions produce even when they have visible texture.
The Kernel
Rather than the classic 4-neighbour approximation, RawCull uses a full 8-neighbour kernel computed on the GPU via Metal:
L = 8 × center − (N + S + E + W + NE + NW + SE + SW)
This 3×3 formulation is more isotropic than the 4-neighbour version — it responds equally to edges in all directions, including diagonals, which matters for natural subjects like feathers and fur.
The sharpness energy at each pixel is then computed as a luminance-weighted magnitude:
energy = |L.r| × 0.299 + |L.g| × 0.587 + |L.b| × 0.114
This preserves perceptual weighting — the green channel contributes most, matching human sensitivity to luminance detail.
Step-by-Step: How It Works
1. Downscale. The image is reduced to 1024 pixels wide before processing. The algorithm operates on pixel neighbourhoods, so full resolution is unnecessary and the performance gain is significant.
2. Pre-blur (Gaussian). A Gaussian blur is applied to the downscaled image. This suppresses out-of-focus texture and sensor noise before the Laplacian runs, preventing false highlights in blurred regions. The blur radius is user-adjustable — higher values ignore more background texture.
3. Laplacian kernel (Metal GPU). The 8-neighbour kernel runs on every pixel in parallel on the GPU, computing the second-order derivative of brightness across all channels.
4. Energy and amplification. The per-pixel result is converted to a single luminance-weighted sharpness energy value and amplified. The amplification factor is user-adjustable.
5. Threshold. Any pixel below the threshold is discarded (black). Only genuinely sharp pixels survive. The threshold is the primary control — lower values highlight more of the image, higher values restrict highlights to only the sharpest edges.
6. Erosion. A morphological erosion pass removes isolated speckle pixels that survive the threshold but are too small to represent genuine edges. This cleans up the mask before it is expanded.
7. Dilation. Surviving pixels are expanded morphologically, turning scattered dots into solid readable regions without introducing false edges.
8. Red overlay. Surviving pixels are colourised red and composited over the original photograph using a screen blend mode. Black (non-sharp) areas are transparent in screen blending, so only the red sharpness regions show through over the photo.
9. Feather. A final Gaussian blur softens the edges of the red overlay, giving the mask a smooth, natural appearance rather than a hard pixelated boundary.
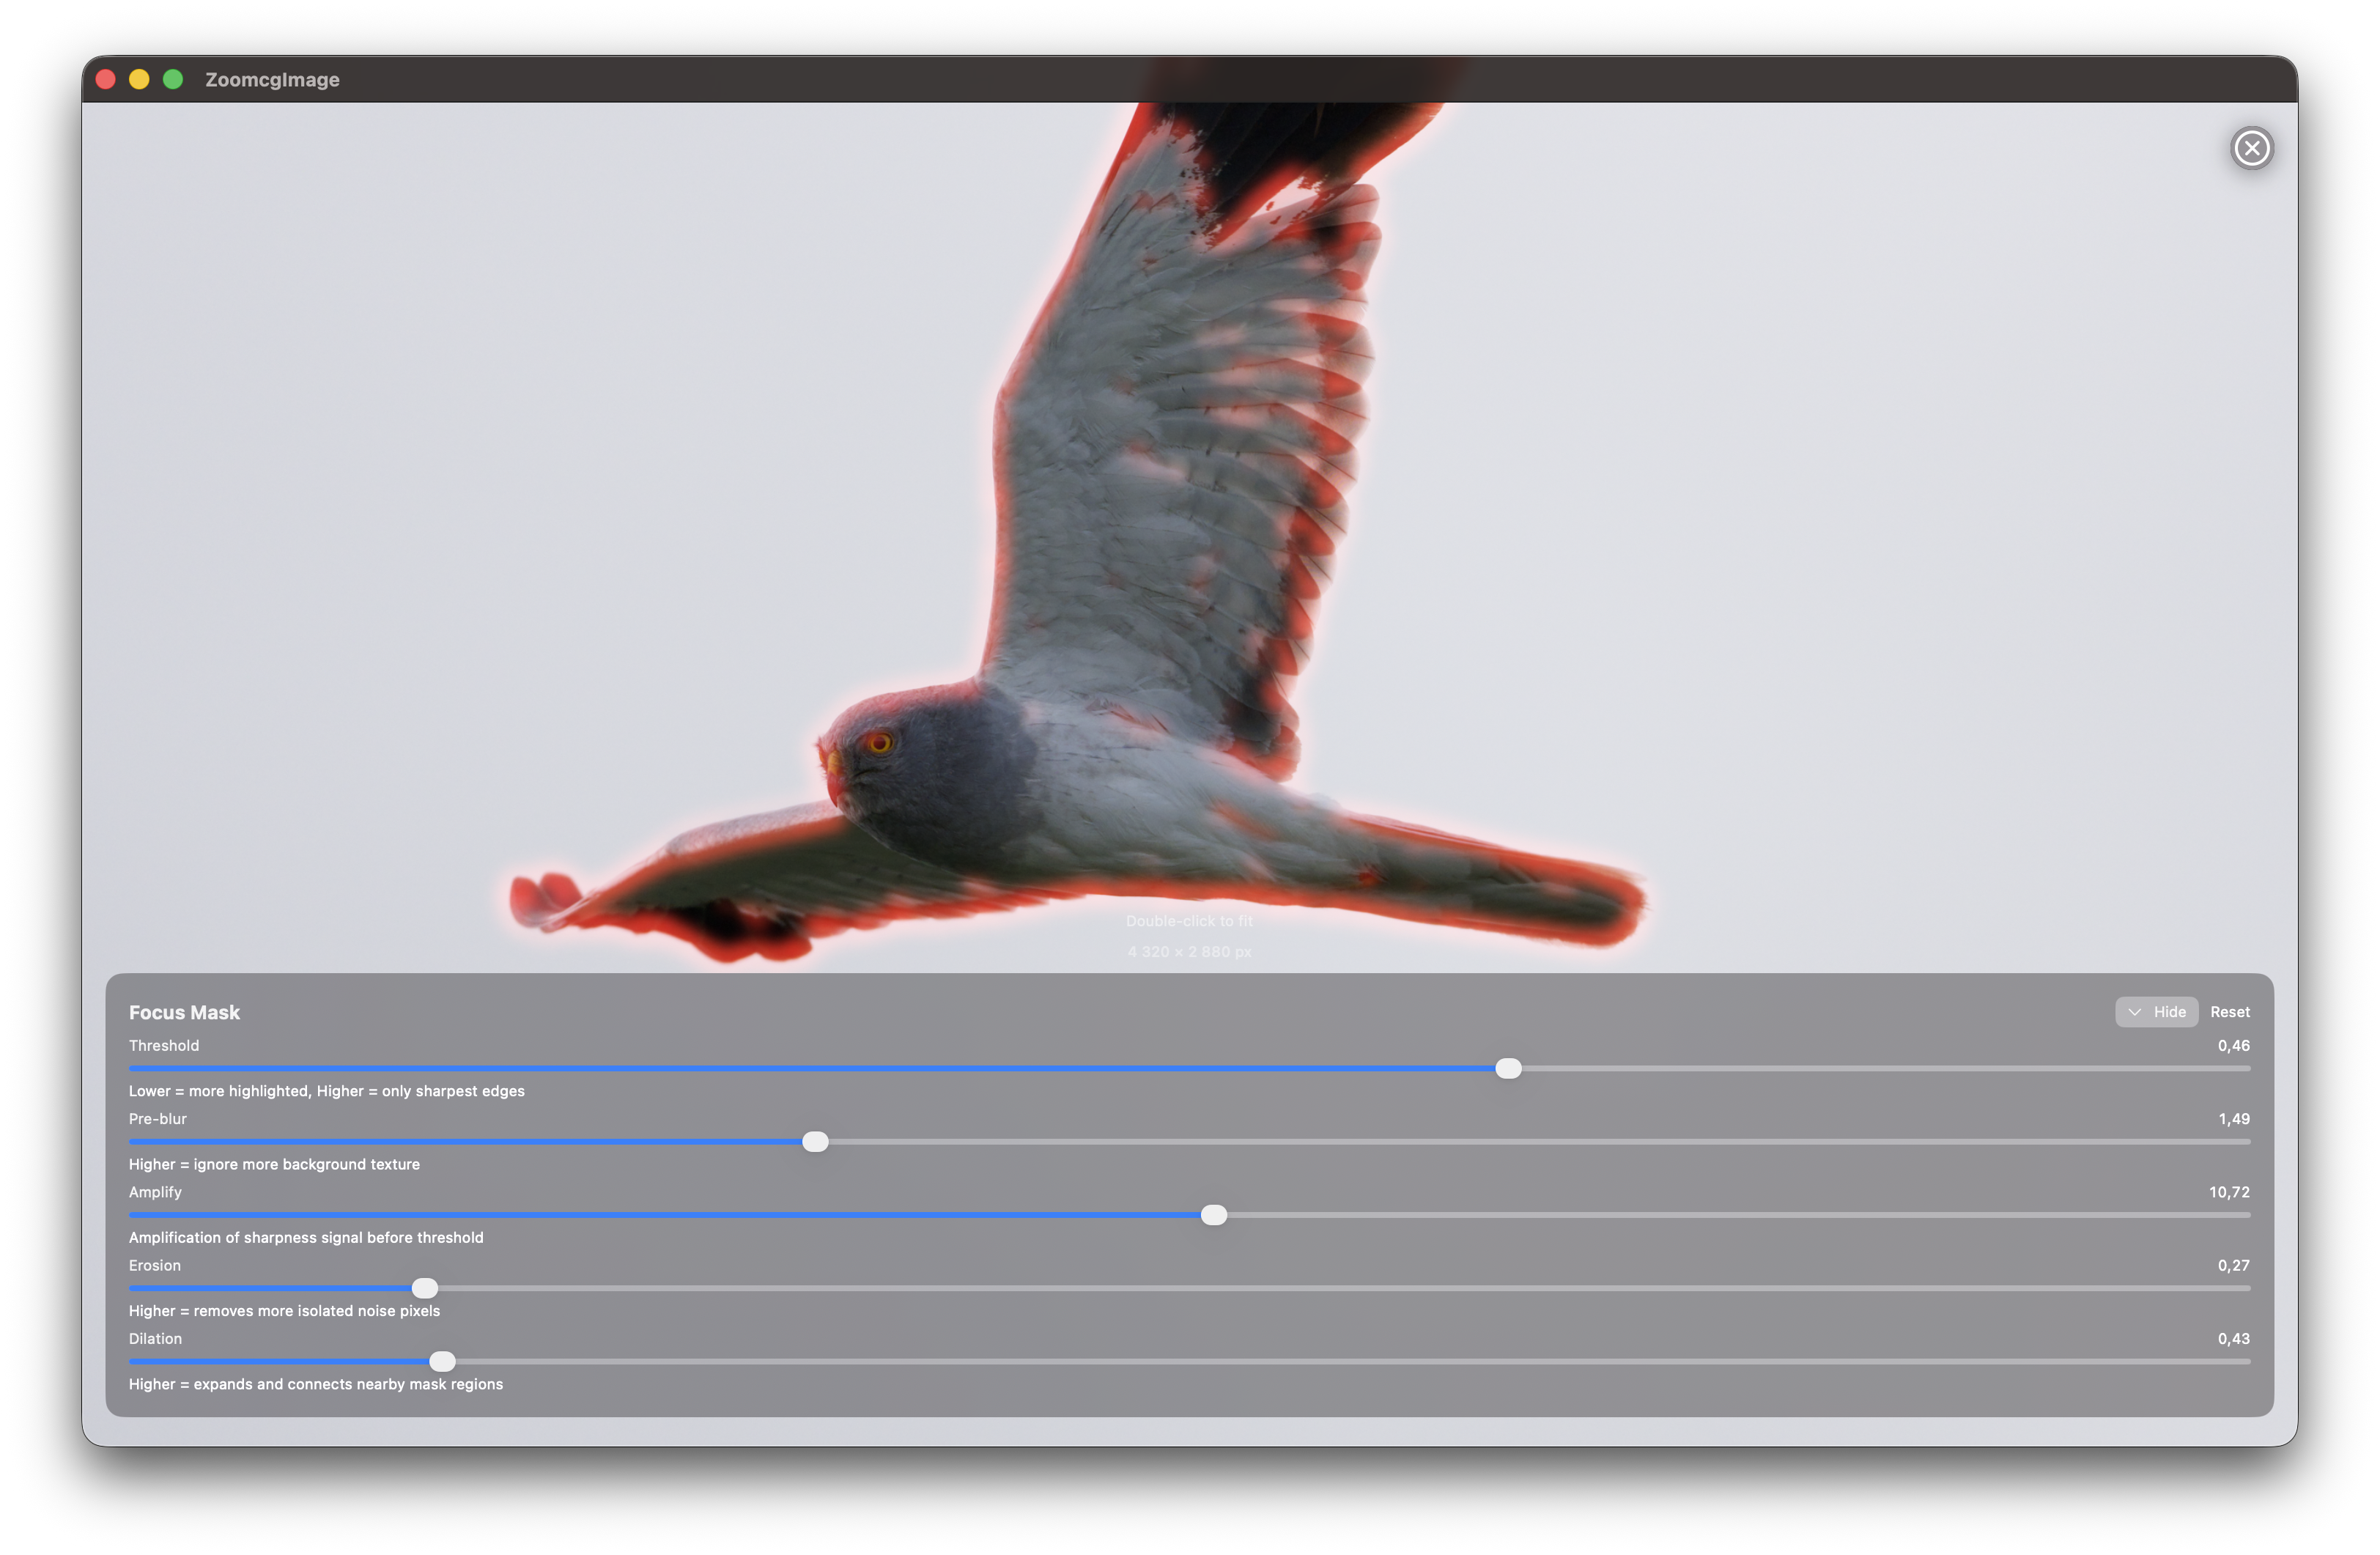
Tunable Parameters
RawCull exposes the following controls in the Focus Peak panel:
| Control | Effect |
|---|---|
| Pre-blur | Gaussian blur radius applied before edge detection. Higher values suppress background texture and high-ISO noise more aggressively. |
| Threshold | Primary sharpness cutoff. Raise to restrict highlights to only the sharpest edges; lower to highlight more of the image. |
| Erosion radius | Morphological erosion applied after thresholding. Removes isolated speckle noise before dilation — increase if the mask is spotty on smooth areas. |
| Dilation radius | Morphological expansion applied after erosion. Widens edge regions into solid, readable patches — increase for small or fine-detailed subjects. |
| Amplify | Multiplier applied to the raw sharpness signal. Higher values make weak edges more visible; too high reintroduces noise. |
| Feather | Gaussian softening applied to the final mask edges. Visual only — does not affect the underlying score. |
| Show raw Laplacian | Replaces the thresholded overlay with the unprocessed Laplacian output. Useful for diagnosing tuning or calibration issues. |
A Reset button returns all values to their defaults.
Practical Considerations
Threshold tuning is the most important variable. Too low and nearly the entire image lights up. Too high and only the absolute sharpest micro-contrast registers. The default of 0.46 suits most sessions well; adjust up or down from there based on the scene.
Pre-blur is your noise lever. Scenes with prominent out-of-focus texture — water, foliage backgrounds, bokeh — benefit from a higher pre-blur radius. Scenes with a small sharp subject against a smooth background can use a lower value.
Subject texture matters. Smooth, low-contrast surfaces — clear sky, still water, skin — produce a weak Laplacian response even when perfectly focused, because there is little edge detail to detect. Focus peaking works best on subjects with natural texture: feathers, fur, foliage, fabric.
RAW vs JPG. The mask is more effective when applied to extracted JPGs rather than thumbnails. Thumbnails are heavily processed and downscaled before RawCull sees them, which reduces the fine edge detail the Laplacian depends on.
Summary
RawCull’s Focus Peaking runs a Laplacian of Gaussian pipeline entirely on the GPU via Metal. A Gaussian pre-blur suppresses noise and out-of-focus texture; an 8-neighbour Laplacian kernel detects genuine sharpness spikes; thresholding followed by morphological erosion and dilation produces a clean, solid mask; a final feather pass softens the overlay edges; and screen blending composites the red overlay non-destructively over the original image. The result is a fast, accurate, and visually interpretable sharpness map that makes focus assessment immediate — particularly valuable when reviewing large numbers of action or wildlife shots where critical focus on a small moving subject is difficult to judge from the image alone.
Feedback
Was this page helpful?
Glad to hear it! Please tell us how we can improve.
Sorry to hear that. Please tell us how we can improve.