The release on GitHub may be more current than the release on the Apple App Store. The builds on both platforms are identical, and the GitHub release is signed and notarized by Apple.
Security & Privacy: RawCull is digitally signed and notarized by Apple to protect against tampering. It runs as a sandboxed application, ensuring your data and system remain secure.
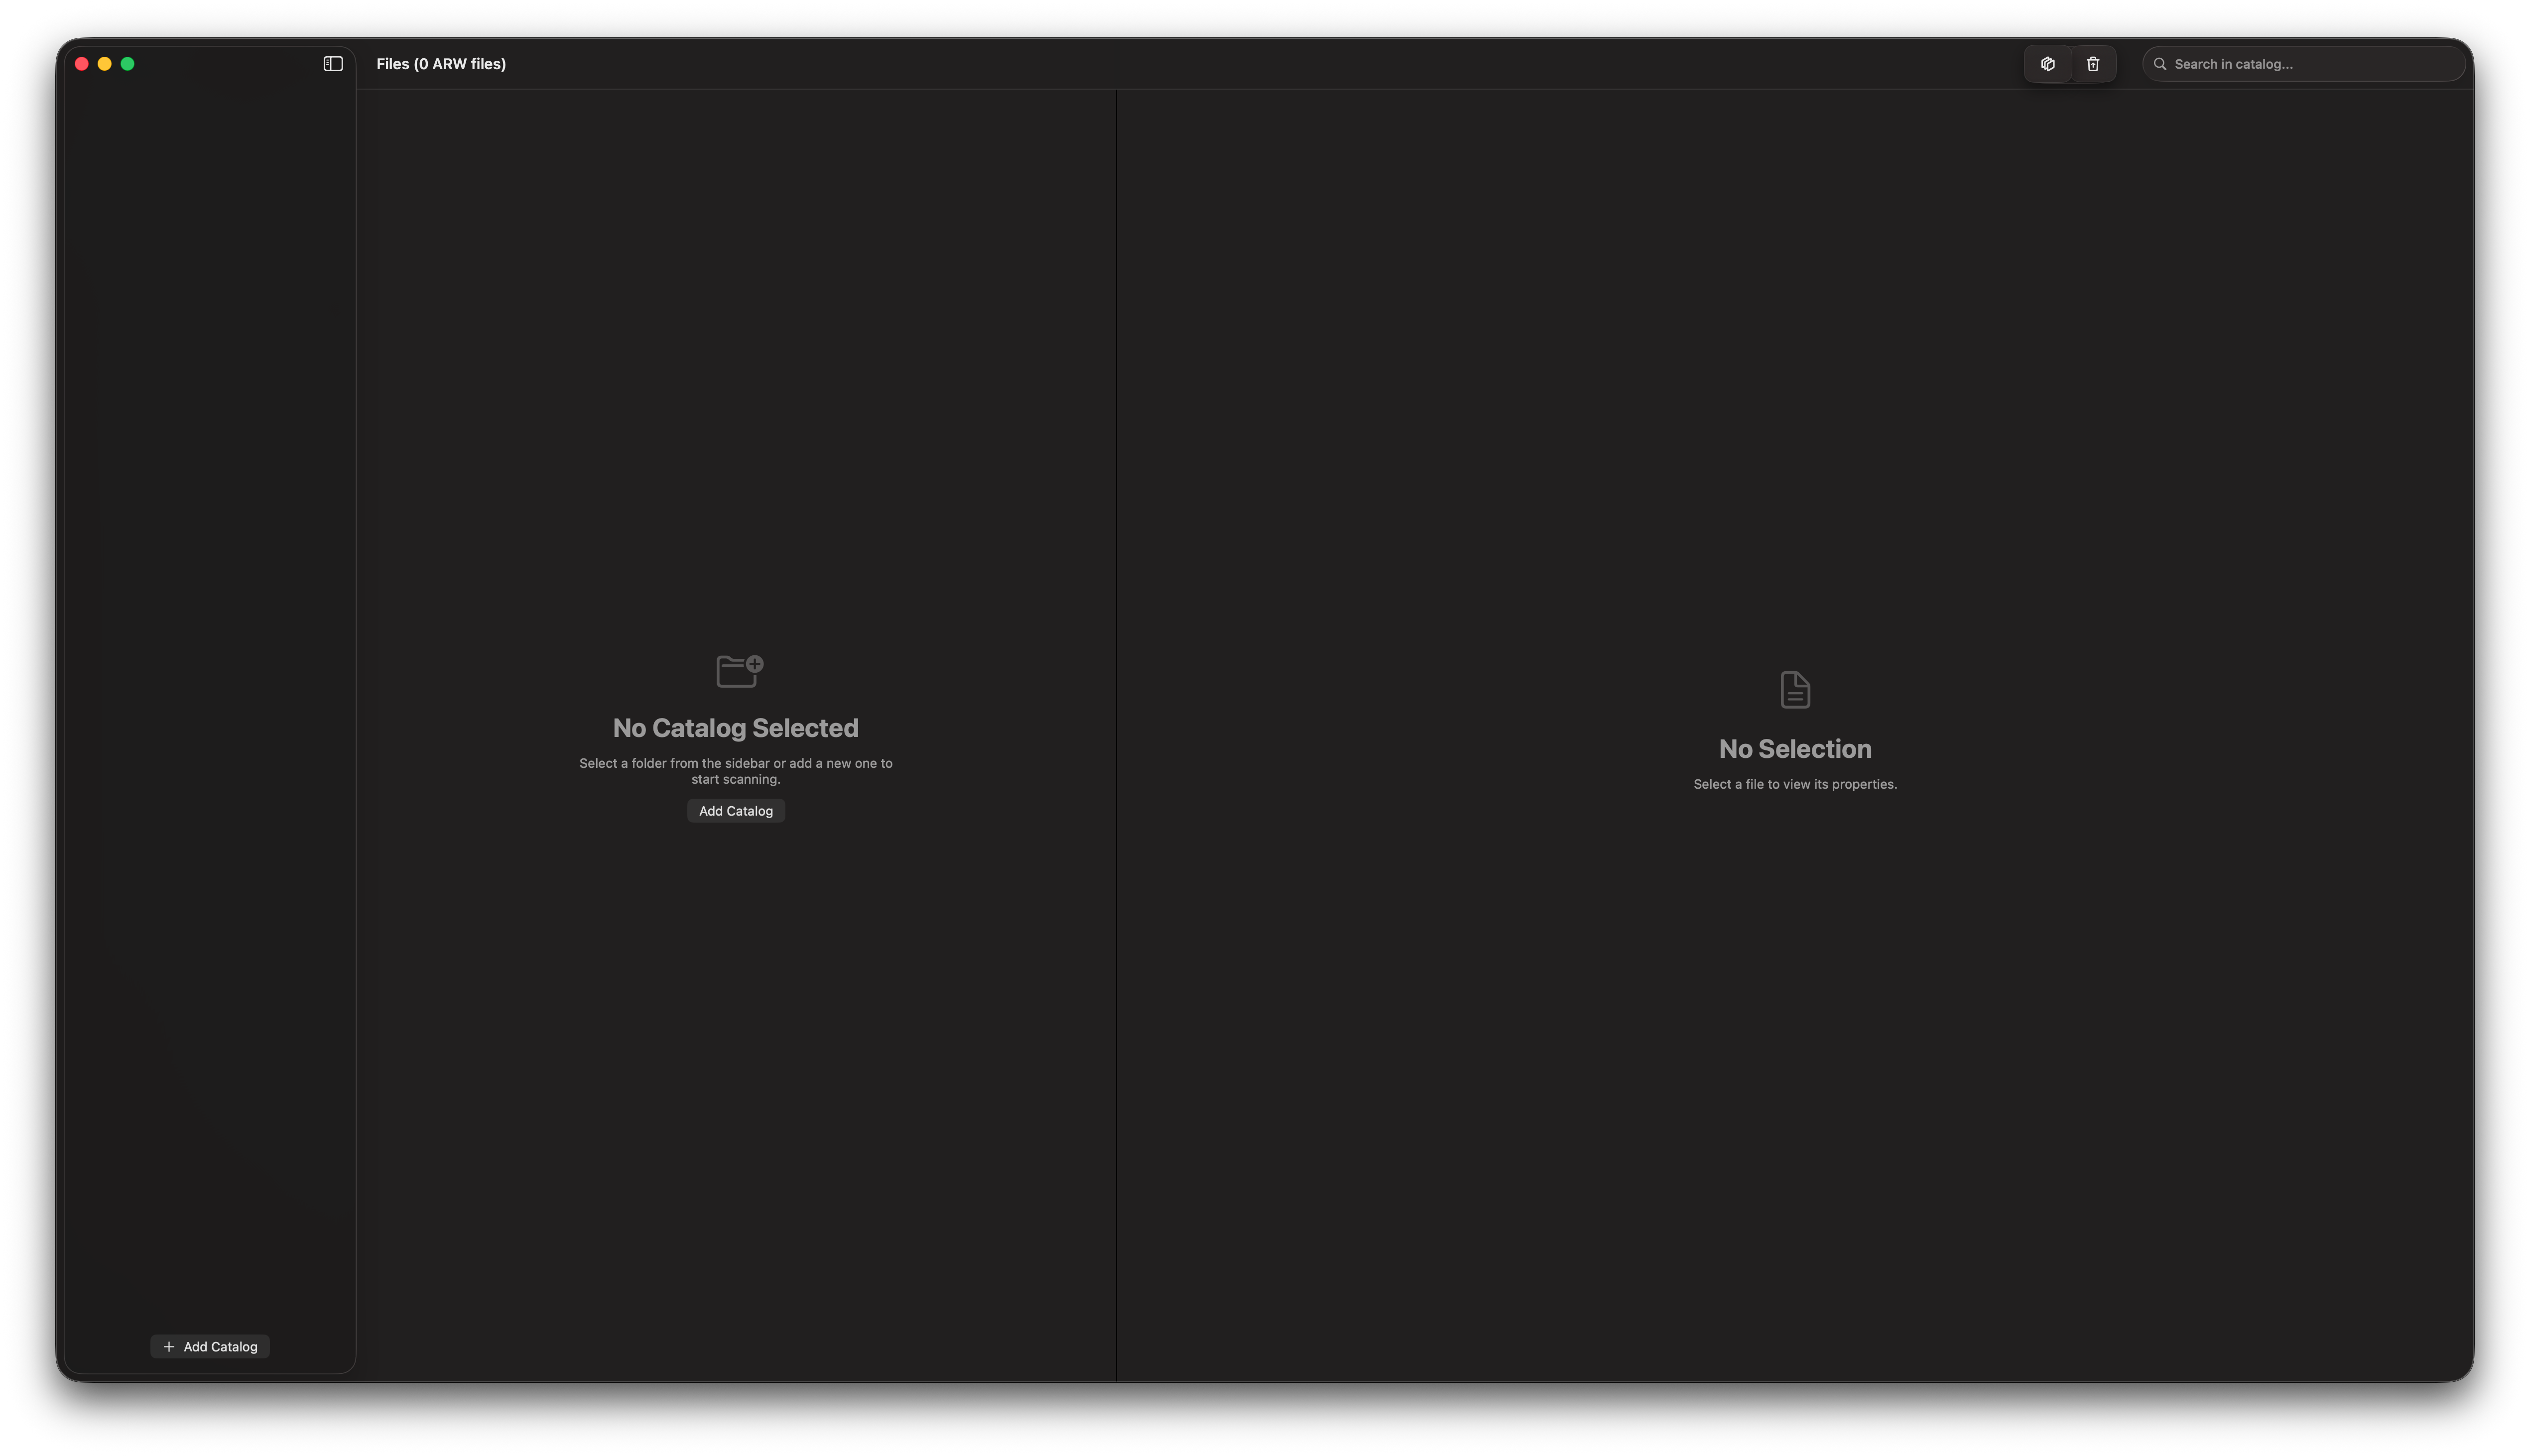
Welcome to RawCull
RawCull is a robust, native macOS application developed using Swift and SwiftUI for macOS Tahoe. Tailored specifically for photographers, it simplifies the photo culling process, enabling users to quickly identify and keep only their best photographs. The initial version exclusively supports culling Sony A1 Mk I and Mk II RAW files. But as documented below RawCull supports more bodies.
ARW body compatibility diagnostic
The following Sony bodies successfully extract EXIF, focus points, sharpness, and saliency, except for the ILCE-7RM5, which failed to extract saliency on one of its three files. The ILCE-1M2 is the only body tested across all three Sony RAW size variants (S/M/L). All files use compressed RAW, and every body achieves full-resolution L-size output, ranging from 12.4 MP (ILCE-1M2 S-crop) to 60.2 MP (ILCE-7RM5). The ILCE-7M5 and ILCE-7RM5 are the next bodies to focus on, but I depend on test ARW files to properly test them before officially concluding support for these two bodies.
RawCull has no editing capabilities — it is purpose-built for viewing, selecting, and copying photos.
High Performance: Developed natively with Swift and SwiftUI, optimized for Apple Silicon-based Macs, utilizing only Apple’s official Swift and SwiftUI frameworks, eliminating the need for third-party libraries
Small application: The DMG file is about 3 MB in size
User-Friendly Interface: Intuitive controls designed for efficient culling workflows
Privacy-First: All data remains on your Mac, eliminating cloud synchronization and data collection
Security: Digitally signed and notarized by Apple, it is also a sandboxed application, providing enhanced security
Free and Open Source: Available under the MIT license
Non-Destructive: It only reads ARW files, creating and storing thumbnails separately in the sandbox
Developed using official Apple Frameworks only: latest Swift version, strict concurrency checking enabled, no third-party libraries which may break the app
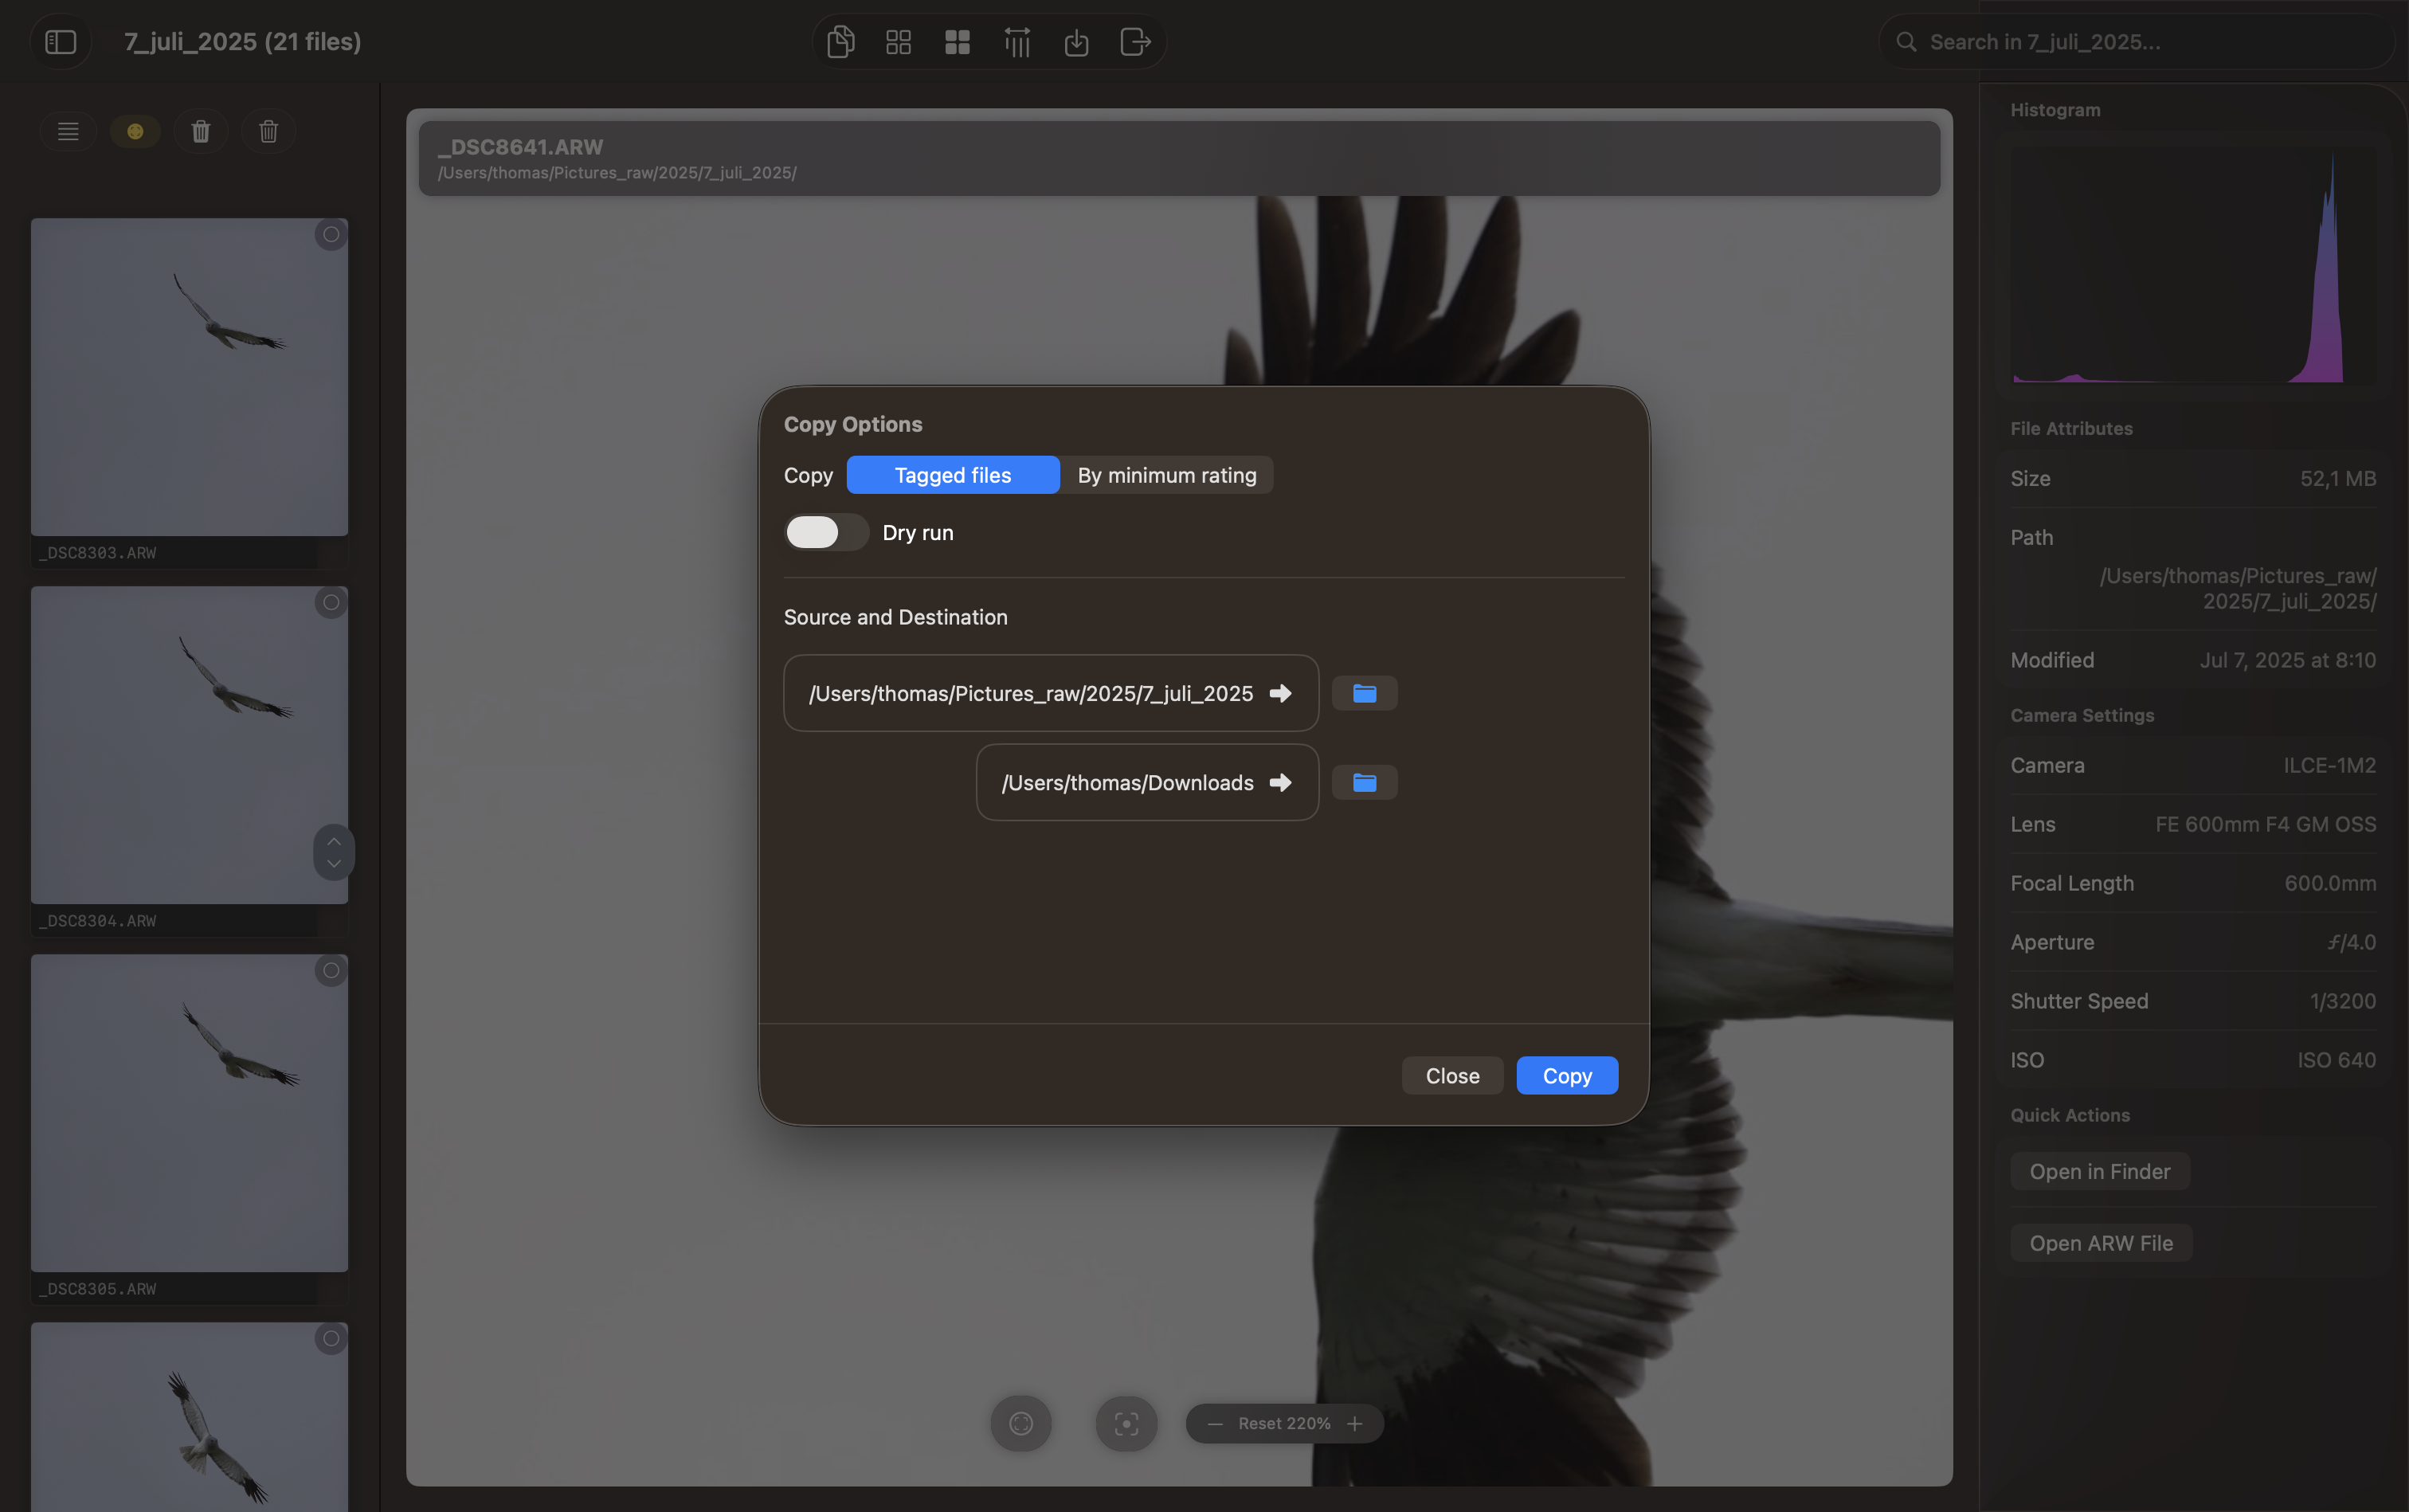
The actual copy of ARW files from source to destination is non-destructive. It utilizes the default /usr/bin/rsync as part of macOS. Prior to the actual copy of files, a --dry-run parameter can be employed to simulate the files that will be copied to the destination.
Both scanning and creating thumbnails, as well as extracting JPGs from ARW files, can be terminated using the shortcut ⌘K or by the menu Actions → Abort task.
For security, please verify the SHA-256 hash after downloading if installed from GitHub. Current updates and release notes are available in the changelog.
1 - Security & Privacy
Security & Privacy
RawCull is built from the ground up with macOS security and user privacy as first-class concerns. The following is a precise and detailed account of every security mechanism the application employs, derived directly from the source code and project configuration.
App Sandbox
RawCull runs inside the macOS App Sandbox (com.apple.security.app-sandbox = true), enforced by the operating system. The entitlements file contains only this single declaration — no additional entitlements are granted. This means:
The app cannot access any file or folder without explicit user consent
The app cannot launch arbitrary processes outside its declared capabilities
The app cannot read or write to system directories or other applications’ data
Network access is blocked at the OS level (no network entitlements are declared)
File: RawCull.entitlements
Code Signing & Notarization
RawCull is digitally signed with an Apple Developer certificate (Team ID 93M47F4H9T) and notarized by Apple. This means:
Apple has scanned the binary for known malware
The code signature guarantees the binary has not been tampered with since signing
macOS Gatekeeper verifies the signature and notarization ticket on first launch
Swift symbols are stripped from the release build (stripSwiftSymbols = true) to reduce the binary’s attack surface
Build configuration: exportOptions.plist
File System Access — Security-Scoped Bookmarks
Because the app is sandboxed, it cannot freely read the file system. All folder and file access follows Apple’s security-scoped bookmark model:
User-initiated selection: The user selects a source folder or destination folder via the standard macOS file picker (fileImporter). macOS grants the app a temporary, user-approved URL.
Bookmark creation: Immediately after selection, the app serializes the approved URL into a persistent security-scoped bookmark using:
The defer pattern is used in actors to guarantee cleanup even on errors. The main view model also tracks all active security-scoped URLs in a Set<URL> and releases all of them in deinit.
Files involved:
RawCull/Views/CopyFiles/OpencatalogView.swift — initial user selection and bookmark creation
RawCull/Model/ParametersRsync/ExecuteCopyFiles.swift — bookmark resolution for rsync operations
RawCull/Actors/ScanFiles.swift — scoped access during directory scanning
RawCull/Model/ViewModels/RawCullViewModel.swift — lifecycle tracking and cleanup
File Operations — What RawCull Does and Does Not Do
Operation
Status
Notes
Read ARW source files
Read-only
Metadata and embedded JPEG extraction only
Write to source folder
Never
RawCull never modifies source files
Copy files to destination
Yes
Via /usr/bin/rsync — append-only, non-destructive
Delete files
Never
No delete or overwrite operations
Write saved selections
Yes
savedfiles.json in the user’s Documents folder
Write thumbnail cache
Yes
JPEG thumbnails in ~/Library/Caches/no.blogspot.RawCull/Thumbnails/
Write rsync filter list
Yes
copyfilelist.txt in the user’s Documents folder
All writes to the Documents folder and cache directory use atomic file writes (Data.write(to:options:.atomic)) to prevent partial writes corrupting stored data.
Process Execution — rsync
RawCull uses /usr/bin/rsync (Apple’s system-provided rsync binary) to copy selected files from source to destination. Key security properties of this integration:
Fixed binary path: The rsync binary path is hardcoded to /usr/bin/rsync — it is never resolved from a user-supplied path or environment variable
Argument list, not shell string: Arguments are passed as a Swift [String] array to the process API, not as a shell command string. This eliminates any risk of shell injection
Controlled environment: The process is launched with a minimal, explicitly specified environment
No elevated privileges: rsync runs as the current user — no sudo, no setuid, no privilege escalation
Dry-run support: A --dry-run (simulate) mode is supported, allowing users to preview what will be copied before committing
Streaming output: Process output is captured line-by-line and parsed by the ParseRsyncOutput package — no raw shell output is ever executed or evaluated
Non-destructive: rsync arguments never include --delete or --remove-source-files — source files are never deleted
rsync-related SPM packages used:
RsyncProcessStreaming — process lifecycle management
RsyncArguments — argument construction
ParseRsyncOutput — output parsing
RsyncAnalyse — transfer statistics
Data Storage & Persistence
RawCull stores only the following data locally on the user’s Mac. No data ever leaves the device.
Data
Location
Format
Purpose
Security-scoped bookmarks
UserDefaults (sourceBookmark, destBookmark)
Binary bookmark data
Persistent folder access across launches
File ratings and tags
~/Documents/savedfiles.json
JSON
User’s culling decisions
Rsync include list
~/Documents/copyfilelist.txt
Plain text
Filter list for rsync
Thumbnail cache
~/Library/Caches/no.blogspot.RawCull/Thumbnails/
JPEG
Performance cache
App preferences
UserDefaults (standard domain)
Key-value
Application settings
No data is written to iCloud Drive, Dropbox, or any networked location.
The thumbnail cache is automatically pruned: files older than 30 days are removed on each launch. Cache filenames are derived from source file paths using an MD5 hash (see Cryptography section below).
Cryptography
RawCull imports Apple’s CryptoKit framework exclusively to compute MD5 hashes for naming cached thumbnail files:
importCryptoKitletdigest=Insecure.MD5.hash(data:Data(sourceURL.standardized.path.utf8))lethash=digest.map{String(format:"%02x",$0)}.joined()// Result: a filename like "a1b2c3d4...jpg"
MD5 is used here solely as a deterministic, fast, content-addressable key for the on-disk cache — not for any security or integrity purpose. No passwords, credentials, or sensitive data are hashed or encrypted.
RawCull does not use the Keychain. It does not perform any encryption of user data.
Network Access
RawCull has no network access. No network entitlements are declared in the sandbox, so the OS prevents any outbound connections at the system level. Specifically:
No URLSession or URLRequest calls exist anywhere in the codebase
No telemetry, analytics, or crash reporting frameworks are included
No update checking or license verification calls are made
No third-party SDKs with network components are included
The app functions entirely offline
Privacy Manifest
RawCull includes a PrivacyInfo.xcprivacy manifest as required by Apple for App Store distribution. The declared privacy properties are:
Property
Value
NSPrivacyTracking
false — no tracking
NSPrivacyTrackingDomains
Empty — no tracking domains
NSPrivacyAccessedAPIType: File API
Reason 3B52A1FF.1 — accessing files the user has opened
NSPrivacyAccessedAPIType: Disk Space
Reason E174B746.1 — managing the thumbnail cache
No camera, microphone, location, contacts, calendar, health, or Photos library access is declared or used.
Permissions — What RawCull Never Requests
RawCull does not request and will never request the following permissions:
Camera or microphone access
Location services
Contacts, Calendar, or Reminders access
Photos library access
Full Disk Access
Network access (inbound or outbound)
iCloud or CloudKit access
Bluetooth or USB device access
Screen recording or accessibility permissions
Third-Party Dependencies
RawCull uses the following Swift Package Manager dependencies:
Package
Purpose
Network?
Executable code?
RsyncProcessStreaming
Process lifecycle for rsync
No
No — manages Foundation.Process
RsyncArguments
Builds rsync argument arrays
No
No — pure argument construction
ParseRsyncOutput
Parses rsync output lines
No
No — pure string parsing
RsyncAnalyse
Analyses rsync transfer statistics
No
No — pure data analysis
DecodeEncodeGeneric
Generic JSON Codable helpers
No
No — pure value types
All packages are authored by Thomas Evensen. No third-party analytics, advertising, or telemetry libraries are included.
Concurrency & Memory Safety
RawCull targets Swift 6 (.swift-version pinned to 6.0.3) with strict concurrency checking enabled. Security-relevant implications:
File scanning and thumbnail generation run in Swift Actors, providing compile-time data-race safety
UI state is confined to @MainActor, ensuring UI updates happen only on the main thread
Memory pressure is handled via NSCache in the SharedMemoryCache actor — thumbnails are automatically discarded when the system is under memory pressure
Your photos, culling decisions, and file paths remain entirely on your Mac, under your control, at all times.
2 - Culling Photos
RawCull is not a tool for image editing; it is solely intended for selecting and copying selected images for editing by dedicated software such as DxO PL, Lightroom, and others.
A photo culling application is specialized software designed to assist photographers in efficiently reviewing, organizing, and selecting the most suitable images from a photo shoot. RawCull supports Focus Peaking and Focus Points.
Persistent Marking and Session Recovery
RawCull automatically saves your marking decisions as you work, allowing you to pause and resume your culling session at any time. Your marks, ratings, and review status are saved to disk, so if you need to continue later, simply reopen the same folder and your progress will be restored.
Thumbnail Performance
Thumbnails are generated and kept in memory during your session for fast navigation. RawCull also maintains a disk cache of thumbnails for previously reviewed catalogs, enabling instant loading when you return to the same folder in the future.
Two-Phase Culling Workflow
RawCull supports an optional two-phase culling approach that separates the initial triage from the final star rating.
Please be mindful that when using the keyboard to rate, RawCull will automatically advance to the next thumbnail.
Phase 1 — Pick and Reject
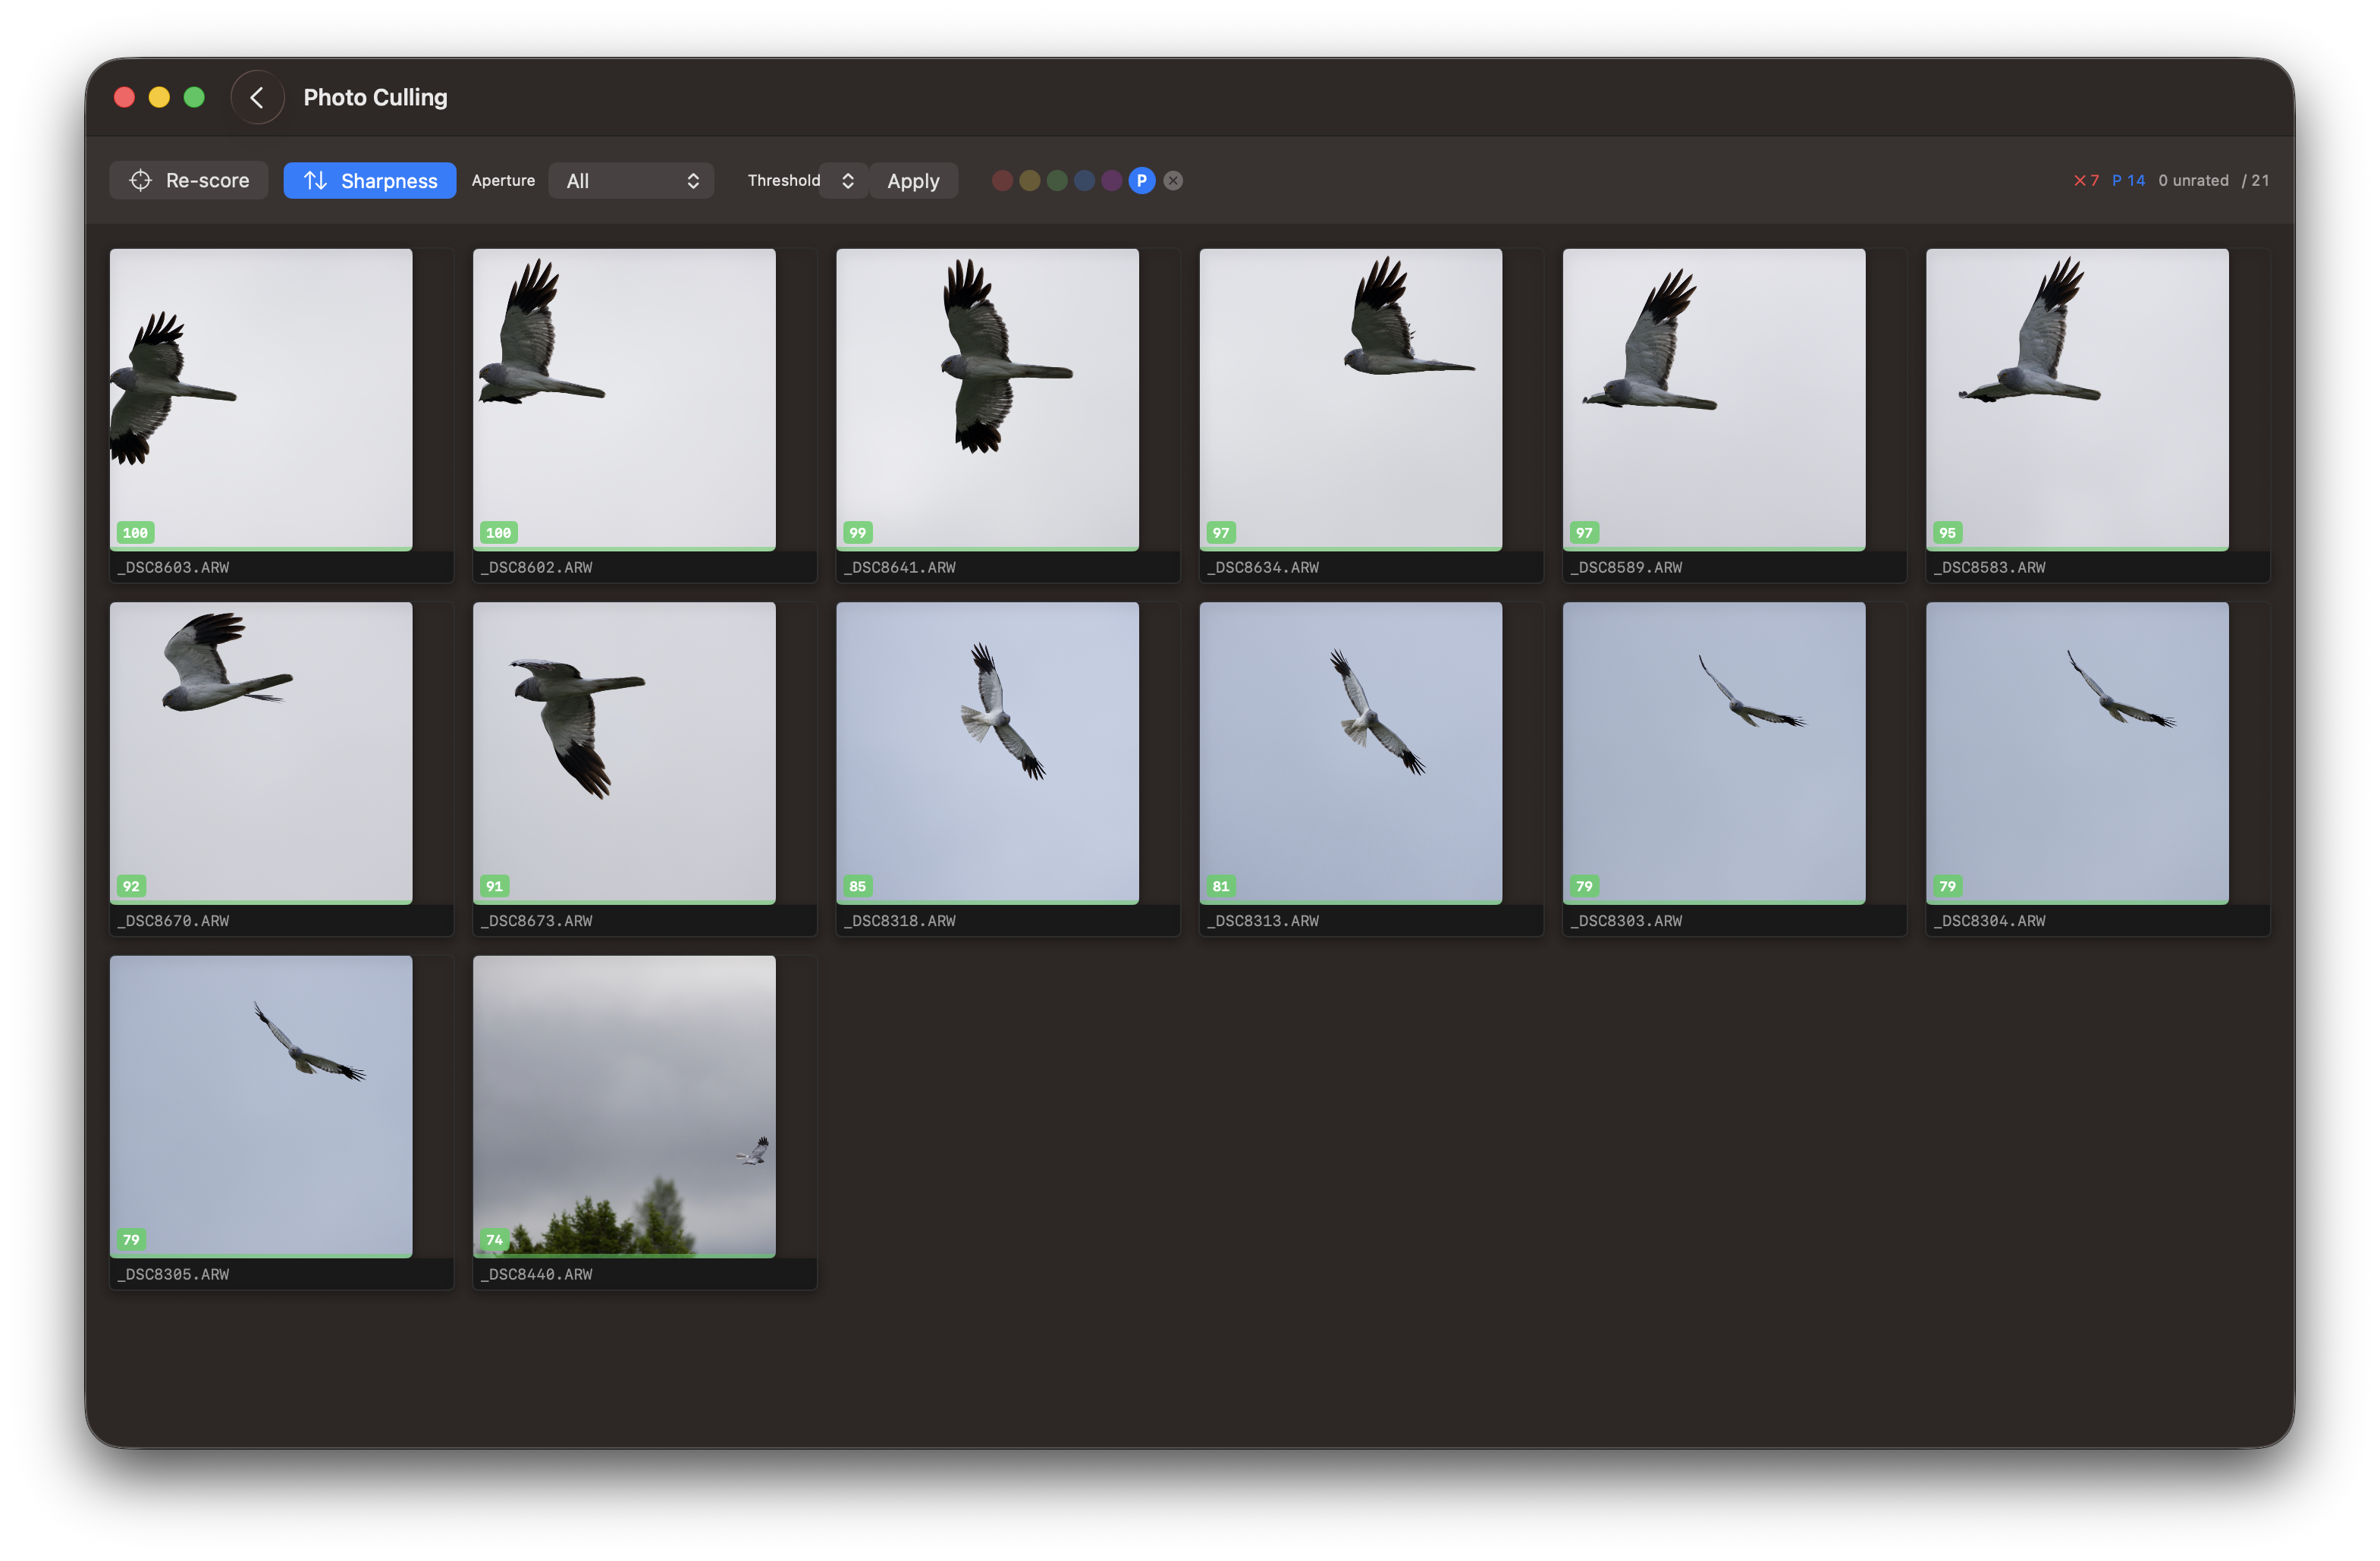
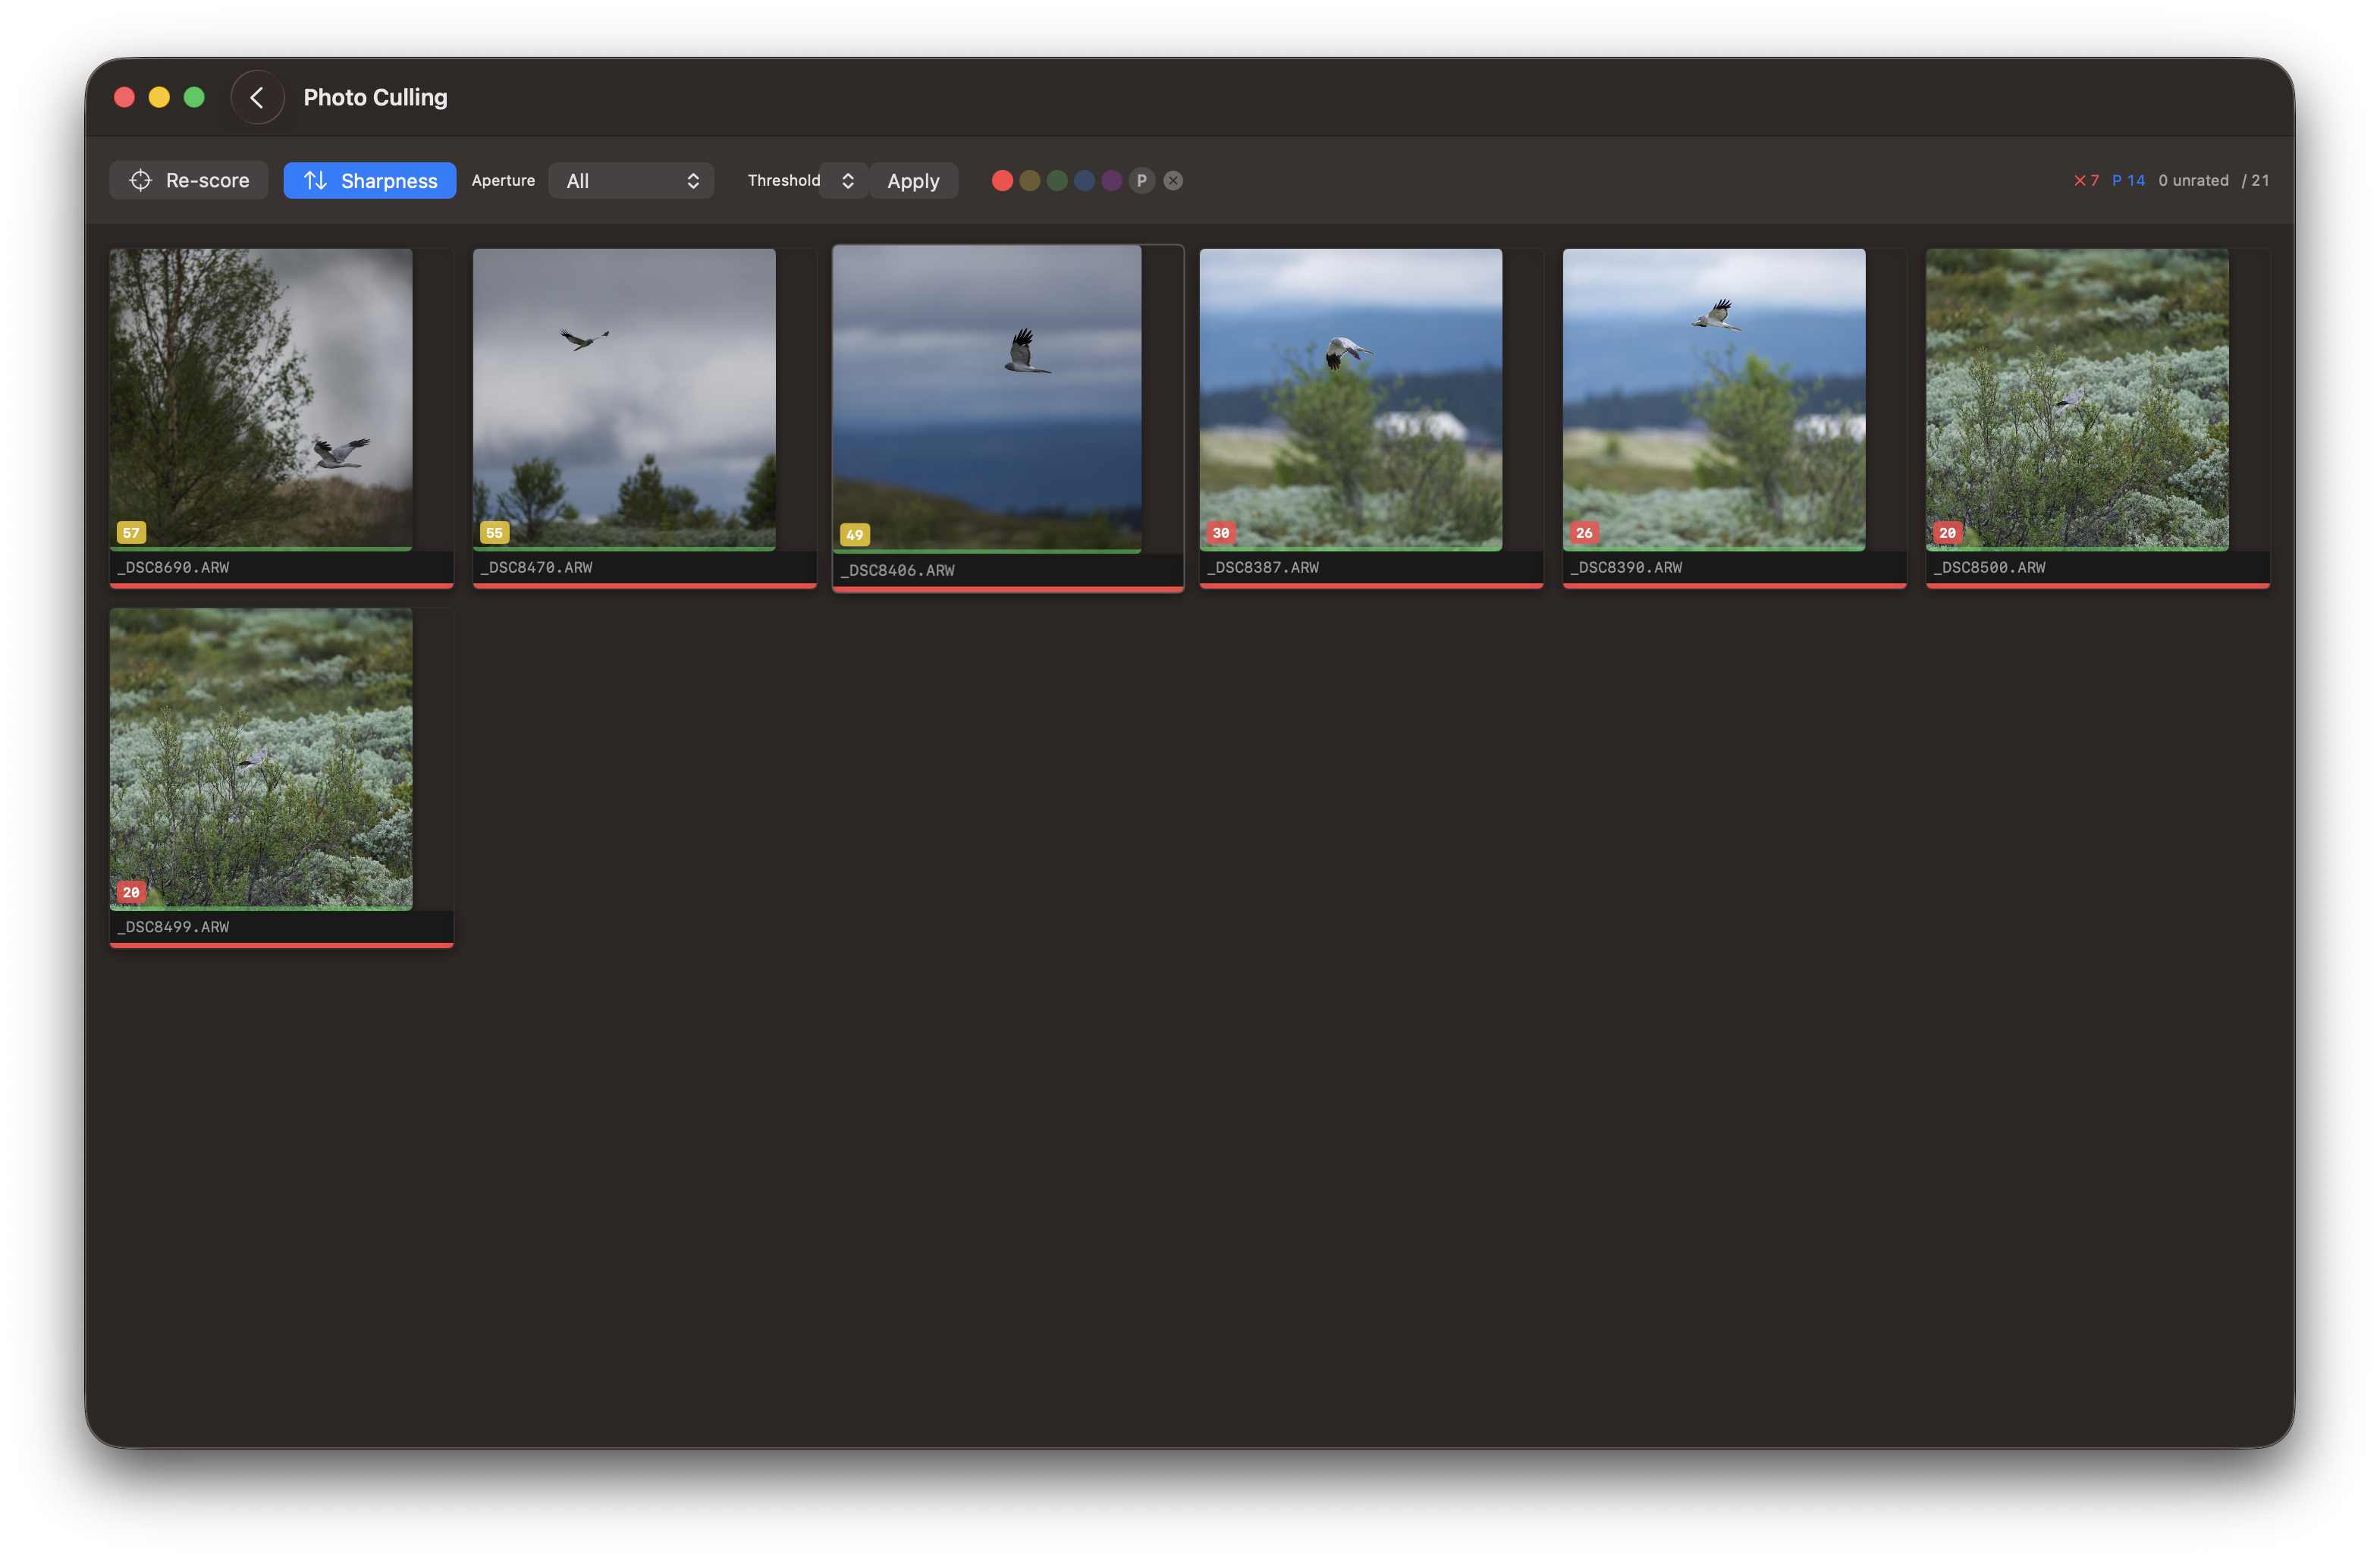
Use P and X to do a fast first pass through all images:
P marks an image as a keeper (rating 0, shown as P in the stats bar)
X marks an image as rejected (rating −1, shown in red)
The header bar shows live counts — ✕ rejected, P kept, and the number of unrated images — so you always know where you stand. Click the unrated count to filter and show only images you have not yet triaged.
Phase 2 — Star Rating
Once you have worked through the pick/reject pass, filter to keepers using the P pill in the rating filter row. You can then apply star ratings 2–5 to your selected images. Only images with a rating of 2 or higher are copied to the final catalog.
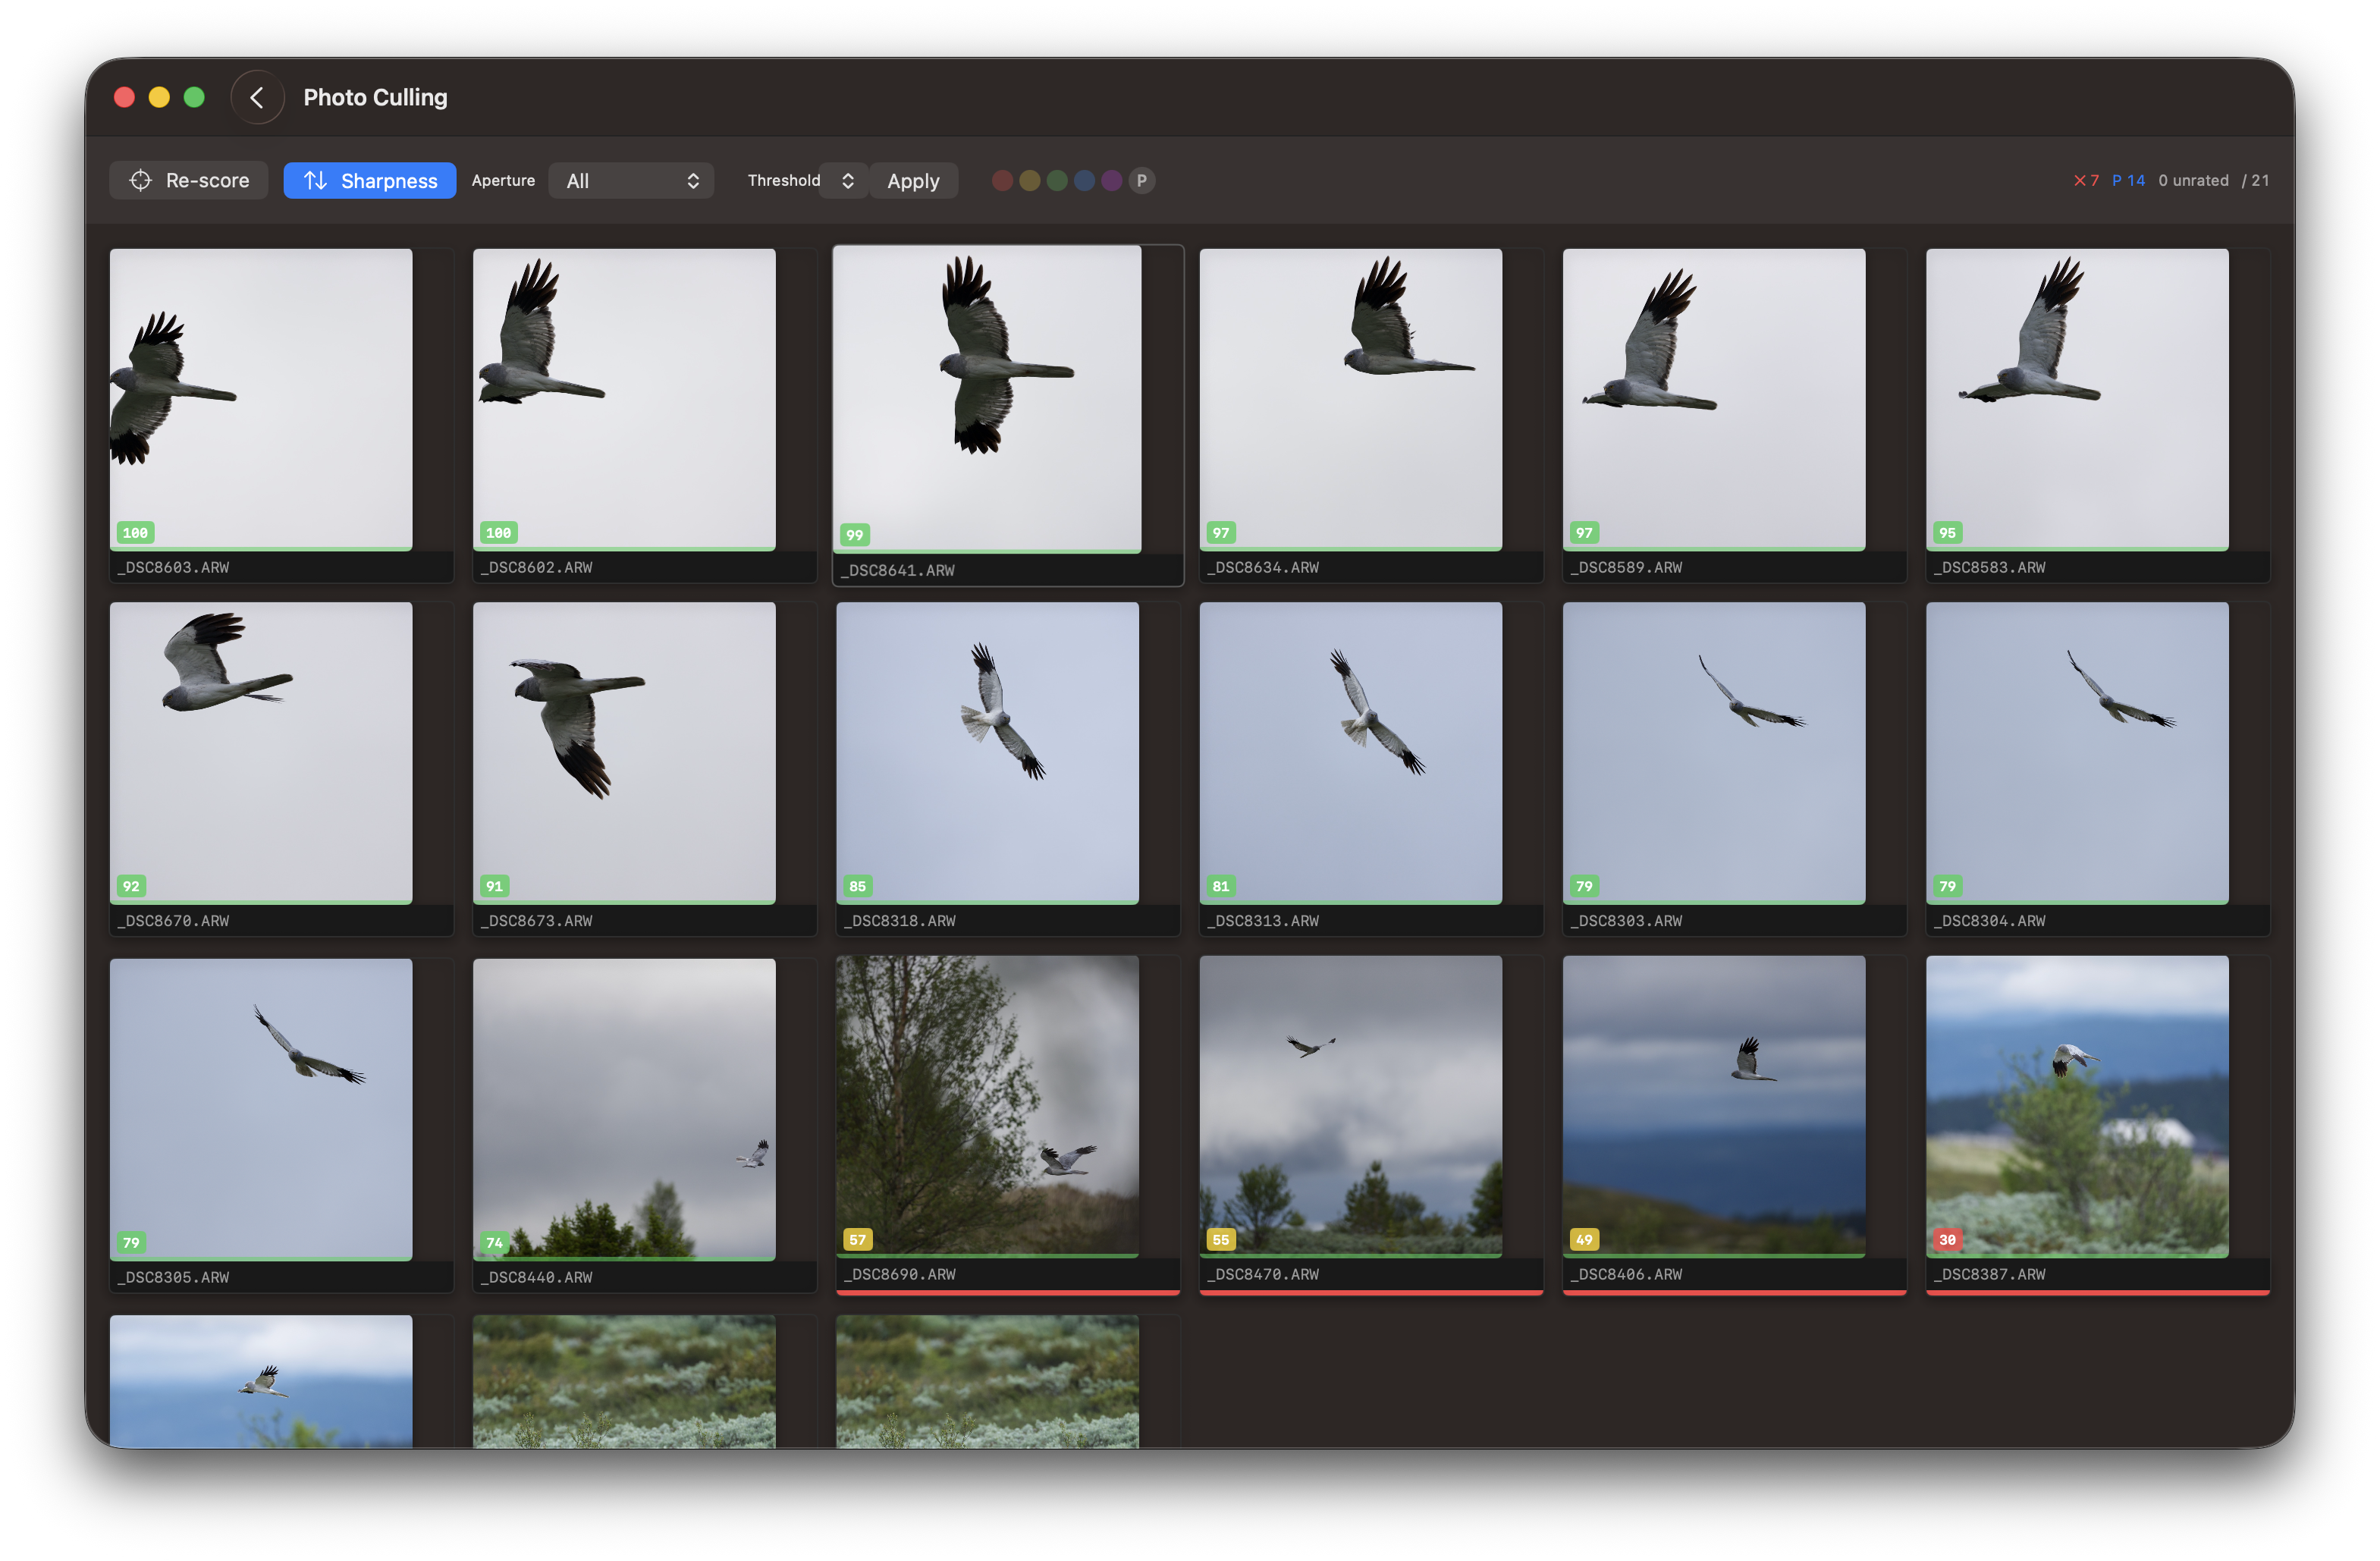
Sharpness-assisted classification
After running Sharpness Scoring, you can auto-classify the entire catalog in one step. Select a threshold percentage (20–80 %) from the Threshold picker and press Apply. Images scoring at or above the threshold are marked as keepers (P); images below are marked as rejected (X). You can then review and adjust before proceeding to star rating.
Keyboard
Use these keyboard shortcuts for efficient culling:
Action
Key
Pick / keep (rating 0)
p
Reject (rating −1)
x
Default tag (rating 3, green)
t
Clear rating / untag
0
Set rating 2
2
Set rating 3
3
Set rating 4
4
Set rating 5
5
Move to next
↓ or →
Move to previous
↑ or ←
Zoom in
+
Zoom out
-
No images are deleted from the temporary catalog. Only images with a rating of 2 or higher may be copied to the final catalog for images. A rating of 1 marks an image as rejected, keeping it visible but excluded from the copy step.
The tagging commands also works in Zoom views.
Icons in the toolbar
Hover the mouse over an icon to see a help message. Icons from left to right:
copy tagged files
show all thumbnails in a grid
show all tagged thumbnails
switch between horizontal and vertical thumbnail view
show saved files
hide the inspector
Rating filter pills
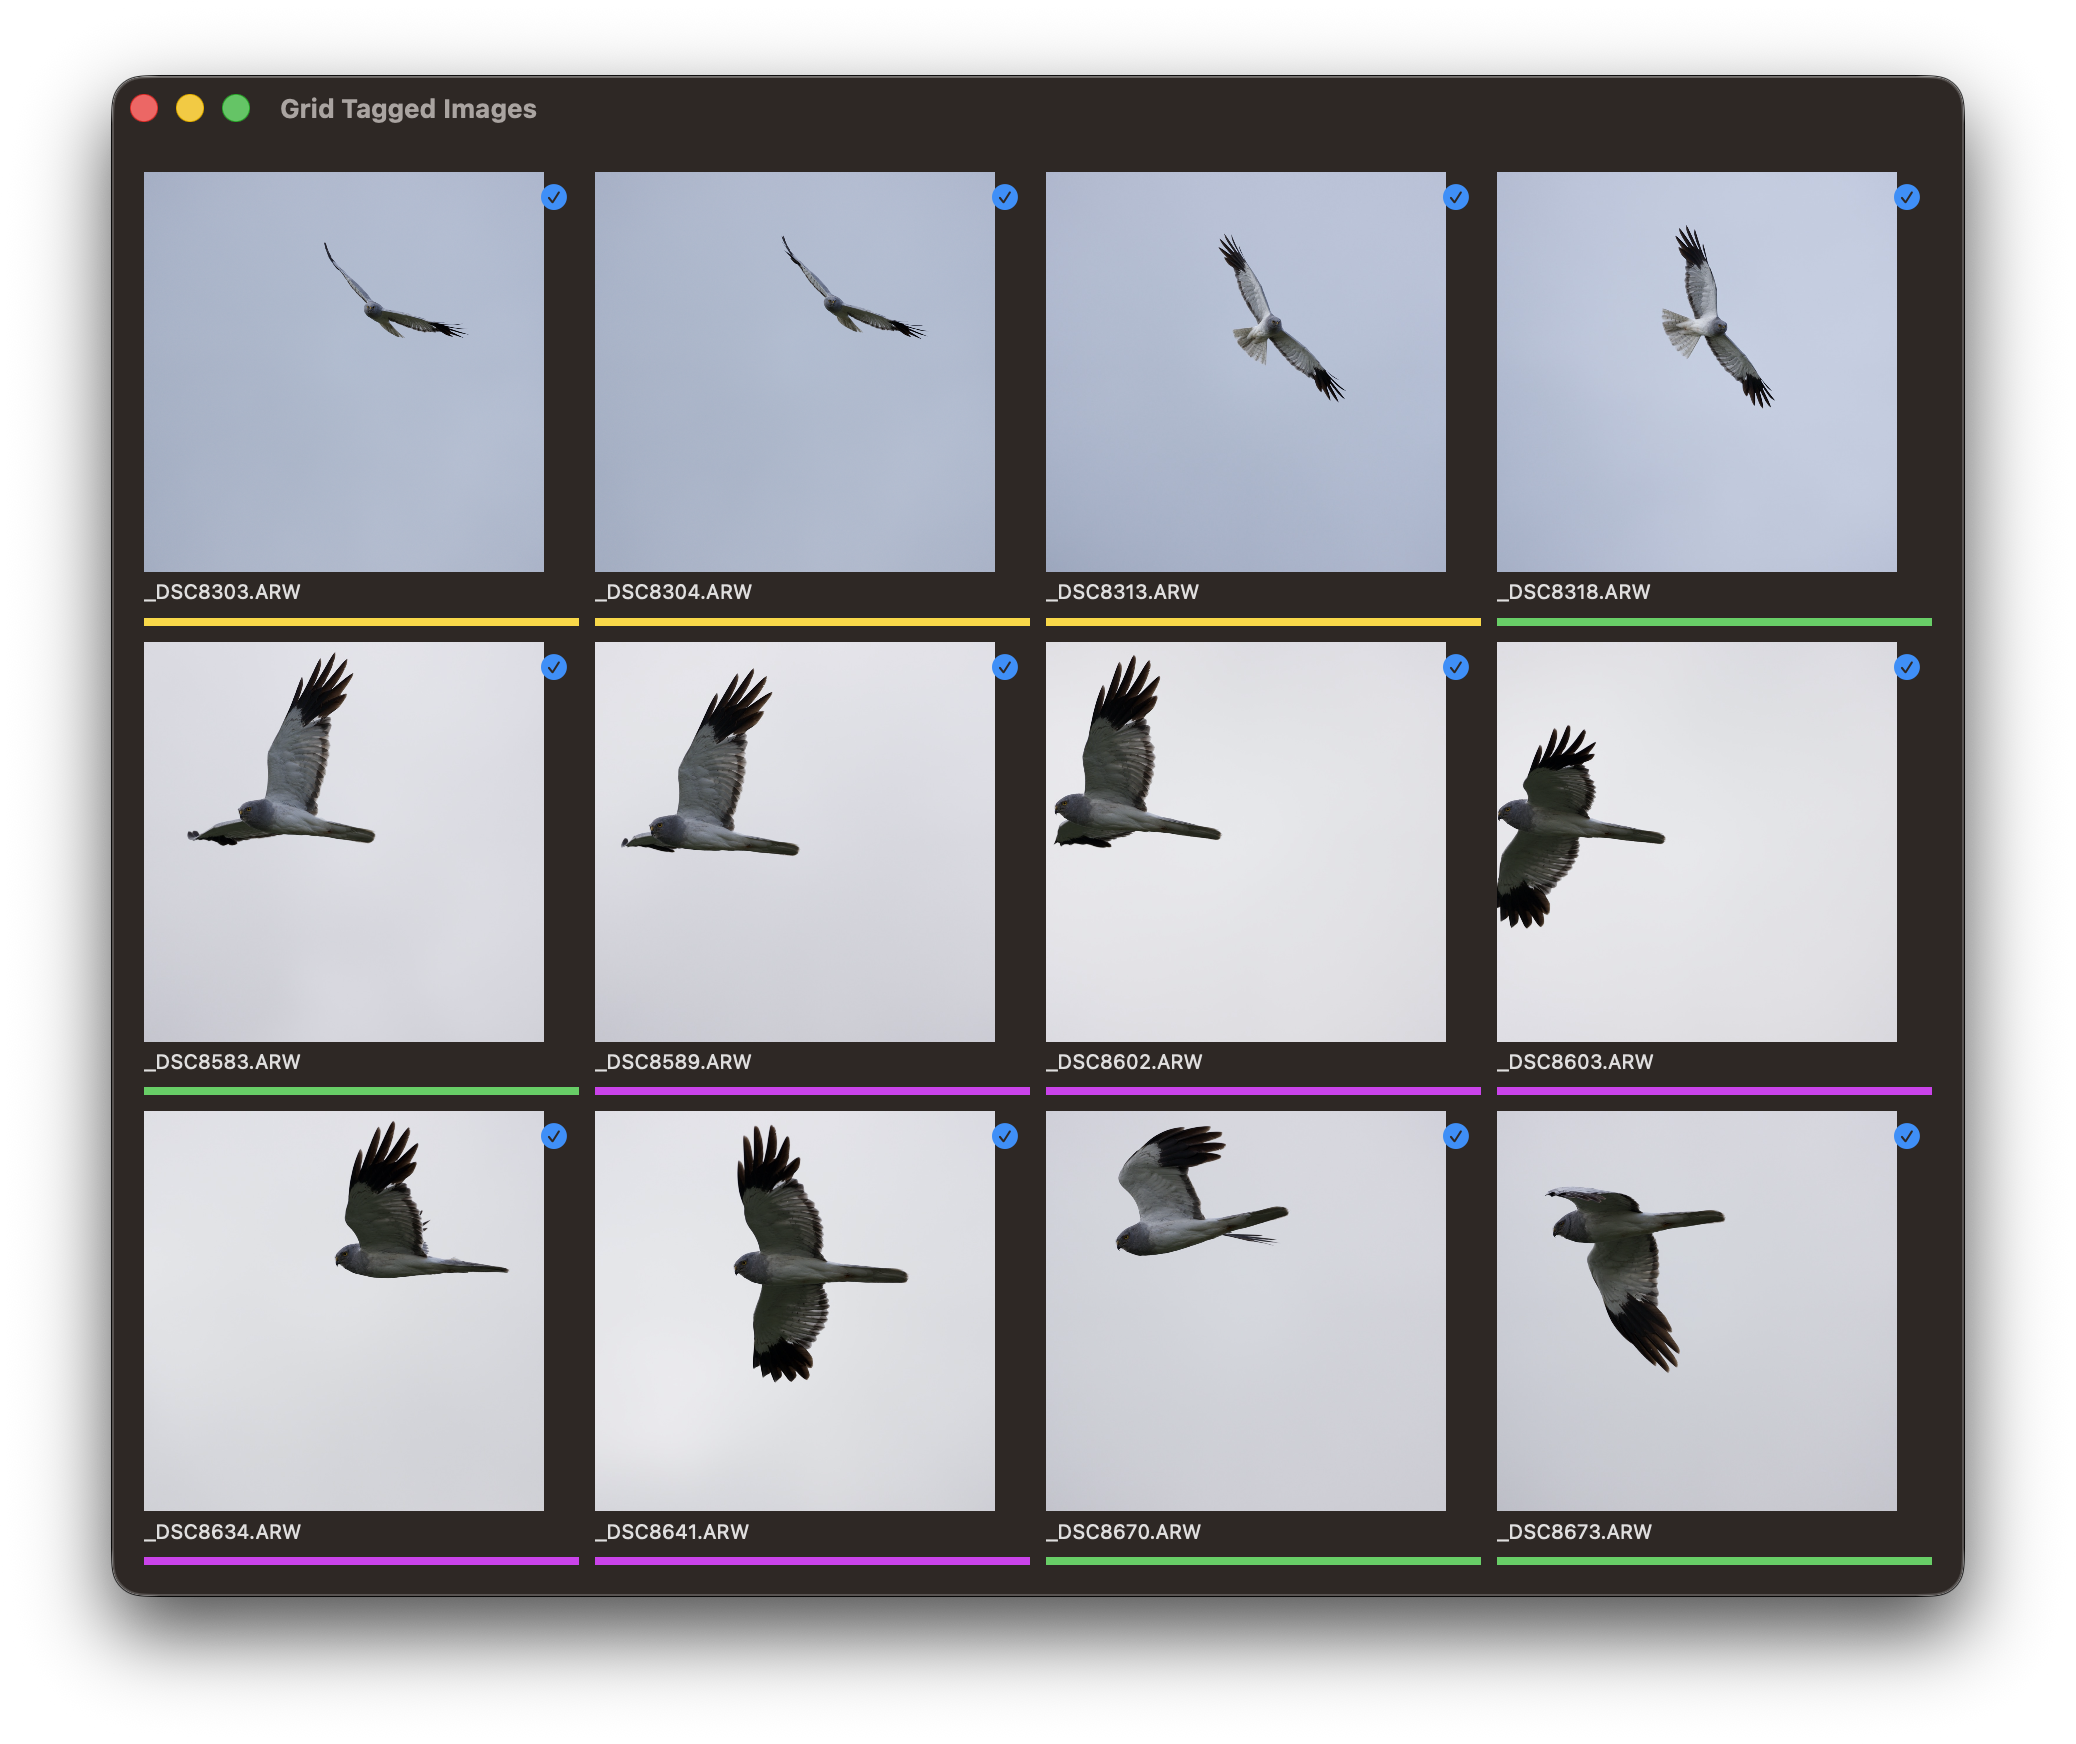
The grid view header contains a row of coloured pills for filtering and sorting thumbnails by rating:
Pill
Filters to
●
Rejected images (rating −1)
●
2-star images
●
3-star images
●
4-star images
●
5-star images
P
Keepers (rating 0) — excludes rejected
Tap a pill to activate the filter; tap it again or press ✕ to return to the full view. Filtering is non-destructive and does not affect saved ratings.
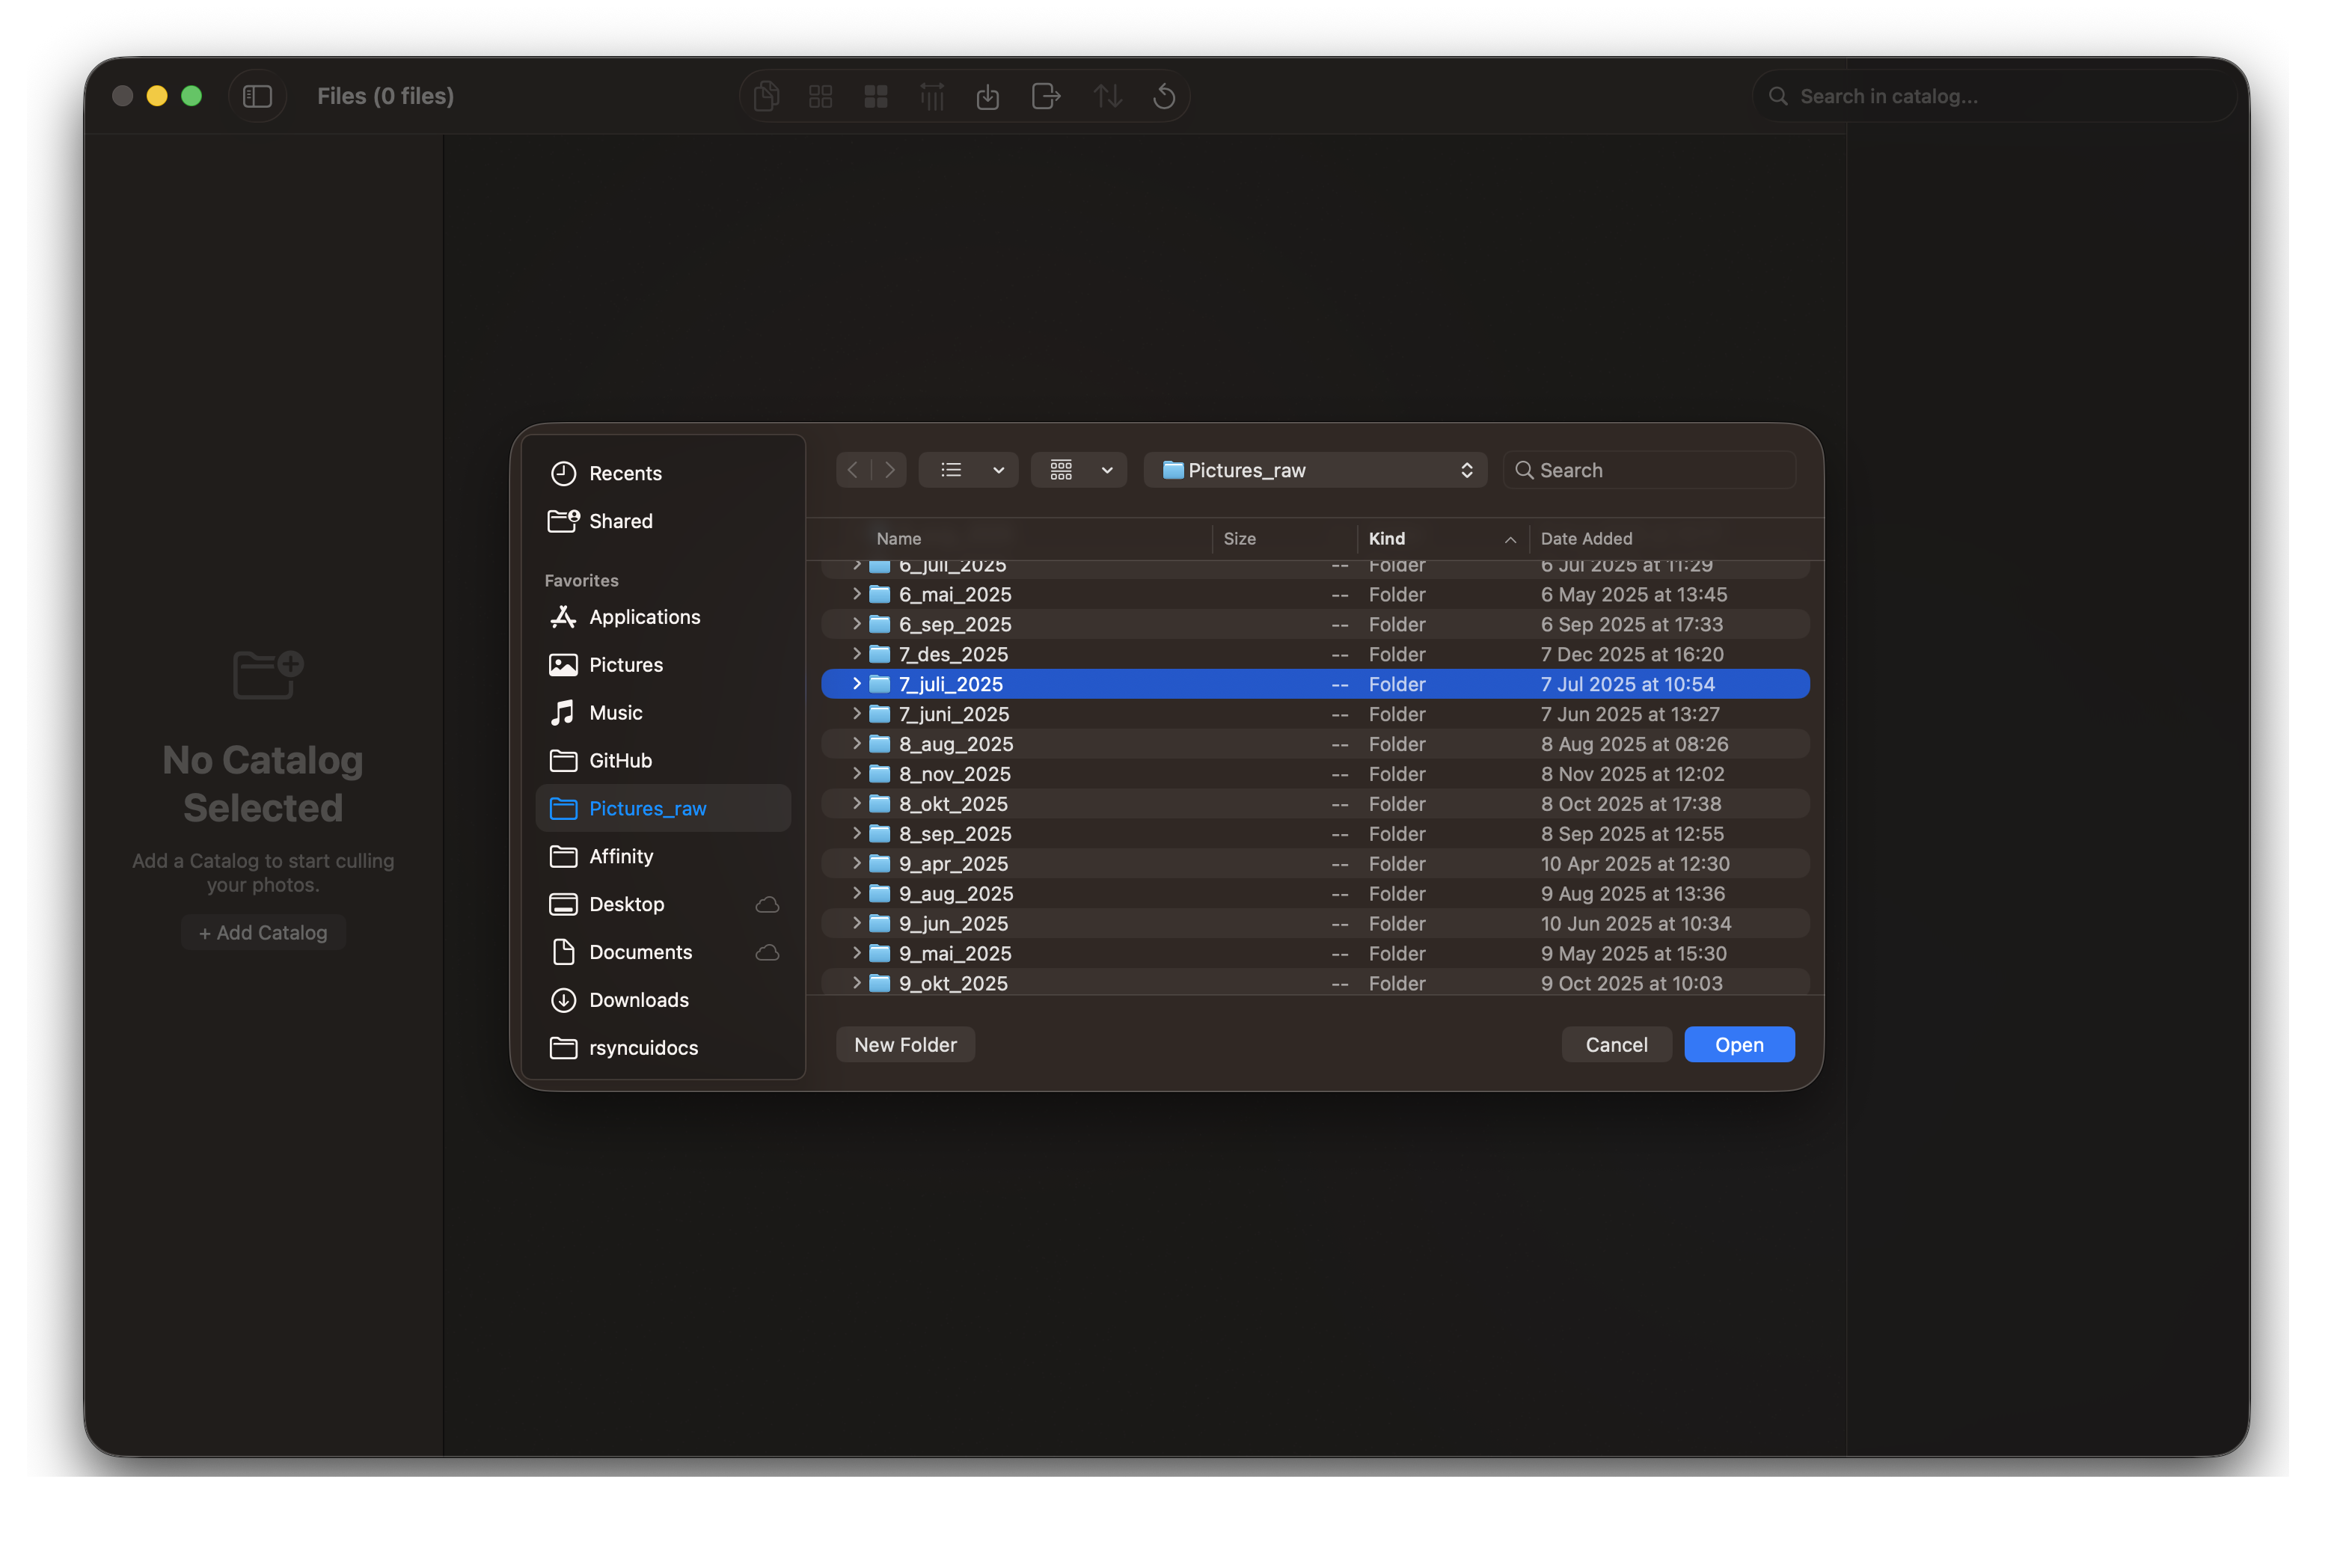
Step 1: Select Your Temporary Catalog
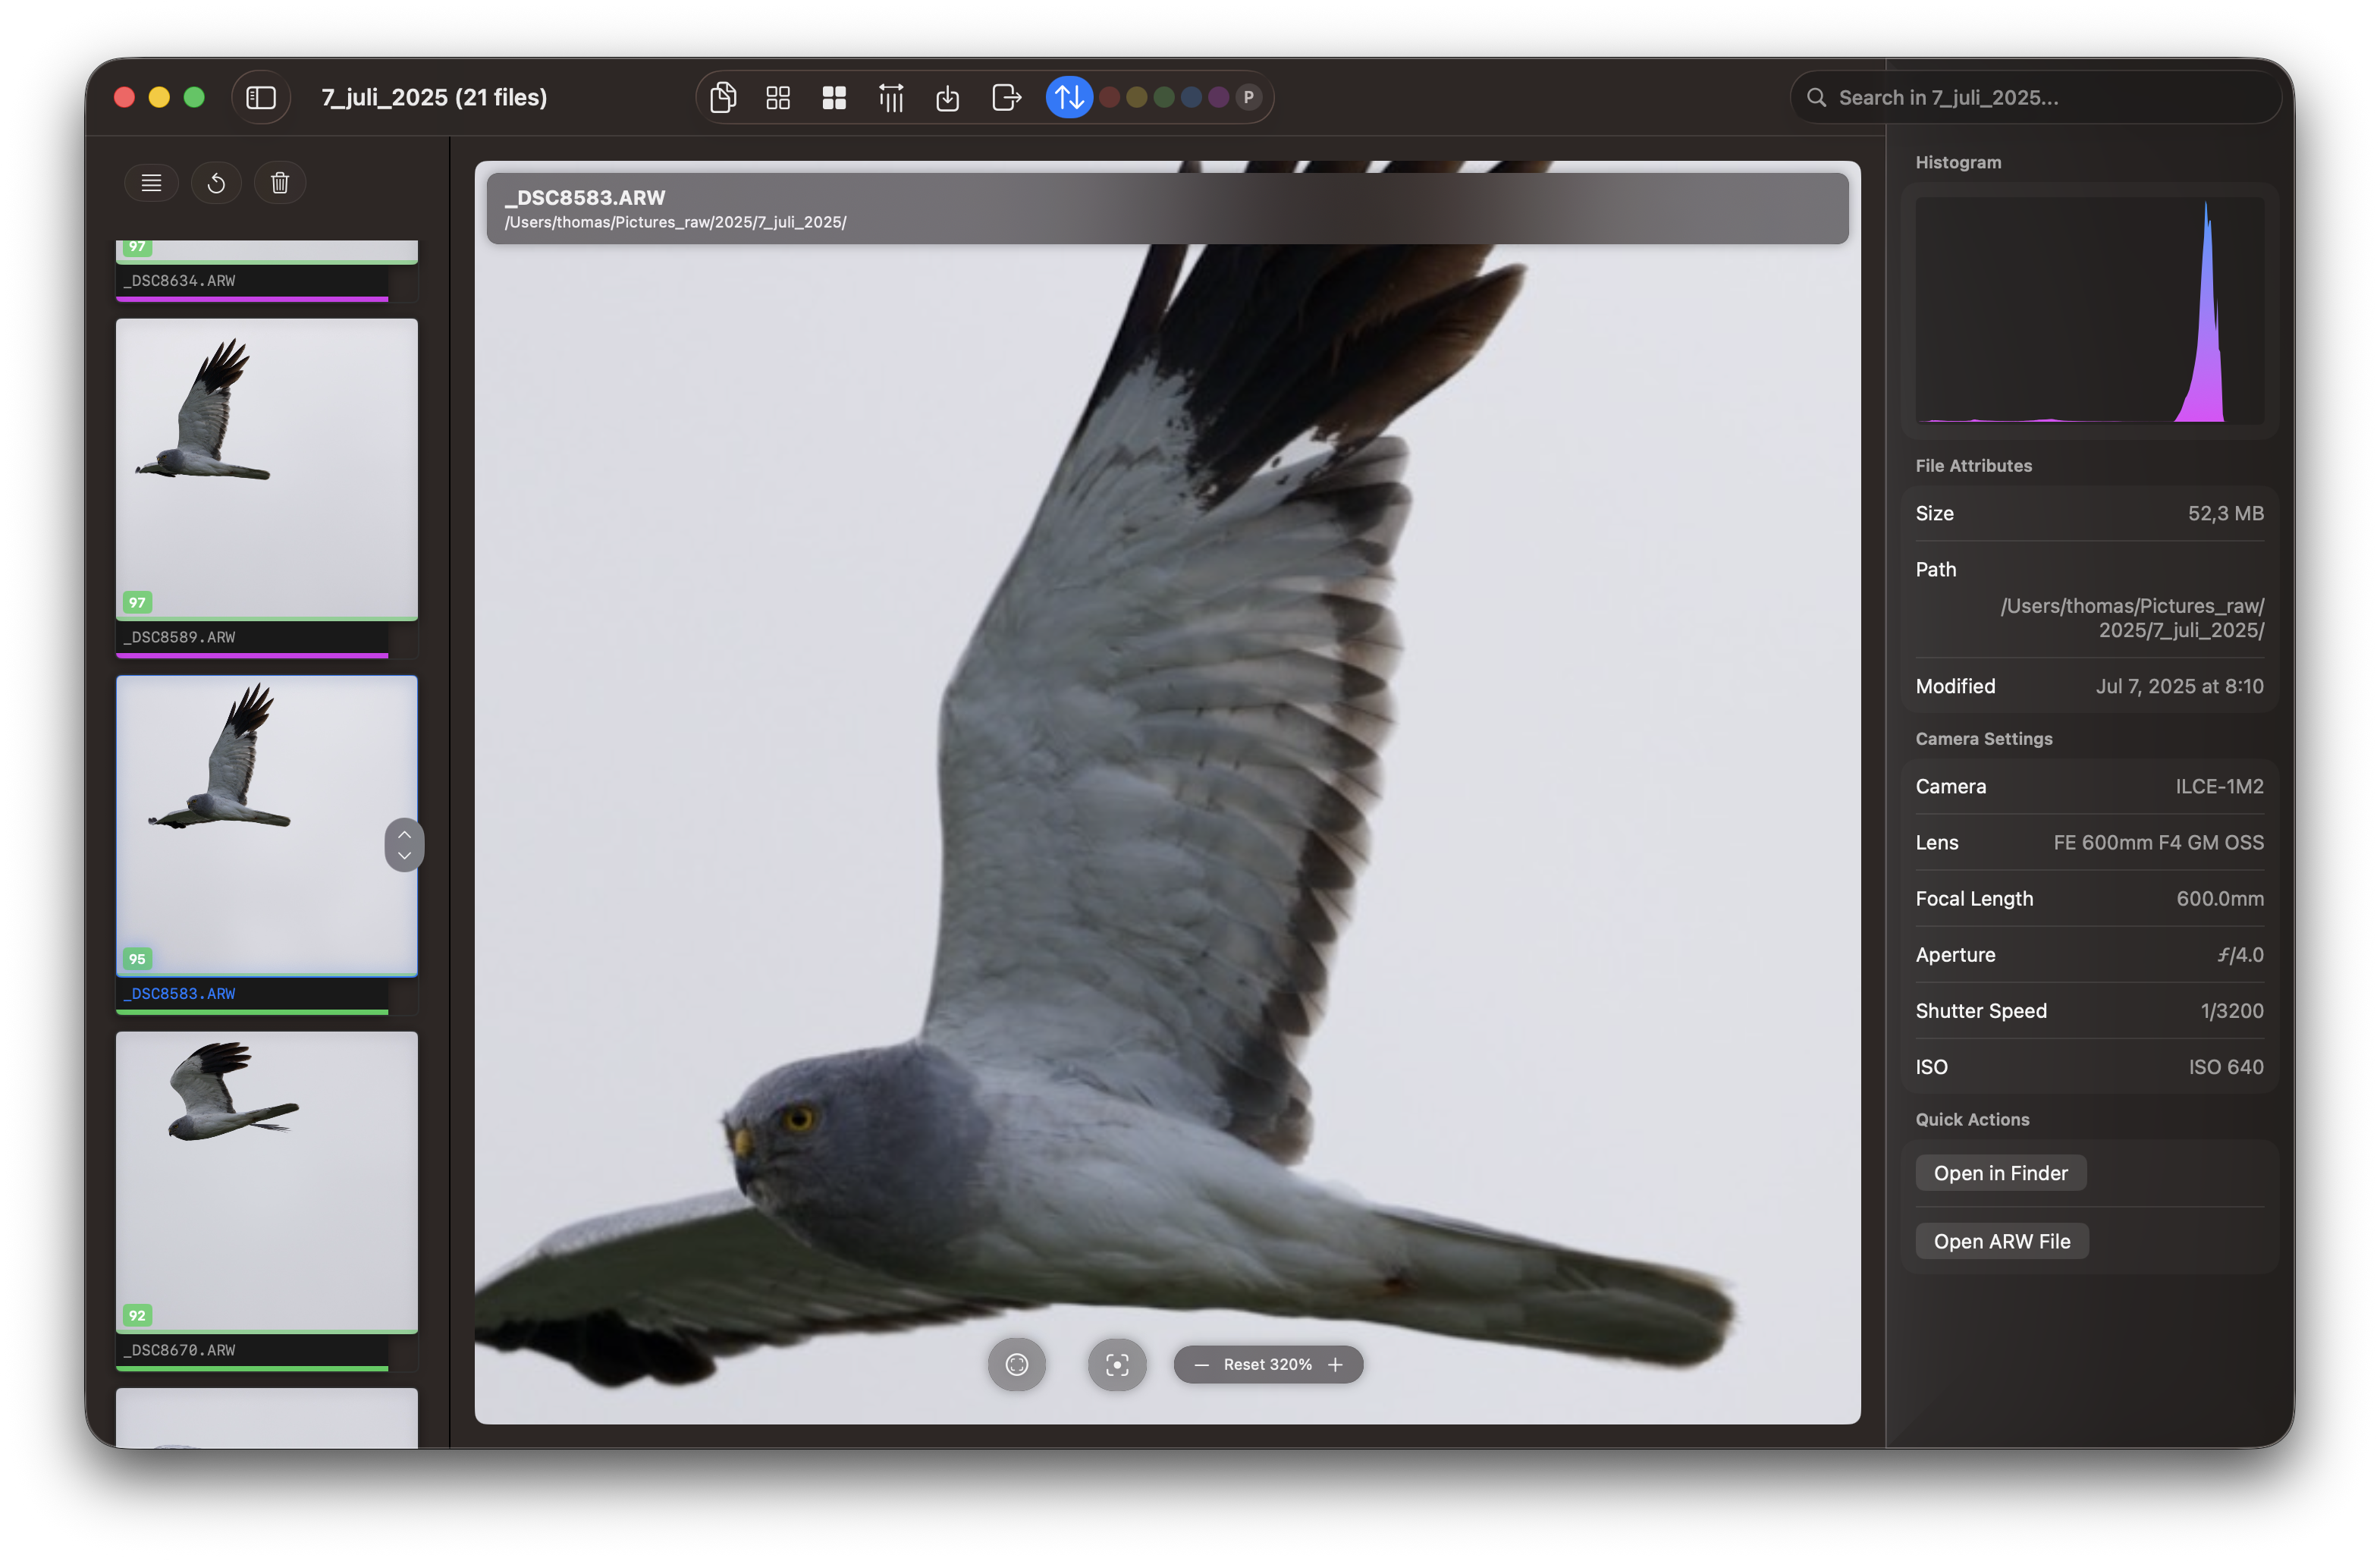
After copying images from your camera to a temporary catalog on your Mac, select that folder in RawCull. The application scans all images and generates previews for quick review. This process reads your photo metadata and creates a visual index of all images in the selected directory.
By default, the Sidebar is hidden. To access new catalogs, toggle the Sidebar via View → Show Sidebar. The Sidebar offers only one option: selecting new catalogs for scanning.
During scanning, you can monitor progress as the application indexes your images. Depending on the size of your library, this may take a few moments.
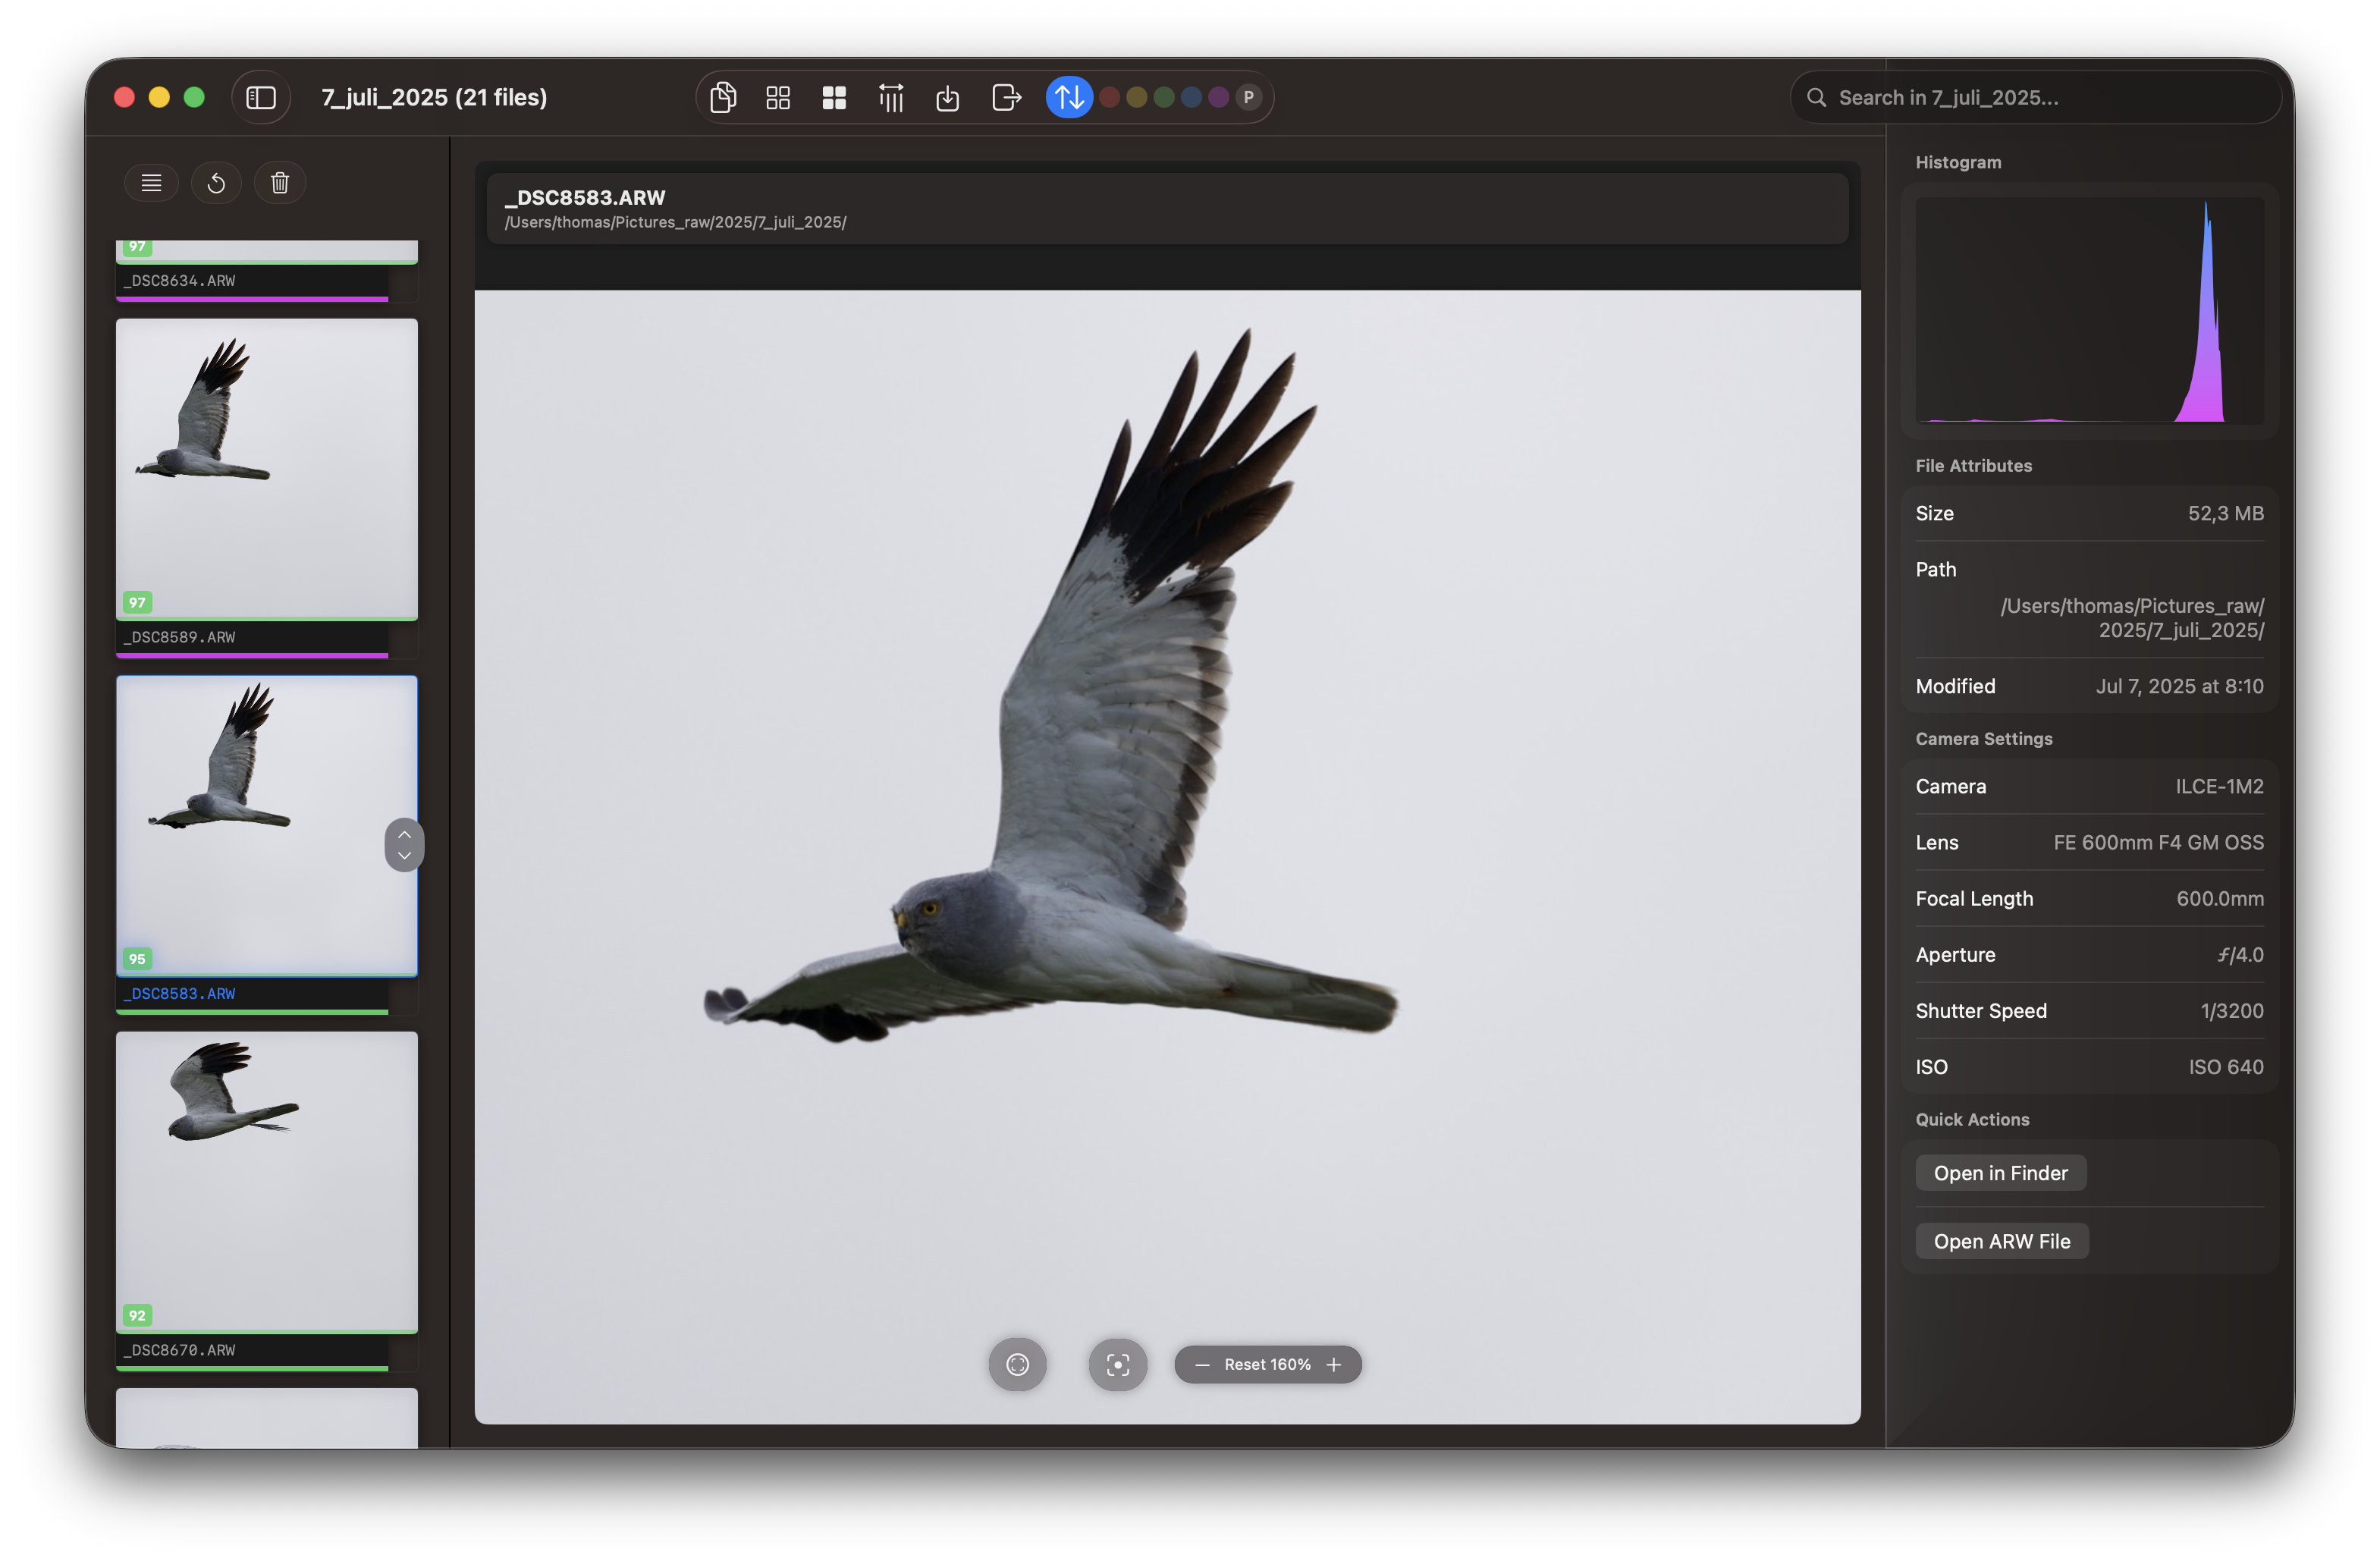
Step 2: Post-Scan Display
Once scanning completes, RawCull displays your full photo library with a thumbnail grid and preview controls ready for culling.
The inspector can be hidden by toggling the hide/show icon on the toolbar.
Vertical and horizontal view of thumbnails
Choose your preferred layout for the thumbnails. At this point, you can:
Navigate through images using arrow keys or click navigation
View the current image in the main preview area
Rate images using keys 0–5, or press t to apply the default tag (rating 3, green)
Use p and x for the two-phase pick/reject pass
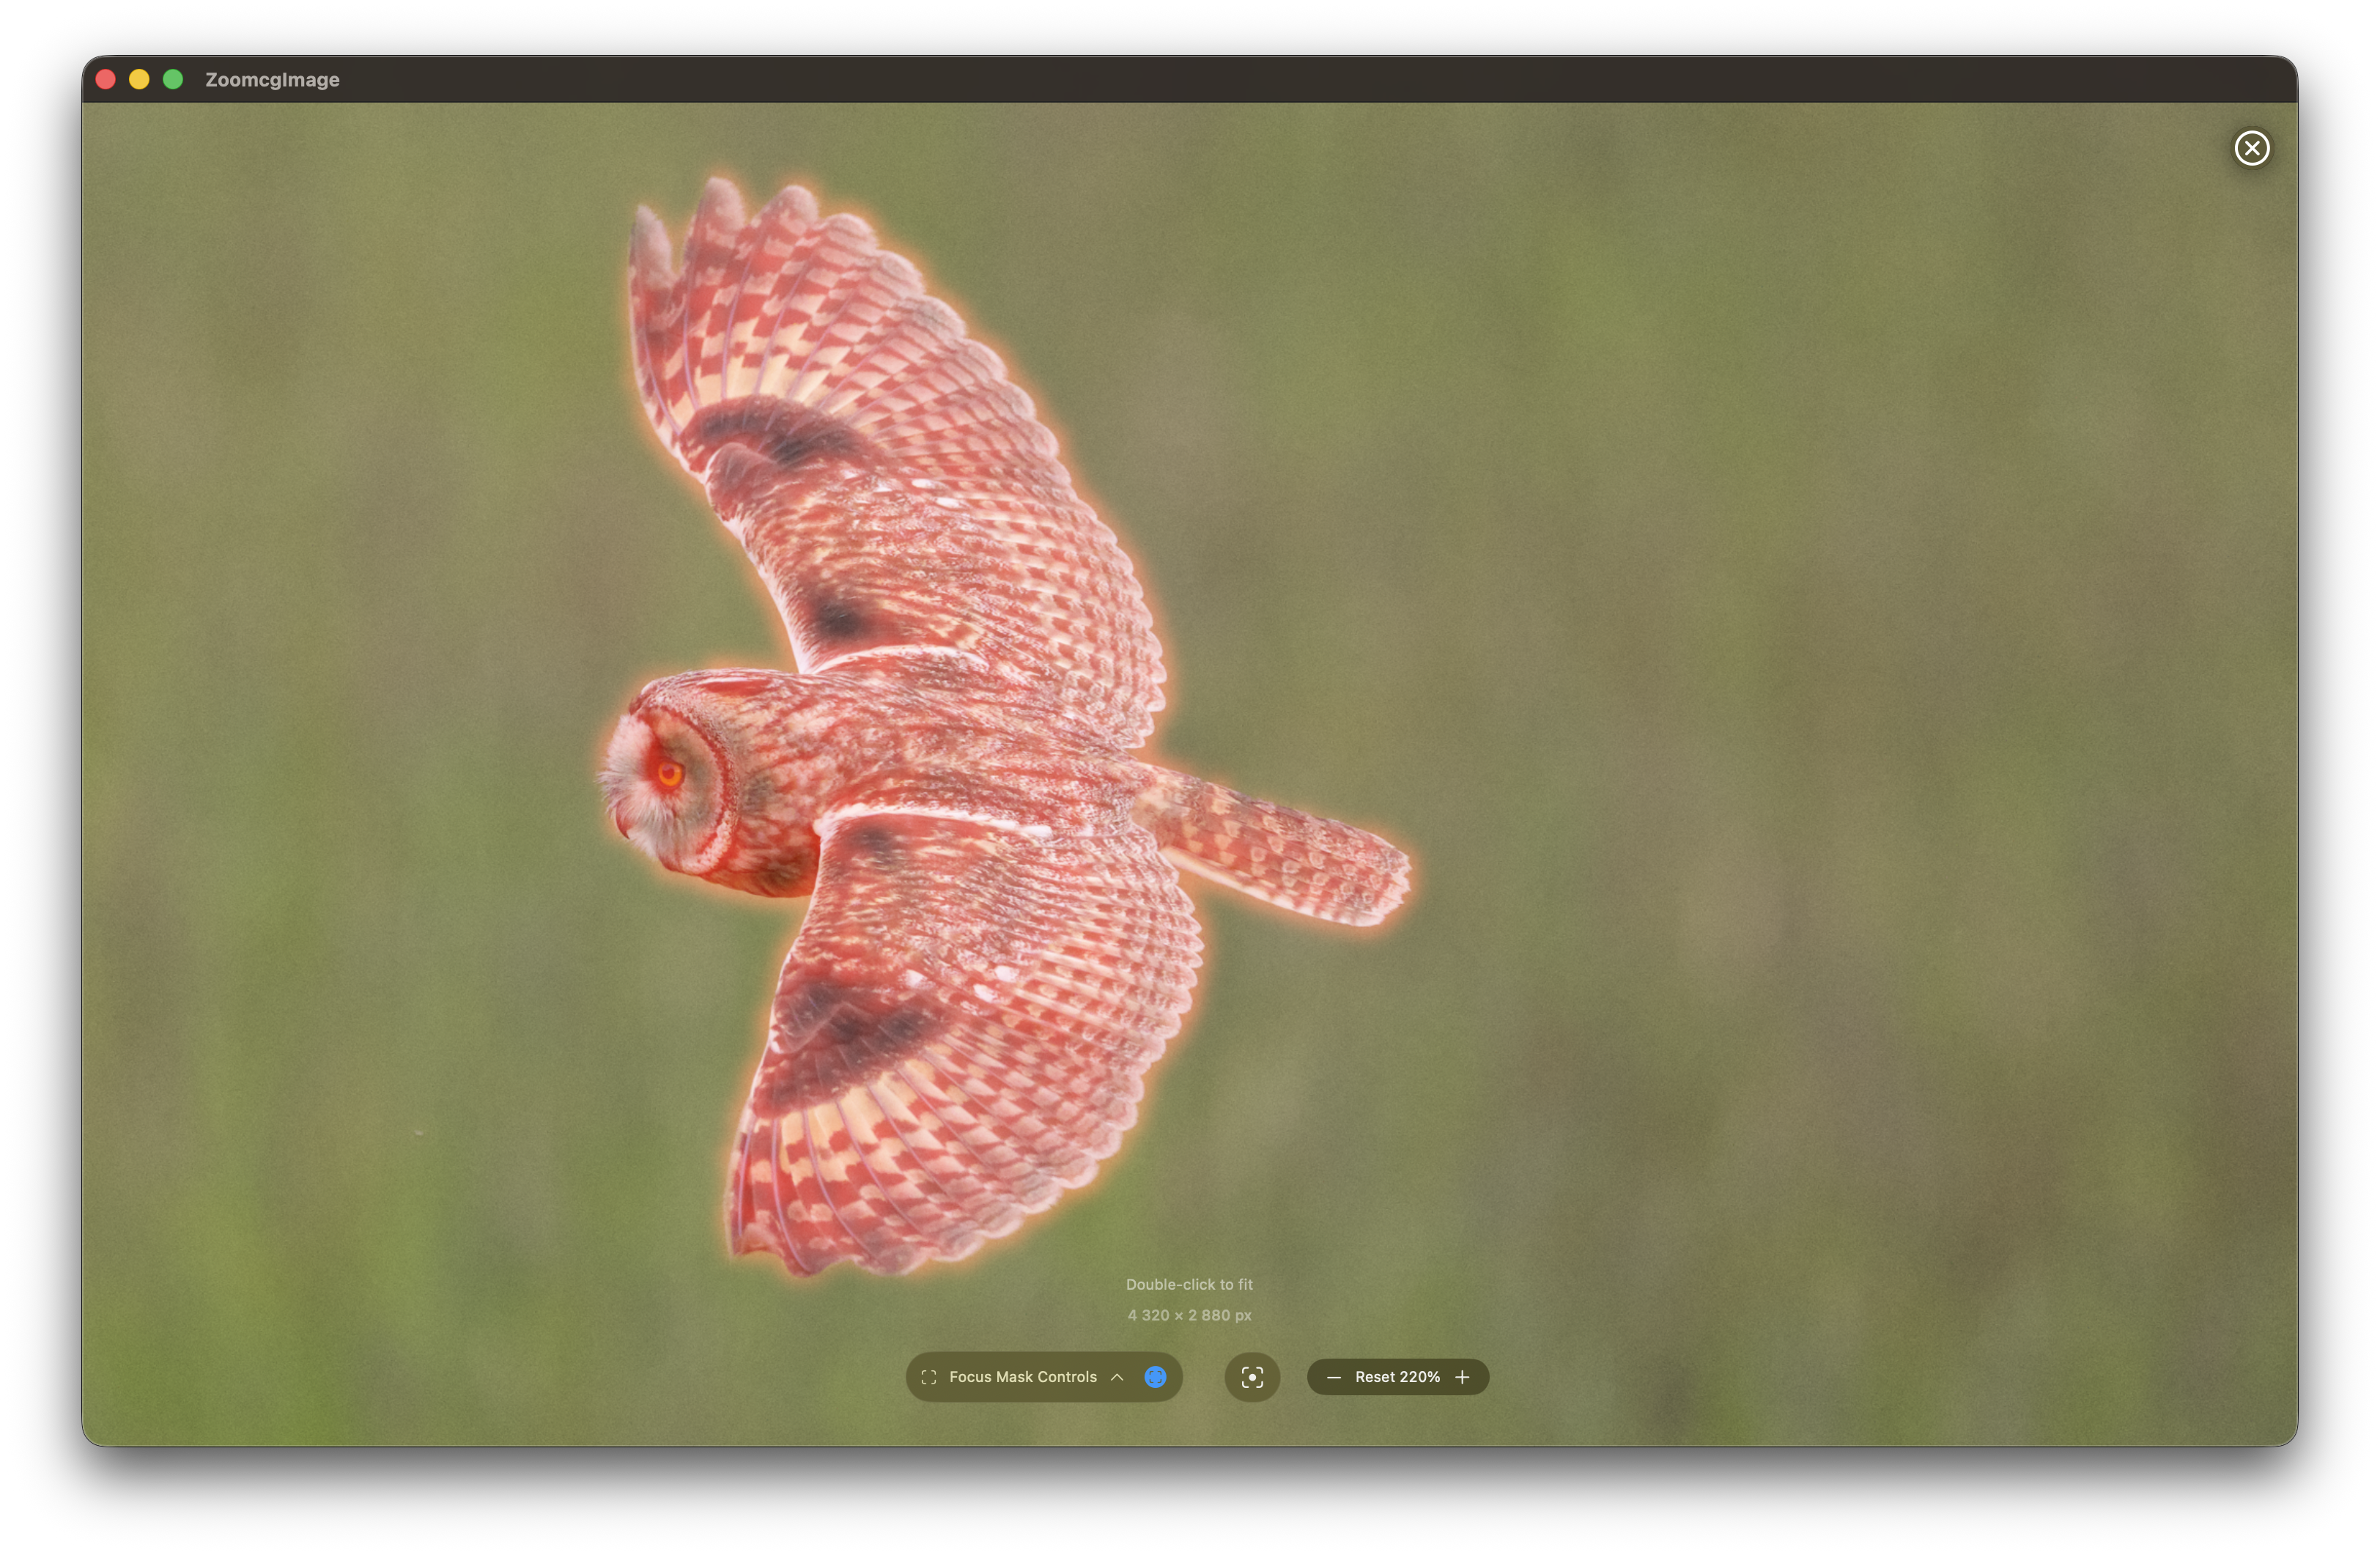
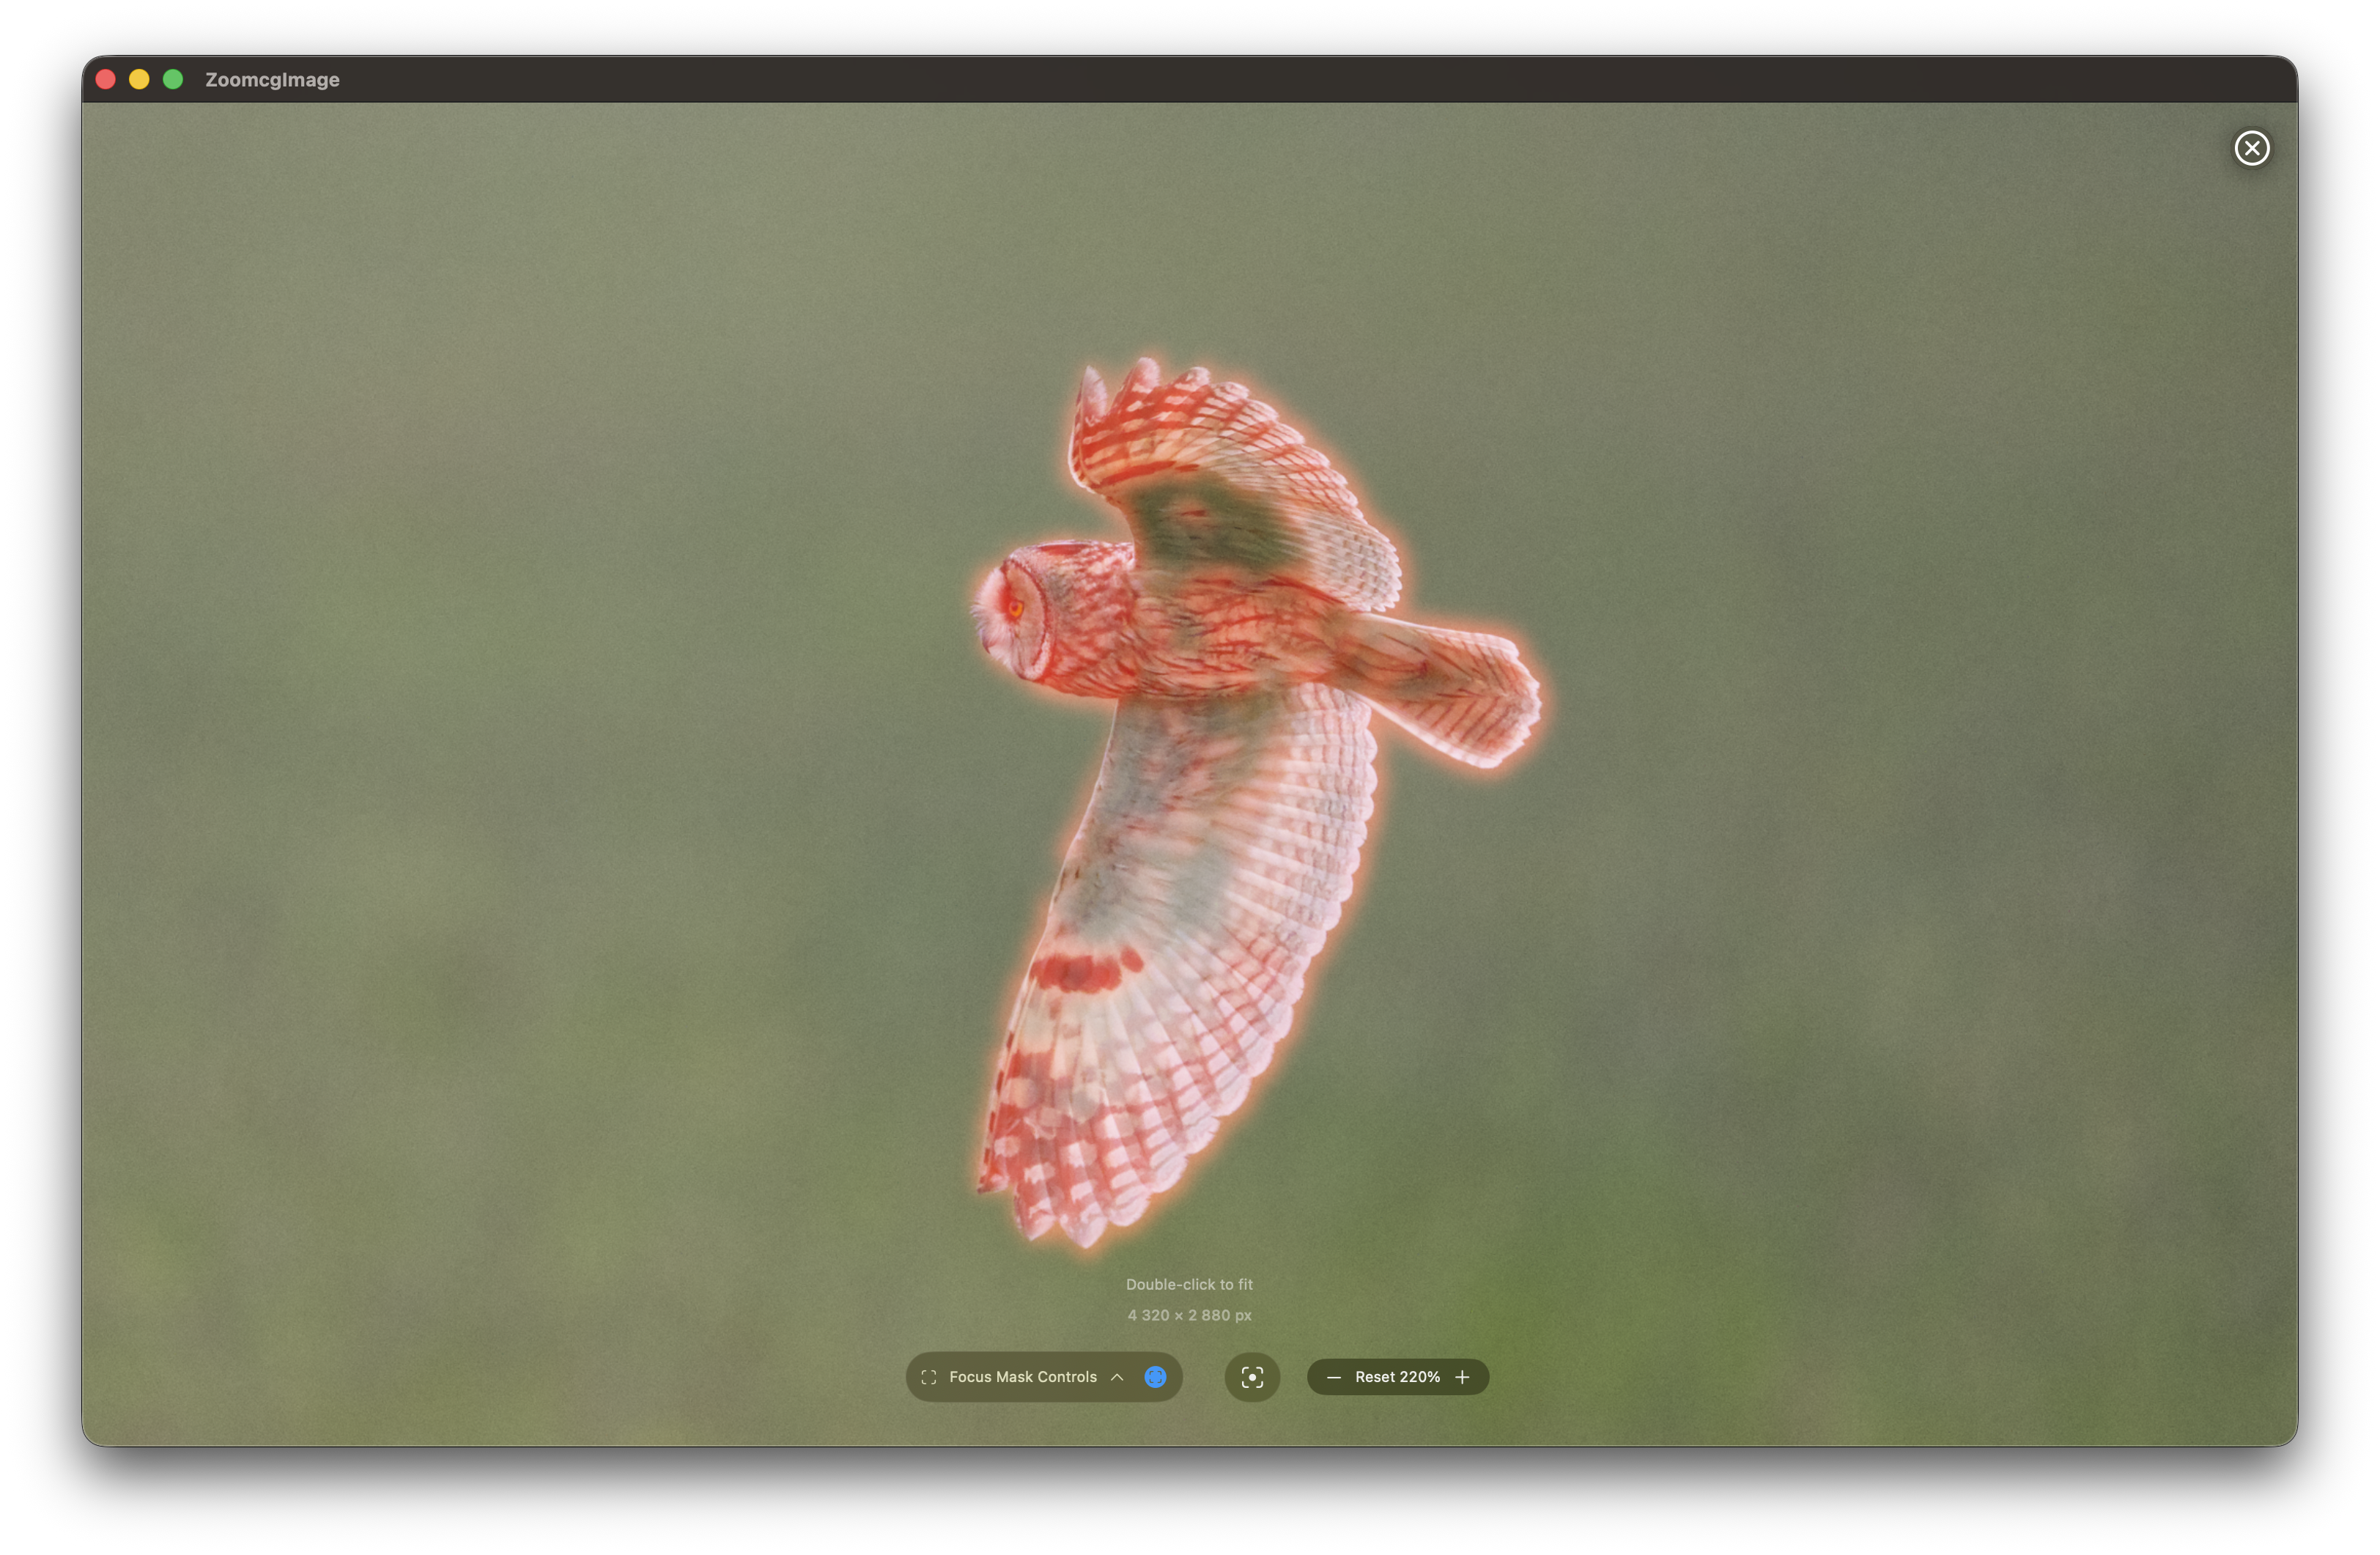
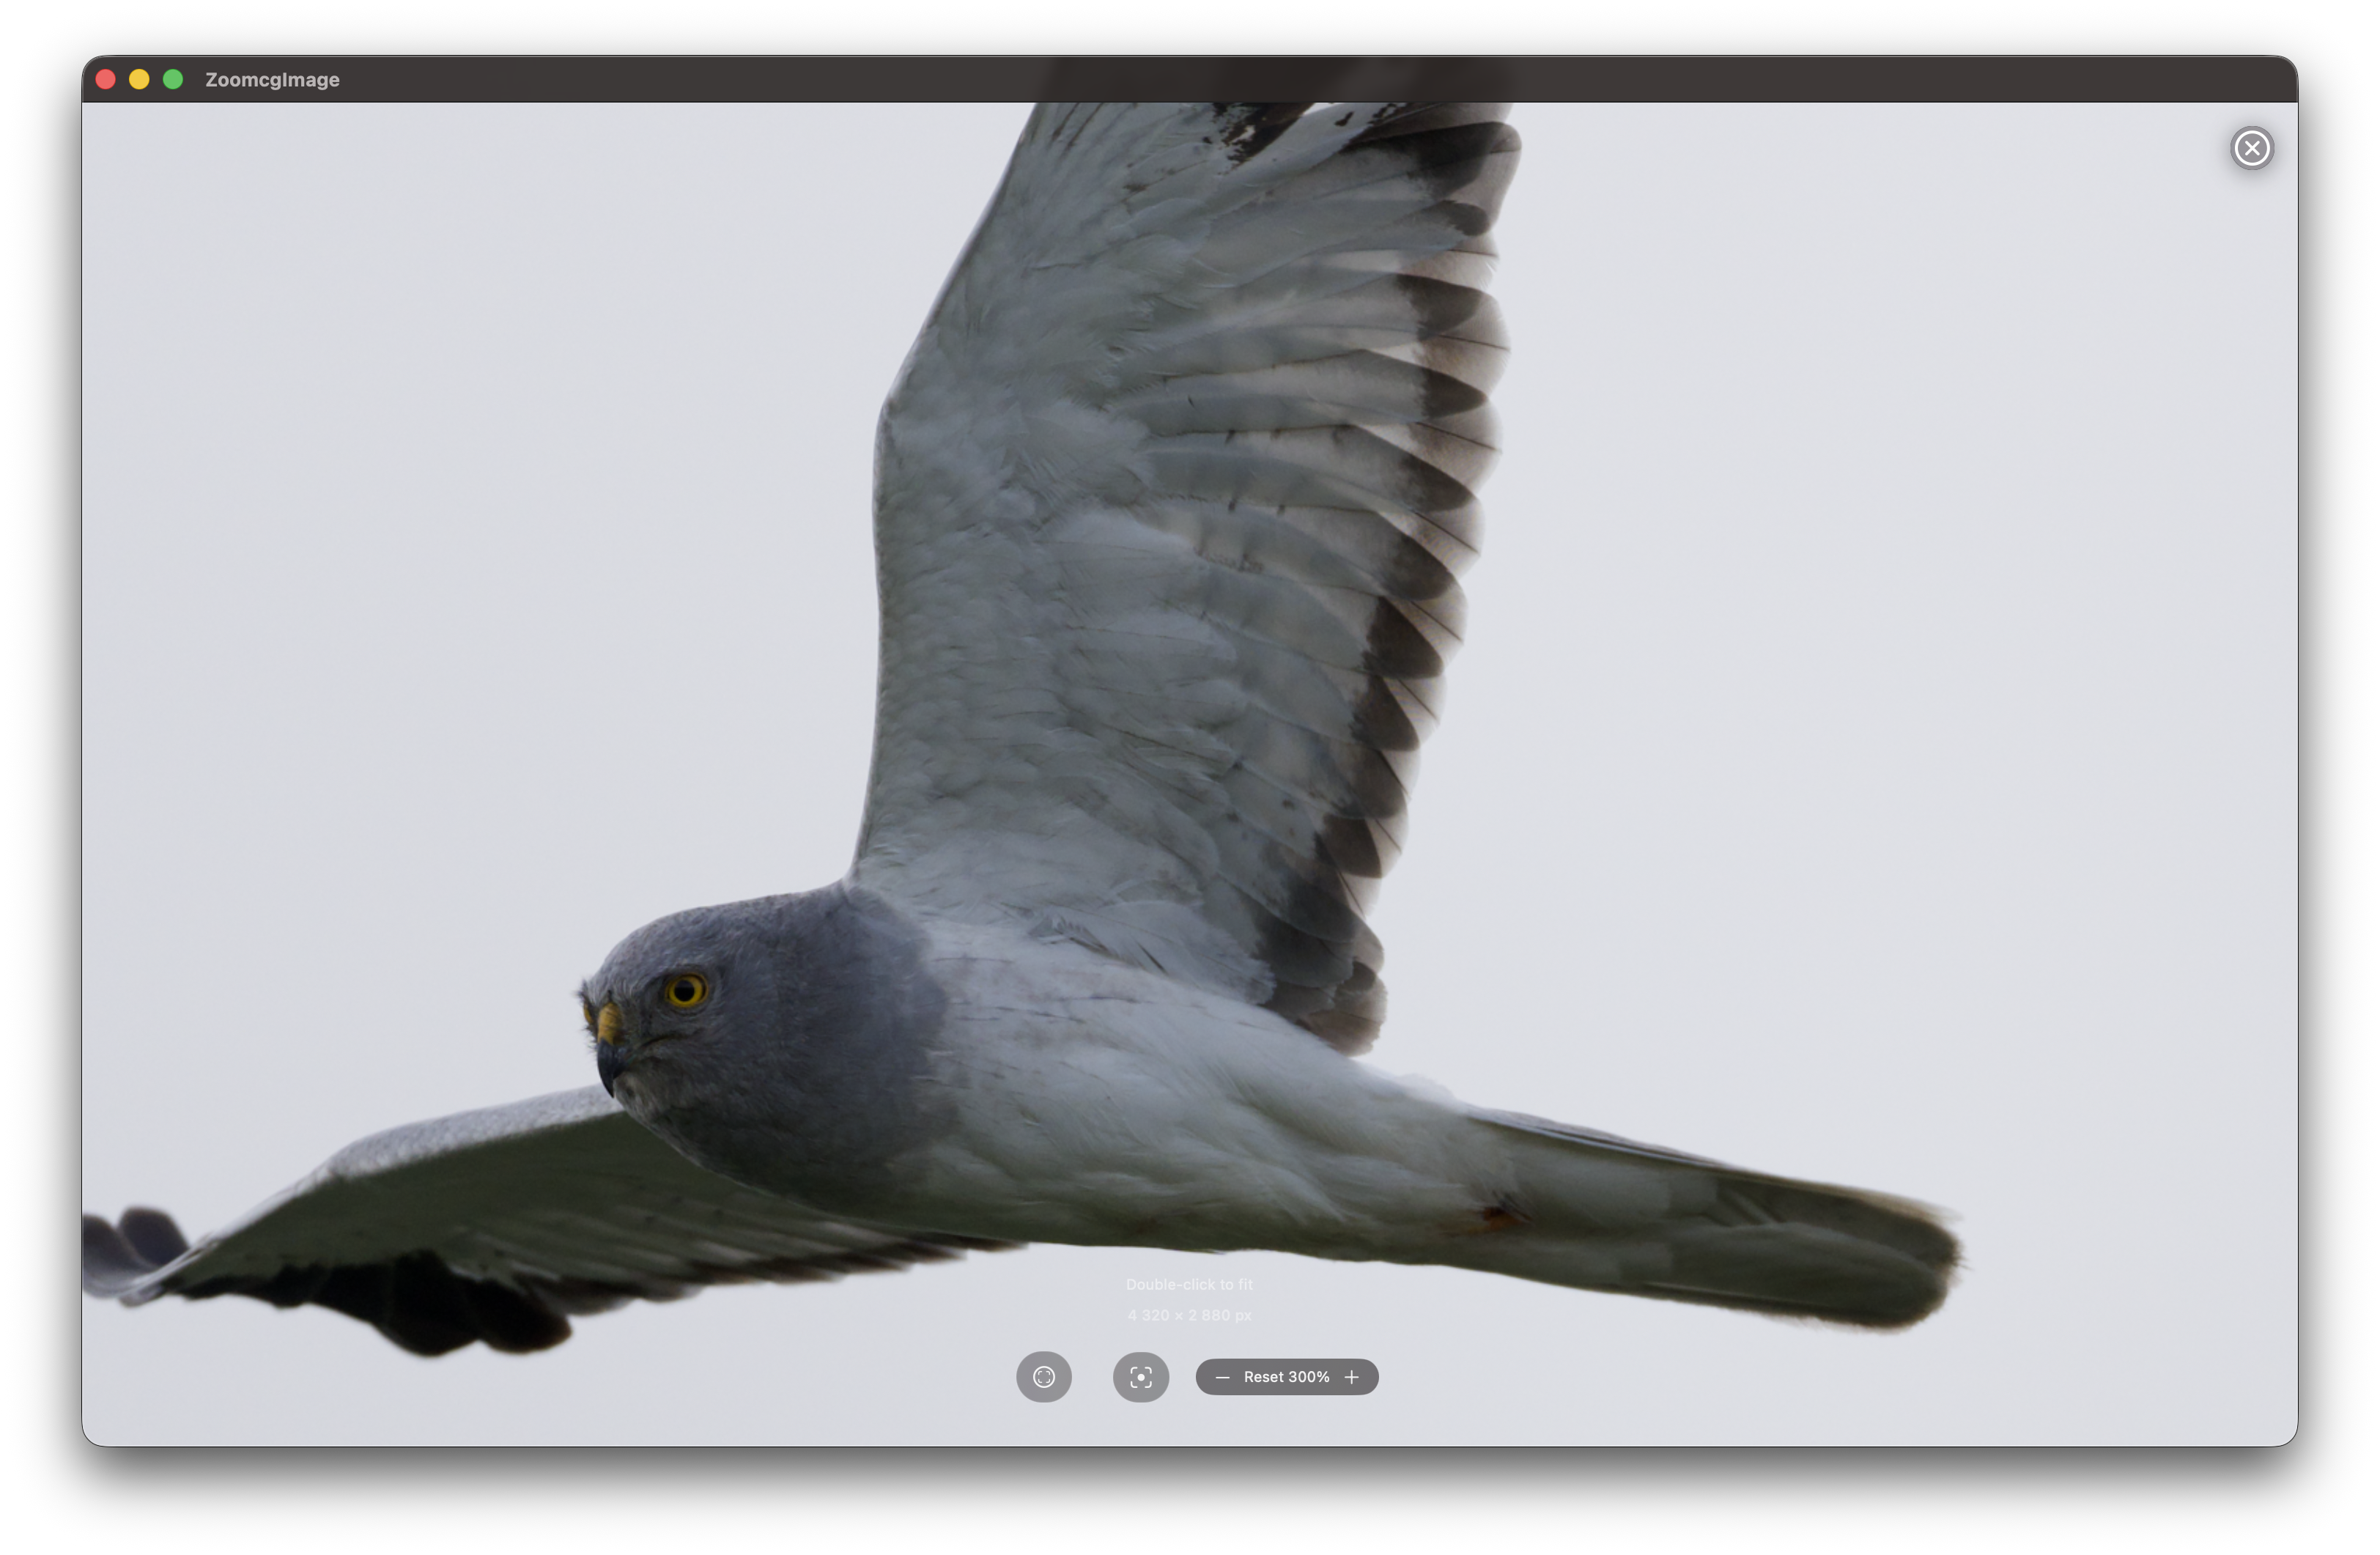
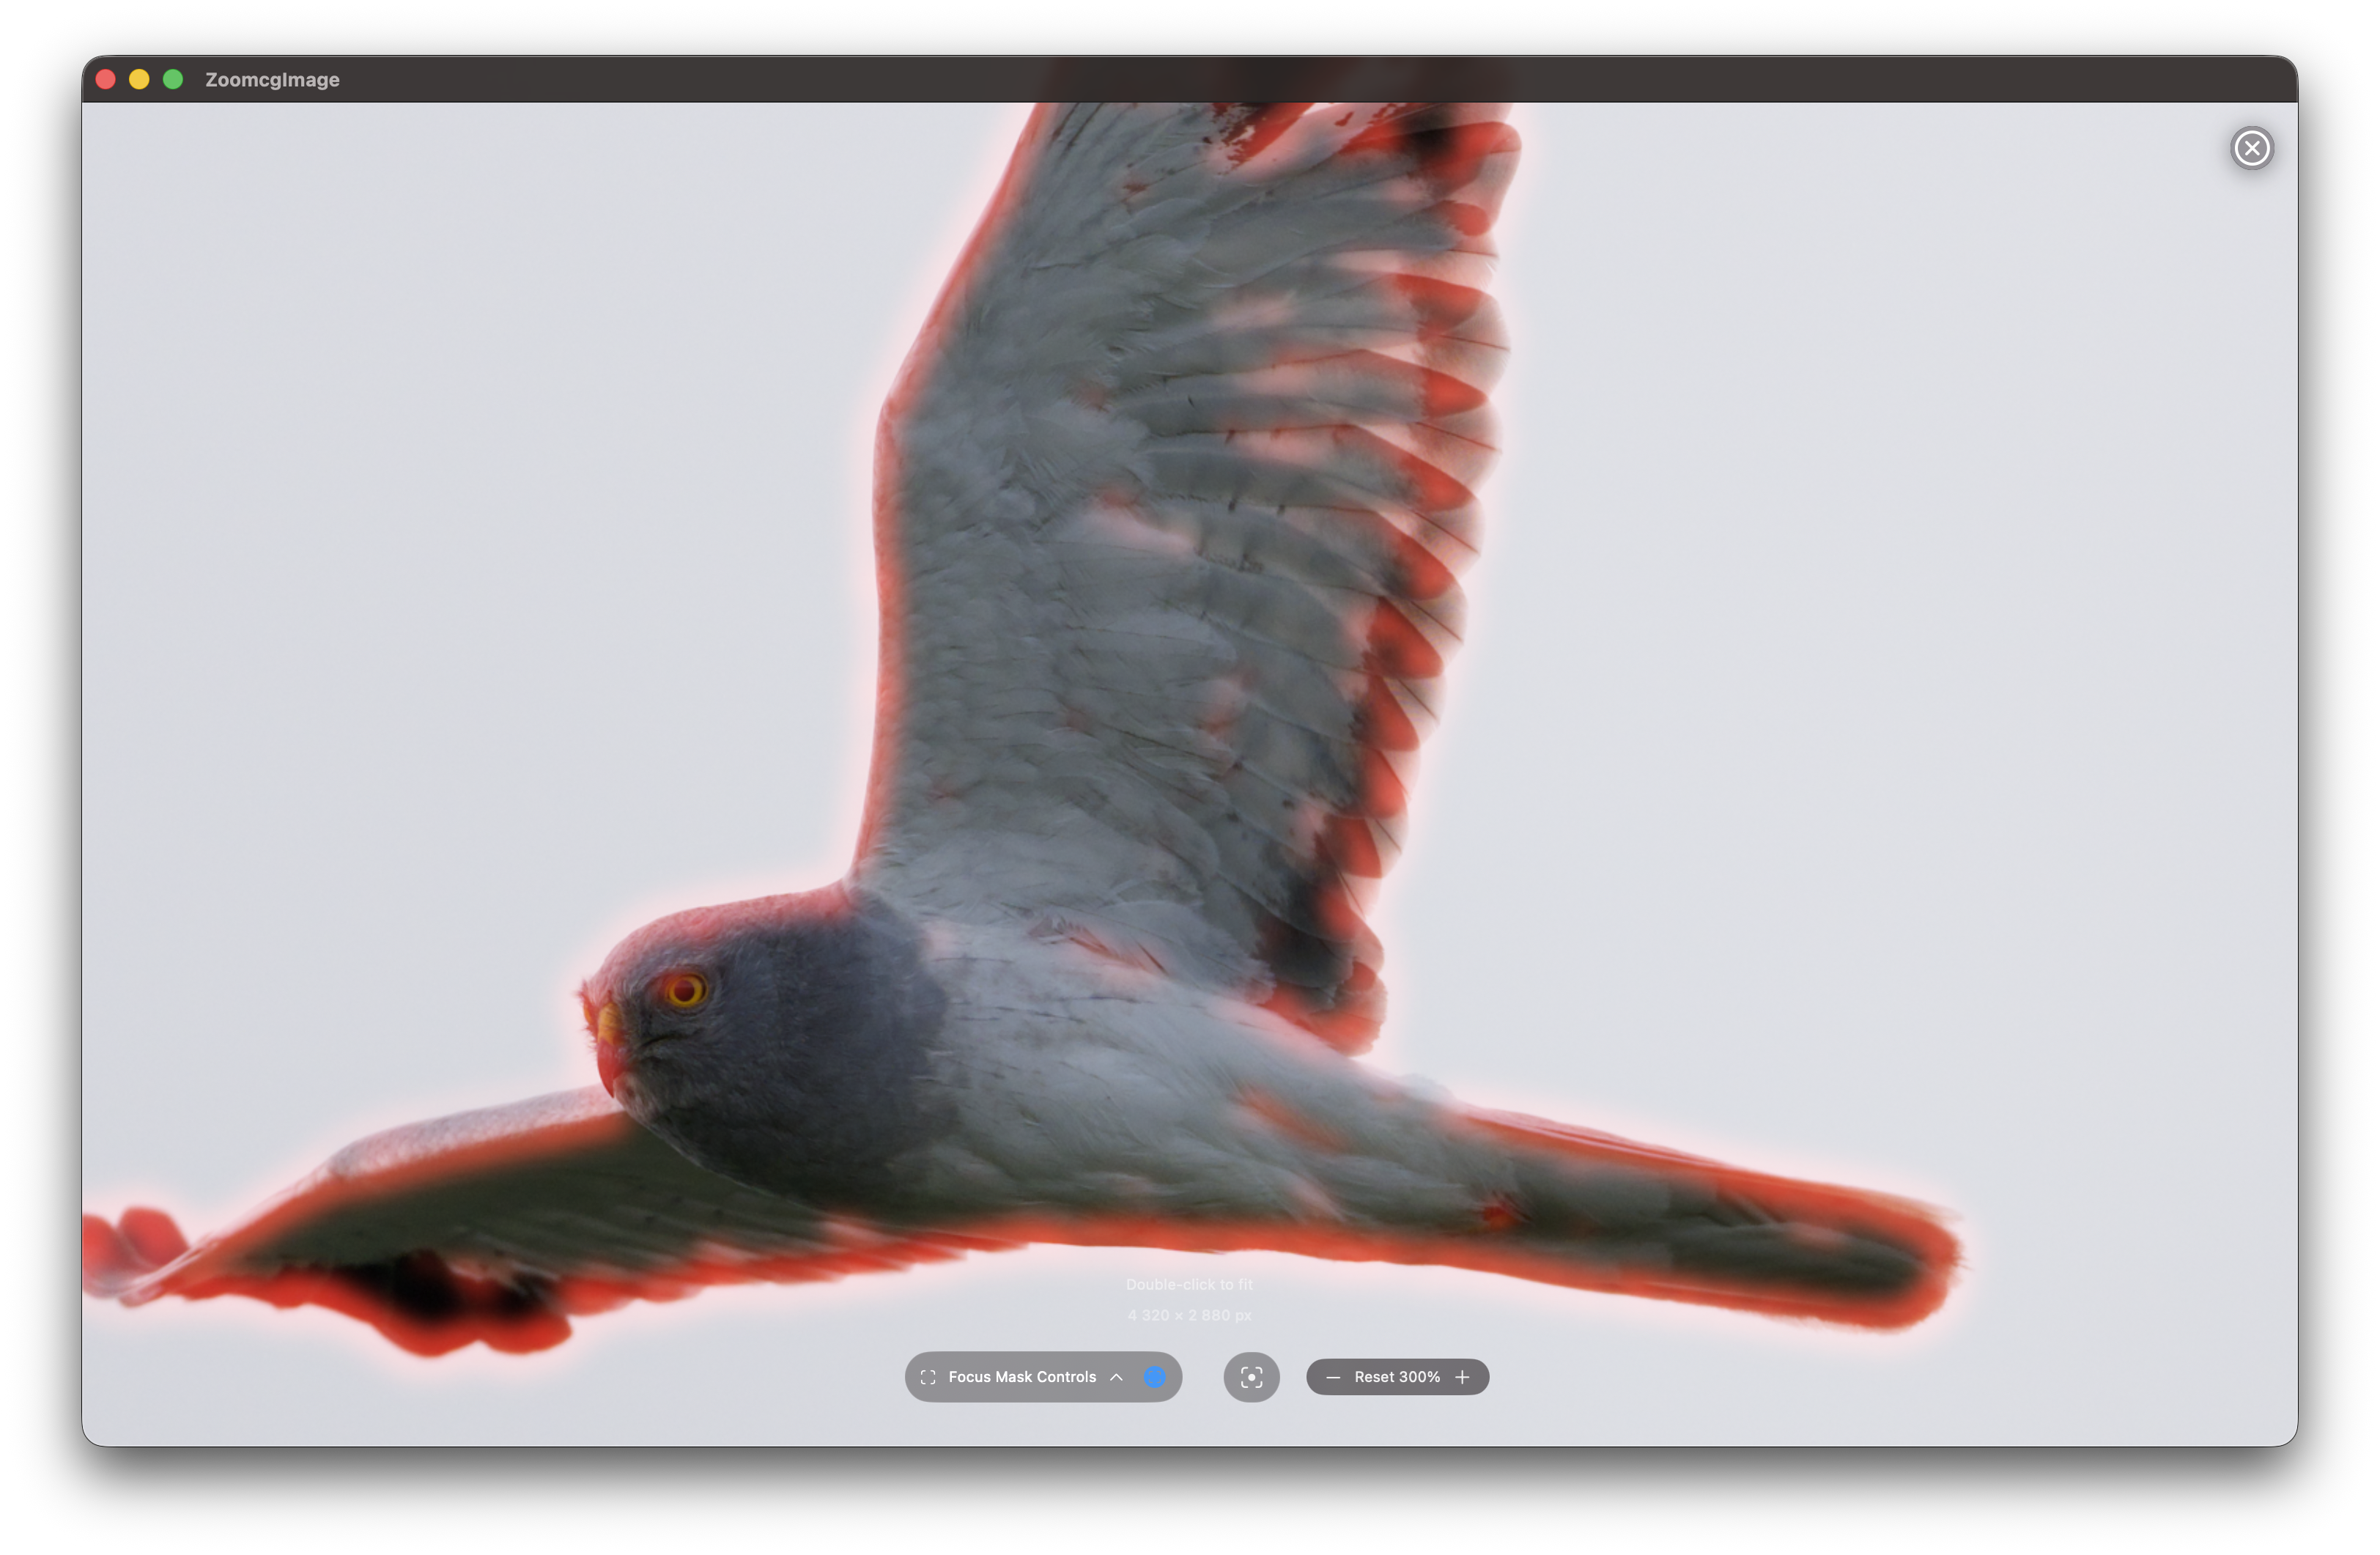
You may also zoom in on details by using the + and - buttons. The image is either a 1024 px or 2048 px thumbnail, and for optimal results, a double-click on the image will extract the JPG file from the ARW format. This is particularly useful for viewing and focusing on specific areas. See Zoom view.
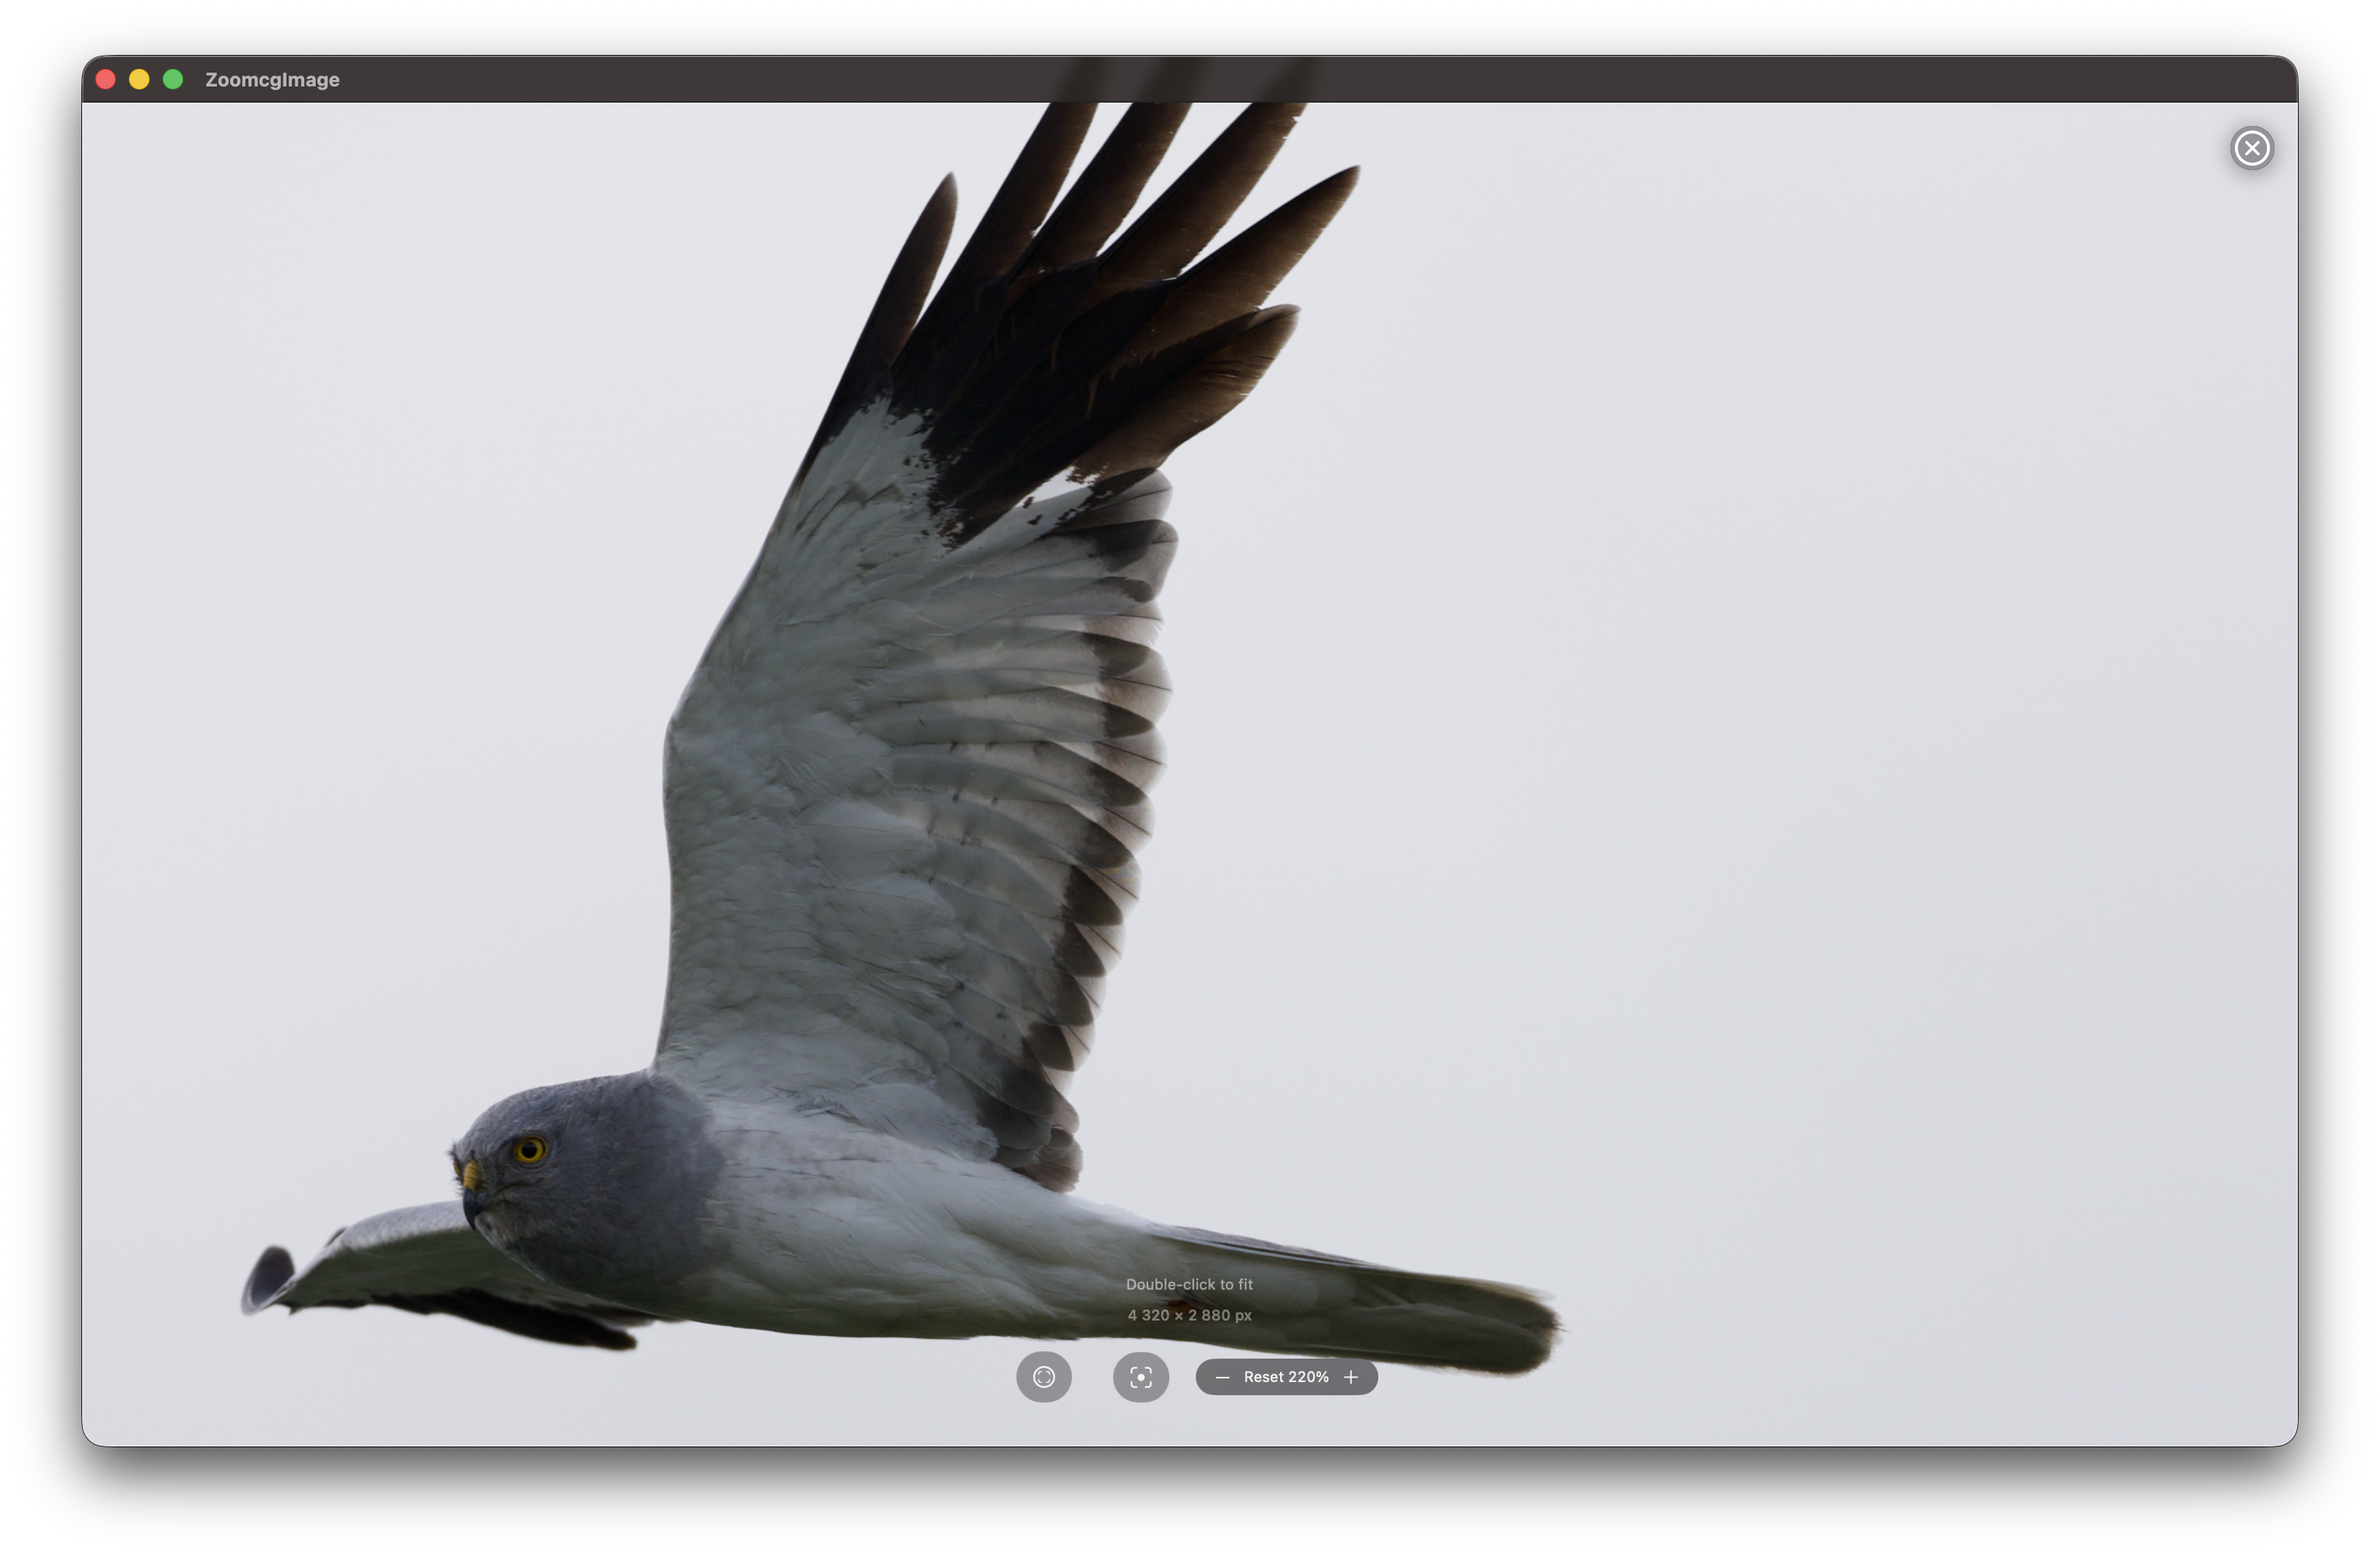
Zoom view
A double-click on an image zooms in, using either an extracted JPG or a generated thumbnail. See Settings for details. Utilize the plus (+) and minus (-) keys to zoom in or out on an image, whether it is a thumbnail or an extracted JPG file.
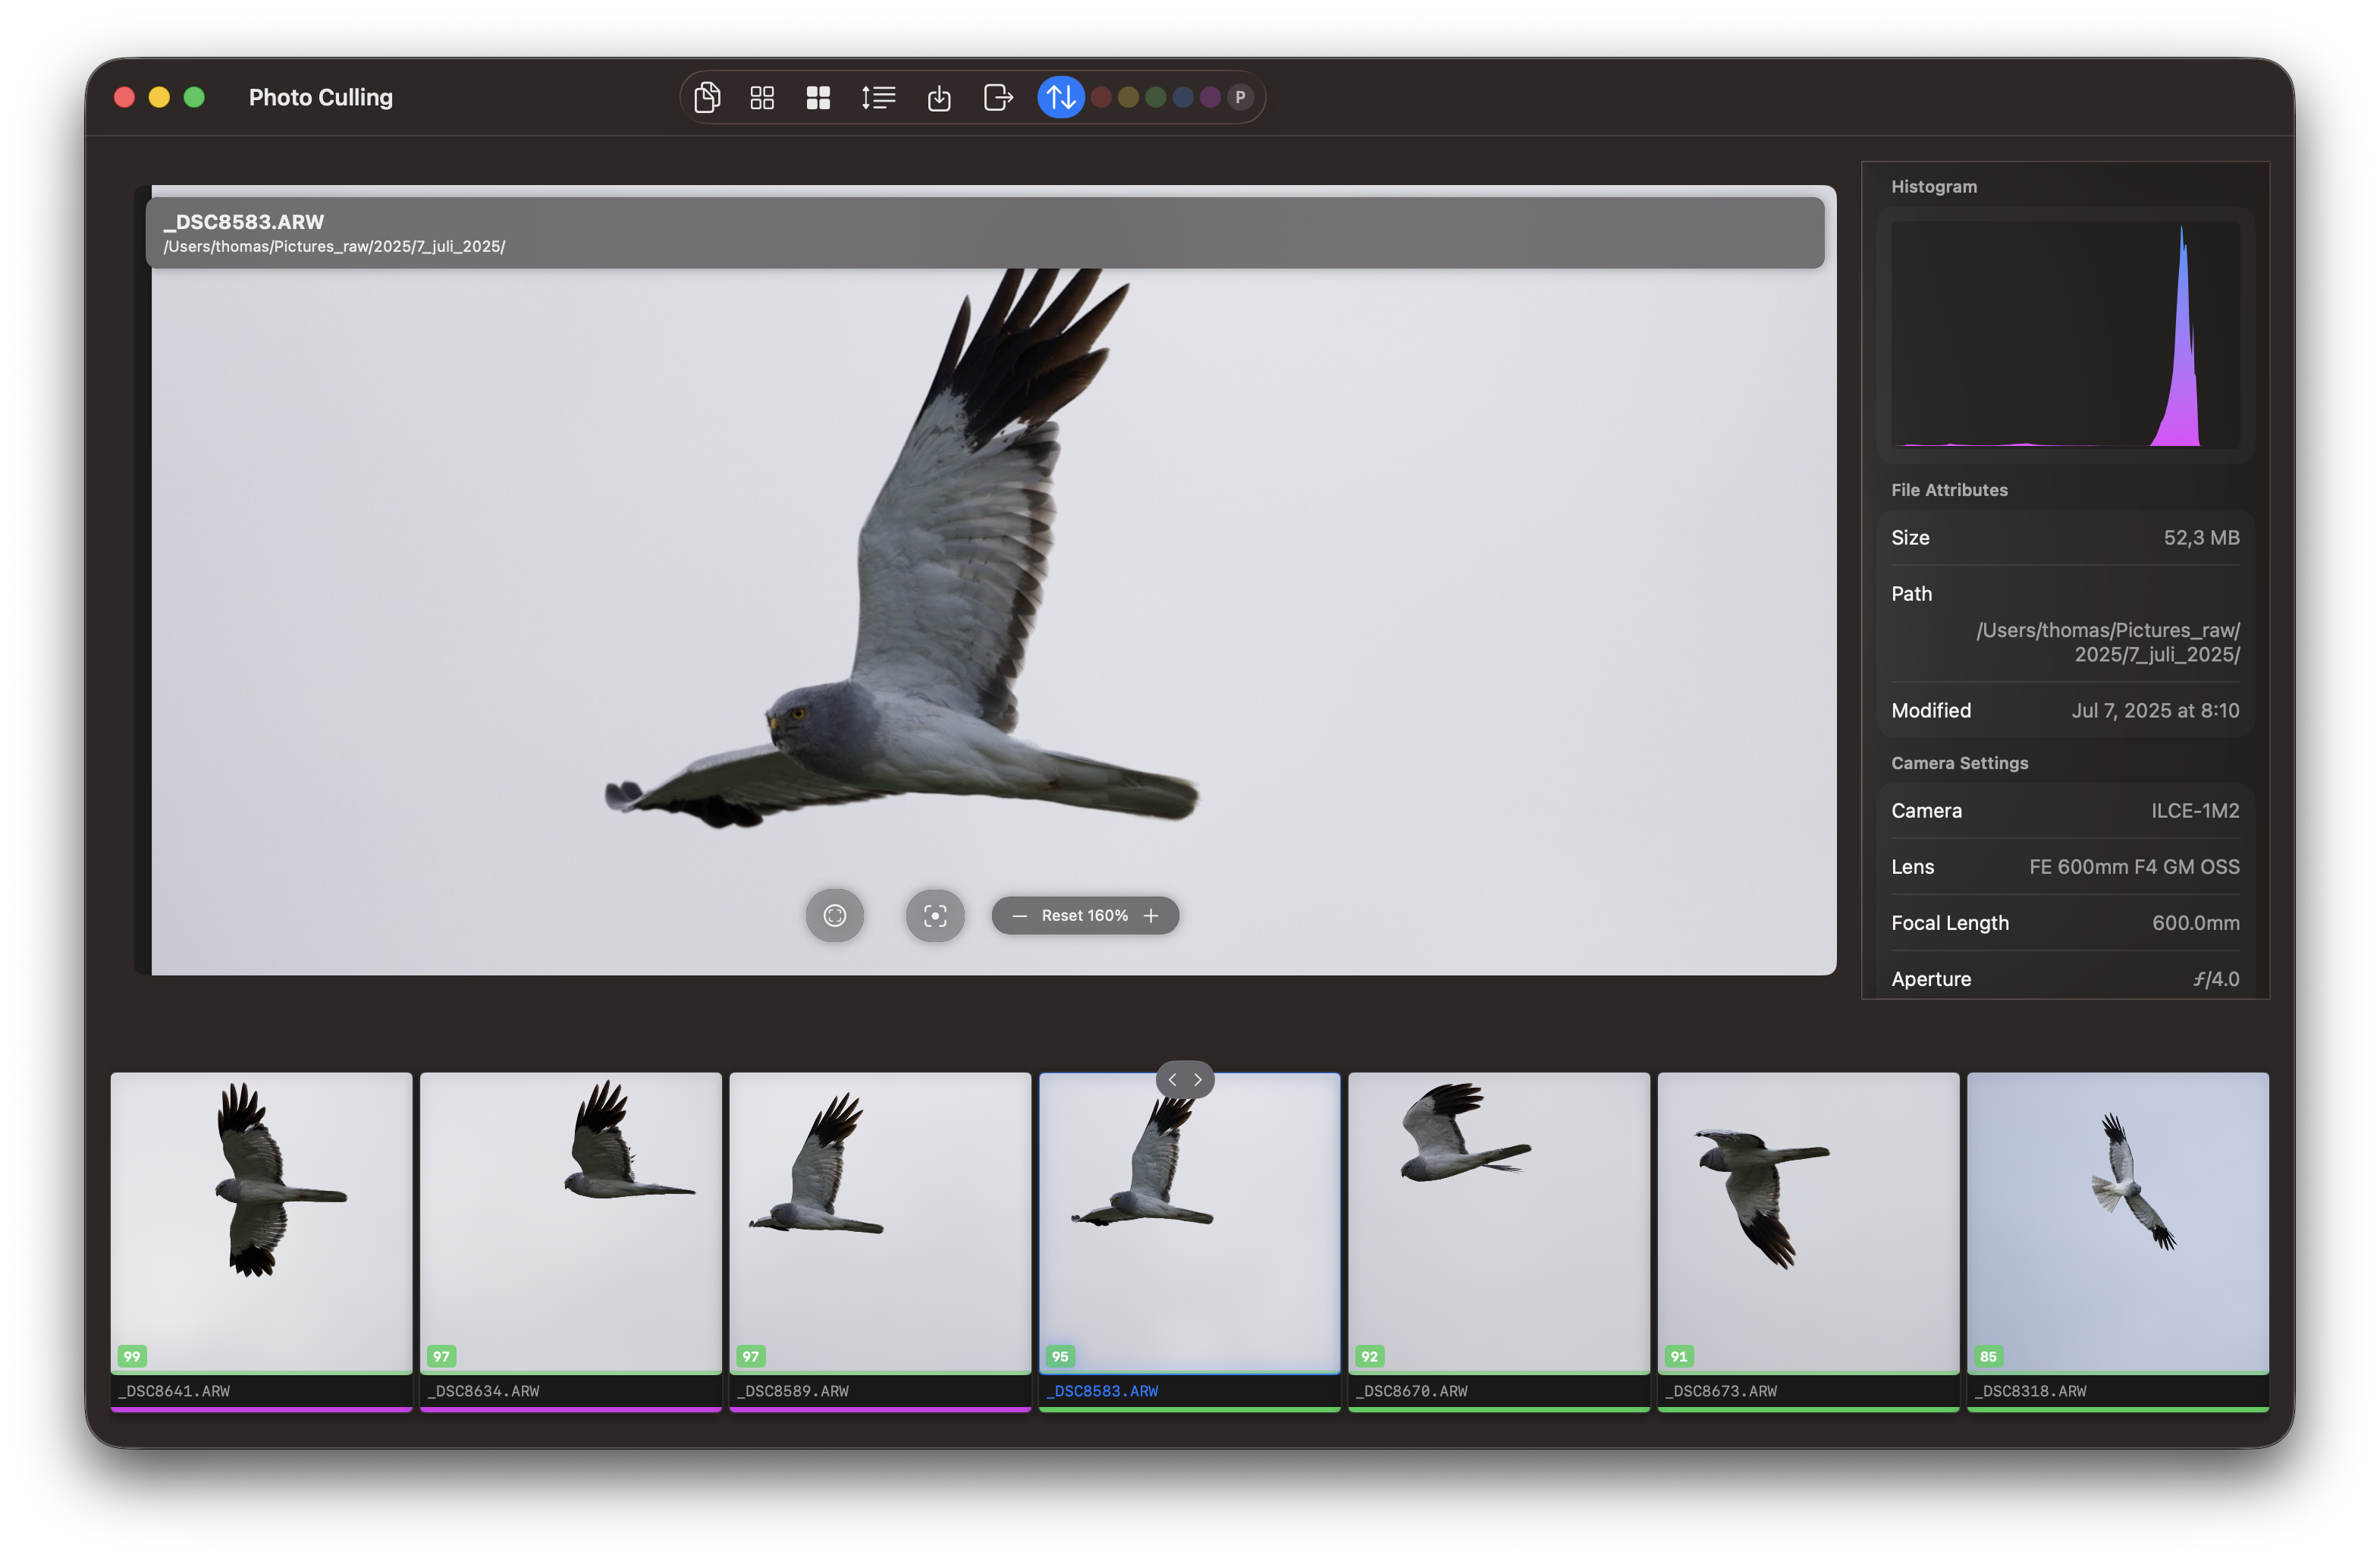
Culling by Grid View
A double-click on an image in grid view also opens a zoom view.
Shows all thumbnails in a grid view. Use the number keys 0–5, p, x, or t to rate images, and arrow keys to navigate. Thumbnails are colour-coded by their rating for quick visual triage.
The rating filter pills in the grid header let you narrow down which images are shown. Select any pill to display only images at that rating — for example, the P pill shows only your keepers, while the red pill shows only rejected images. Selecting P also includes all scored images.
Show only rejected images.
Shows only tagged images.
Step 3: Copy tagged images
Only photos with a rating of 2 or higher are copied to the final catalog. Keepers (rating 0), unrated (rating 0), and rejected (rating −1) images remain in the temporary catalog and are not copied to your editing workflow.
3 - Sharpness Scoring
Sharpness Scoring
RawCull can automatically rank every image in a catalog by sharpness, so the sharpest frames rise to the top and out-of-focus or motion-blurred shots sink to the bottom. This page explains what the score means, how to run it, and how to interpret the results.
Overview
When you click Sharpness, RawCull analyses each RAW file using a multi-step pipeline:
A small thumbnail is extracted directly from the ARW file — fast, no full RAW decode needed.
Apple Vision locates the main subject in the frame and, when classification is enabled, identifies what that subject is (bird, person, animal, etc.). A salient region is accepted when it covers more than 3 % of the frame or when Vision’s confidence is ≥ 0.9 — the high-confidence path means a small but clearly identifiable subject (a bird on a stick, a distant raptor) is never discarded for being too small.
A Gaussian pre-blur smooths the image to suppress high-ISO noise before edge detection. The radius adapts automatically: it scales proportionally with √(ISO/400) to compensate for noise at high ISO values, and with √(imageWidth/512) to maintain consistent spatial-frequency selectivity on larger images. Both factors are capped at 3×.
A Laplacian edge-detection kernel measures per-pixel sharpness energy across the entire frame. The outer 4 % of each border is excluded from the full-frame score to prevent Gaussian edge artifacts from inflating the result.
The edge response is amplified, then scored with a robust tail score — the mean of values above the 95th percentile, clipped at the 99.5th — so a single sharp feather edge cannot carry a blurry frame.
Two scores are computed separately: one for the full frame (minus the border strip) and one for the salient subject region. They are fused as 25 % full-frame + 75 % subject region. If no salient region is found, the full-frame score is used directly. A small proportional bonus is applied for subjects that fill more of the frame.
All scores are normalised against the p90 of the catalog: that anchor becomes 100, and every other frame is expressed as a percentage of it. Using p90 rather than the maximum prevents a single noise spike from collapsing the rest of the scale.
Because scores are relative to your catalog, a score of 60 does not mean the image is soft — it means it is 60 % as sharp as the sharpest typical frame in that session. Opening a catalog of sharper images will recalibrate the scale.
Running a Sharpness Score
The Score Sharpness button appears in the grid toolbar. The toolbar function for showing the grid view is:
show all thumbnails in a grid
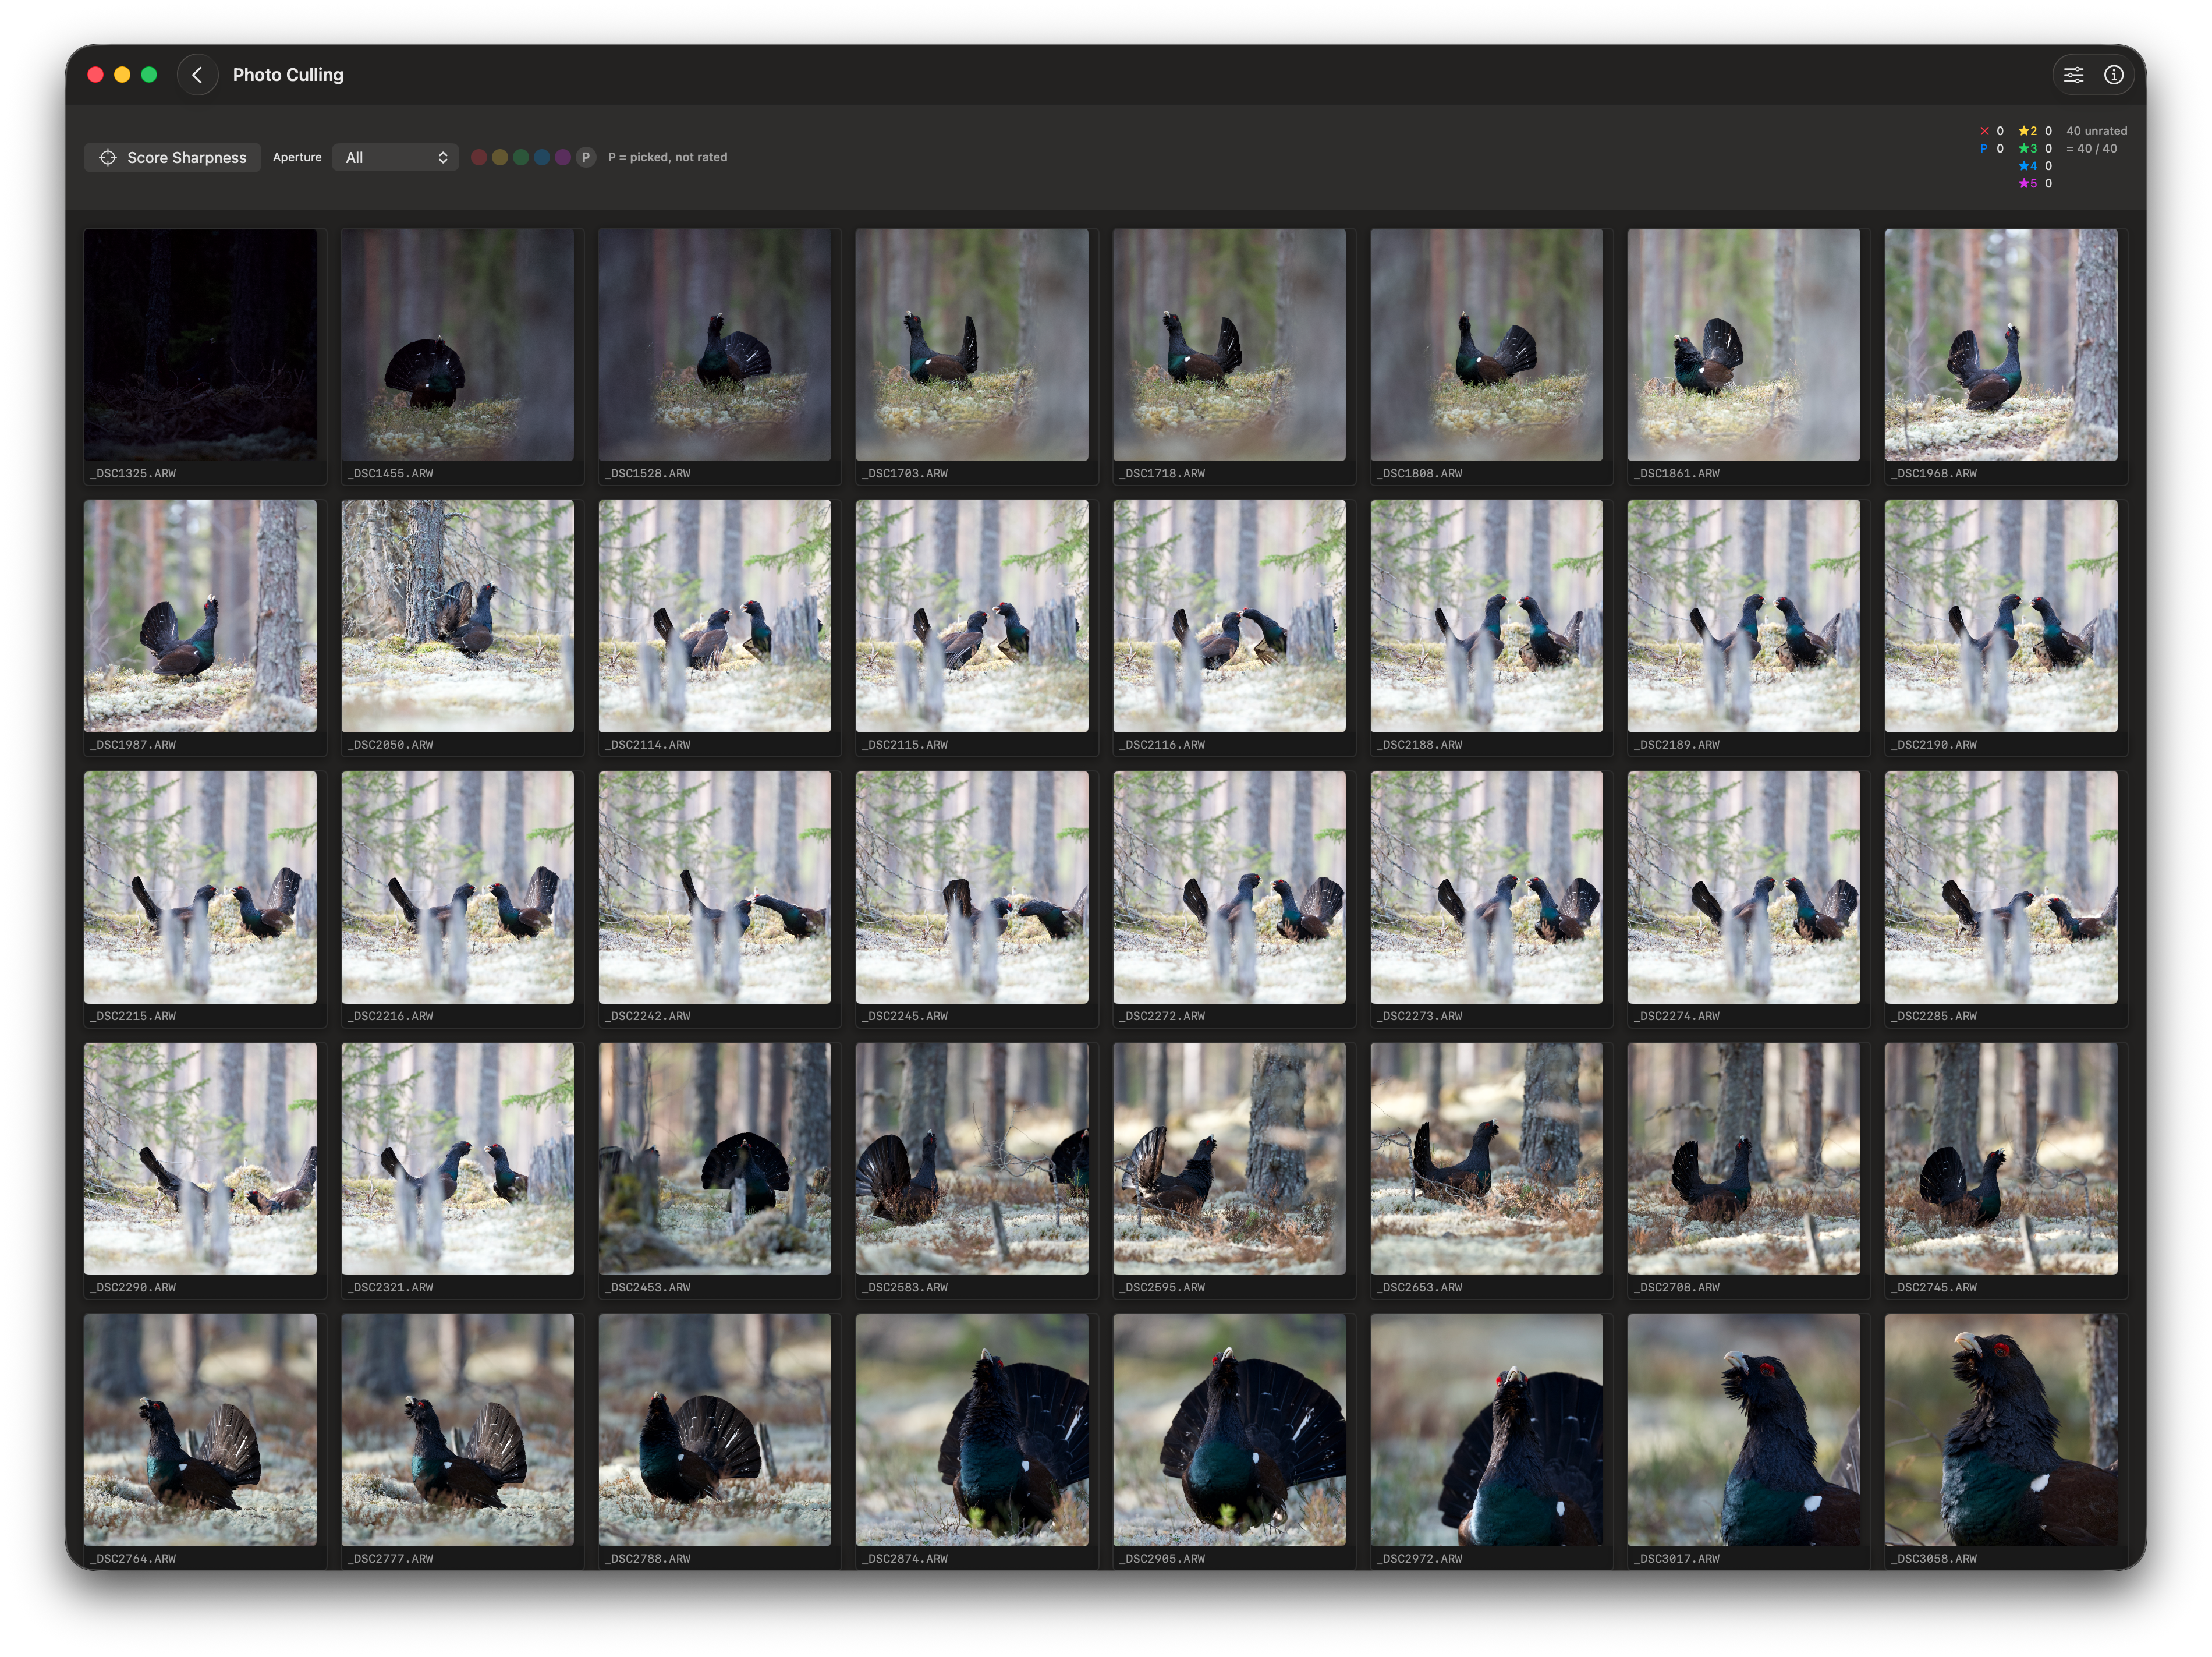
Open a catalog and wait for thumbnails to finish generating.
Click Score Sharpness (scope icon) in the toolbar above the grid.
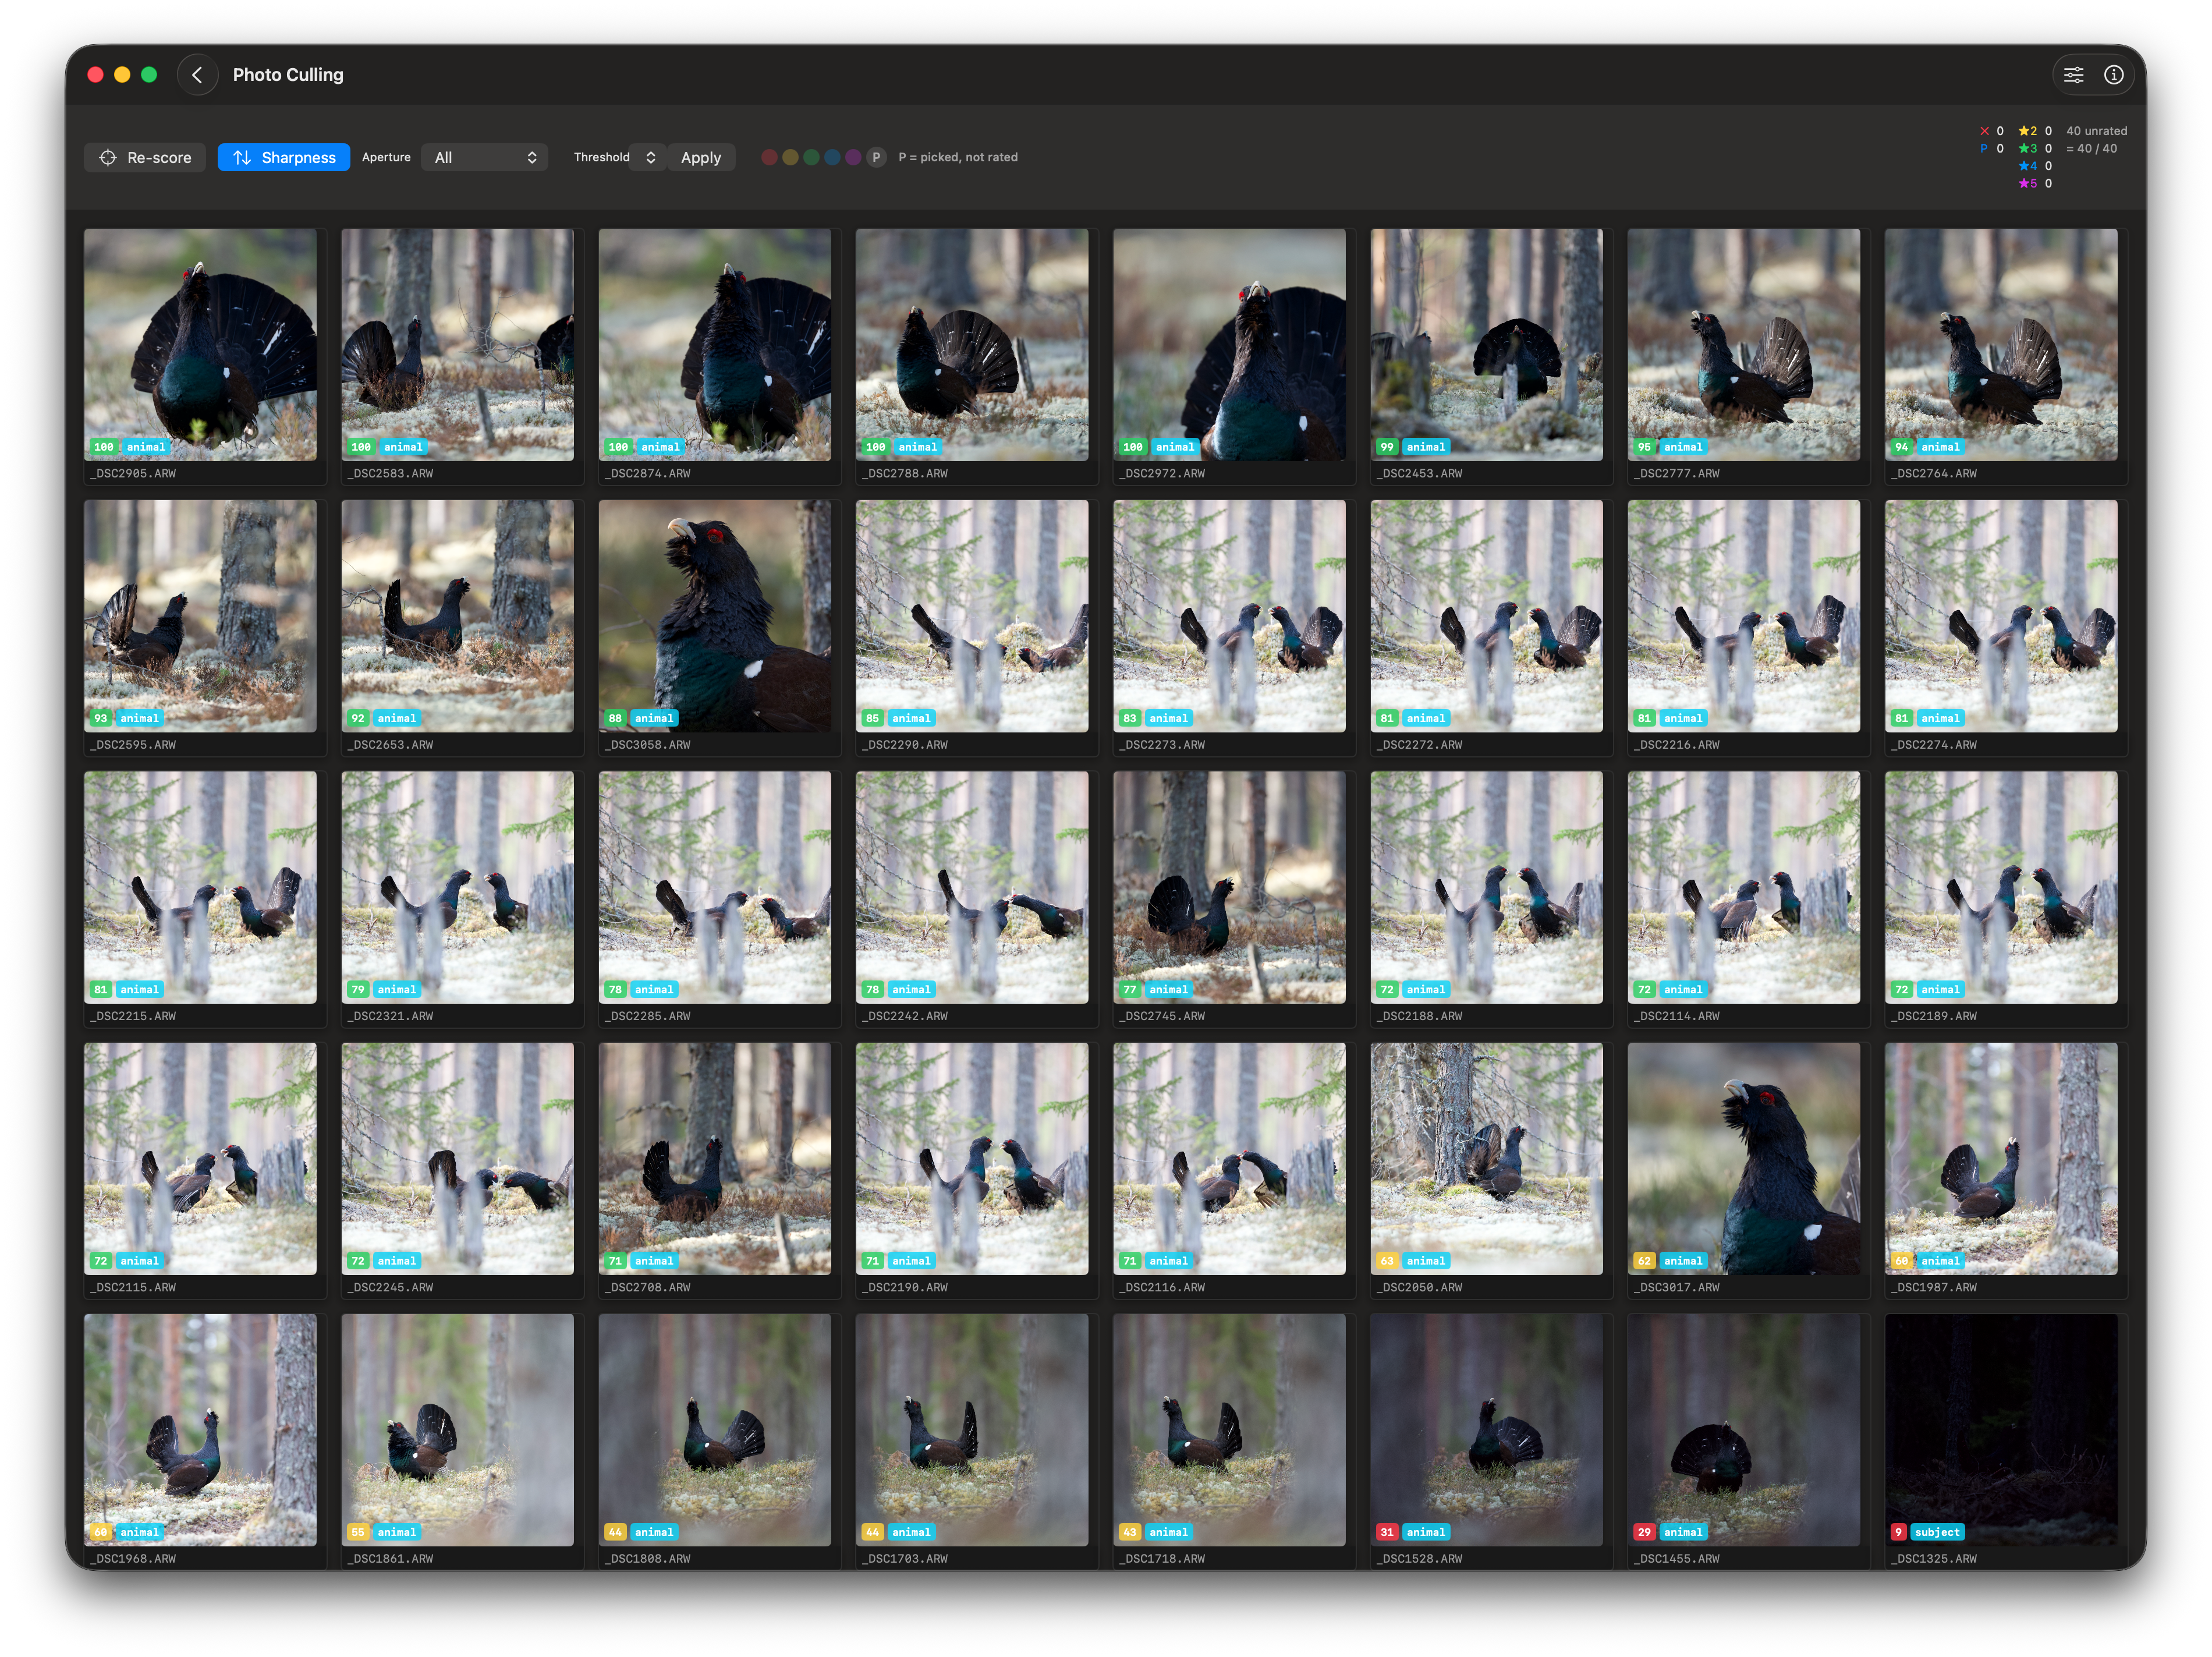
A Scoring… label replaces the button while analysis runs. Progress is bounded — at most six images are analysed concurrently to avoid saturating disk I/O.
When complete, a coloured score badge appears on every thumbnail and the grid re-sorts automatically with the sharpest frames first.
You can re-score at any time — for example, after adjusting the Focus Mask Controls or switching the aperture filter. Click Re-score (the button label changes once scores exist).
Reading the Score Badge
Score badges appear in the bottom-left corner of each thumbnail.
Each thumbnail shows a small badge in the bottom-left corner:
Colour
Normalised score
Meaning
Green
65 – 100
Sharp — well-focused, fine detail visible
Yellow
35 – 64
Acceptable — slightly soft or minor motion blur
Red
0 – 34
Soft — missed focus, camera shake, or significant motion blur
The number in the badge is the normalised score (0–100). The sharpest frame in the catalog always shows 100.
Sorting by Sharpness
The Sharpness sort toggle in the grid toolbar.
After scoring, the grid sorts sharpest-first automatically. You can toggle this off and back on with the Sharpness toggle button in the toolbar. Turning the toggle off returns the grid to its previous sort order (typically by filename).
The same toggle is also available in the sidebar toolbar for the vertical and horizontal list views.
Filtering by Aperture
The Aperture filter picker lets you focus on one shooting style at a time.
Wildlife and landscape sessions are often mixed in the same catalog but have very different sharpness expectations. The Aperture picker lets you restrict scoring and sorting to one shooting style:
Changing the aperture filter immediately re-filters the grid. If scores exist, the sharpness sort is re-applied within the filtered set.
Auto-Calibration from Burst
Instead of hand-tuning the Focus Mask Controls for each session, you can let RawCull calibrate Threshold and Laplacian strength automatically from the images in the current catalog. Calibration runs automatically when you click Score Sharpness.
Only these two values are written back by calibration — Pre-blur, Erosion radius, and Dilation radius are not touched and keep whatever values they had before.
How it works:
Each image is decoded to a fast thumbnail and scored with the Laplacian amplifier disabled (gain = 1), so the result reflects the raw optical sharpness of that session without any prior tuning bias.
Apple Vision locates the salient subject in each frame and collects scores from that region.
Percentiles (p50, p90, p95, p99) are computed across all scoreable images in the catalog.
Laplacian strength is set so that the catalog’s p95 score maps to 0.50 after amplification — placing the sharpest typical frames in the middle of the usable signal range with headroom on both sides.
Threshold is set to the 90th-percentile raw score multiplied by the tuned gain, placing the mask cutoff just above typical background noise for this session.
The calibrated values are applied immediately to the Focus Mask Controls sliders and remain active for the current catalog. Calibration requires at least 5 scoreable images; if fewer are available the existing config is left unchanged. You can still adjust any slider manually after calibration to fine-tune further.
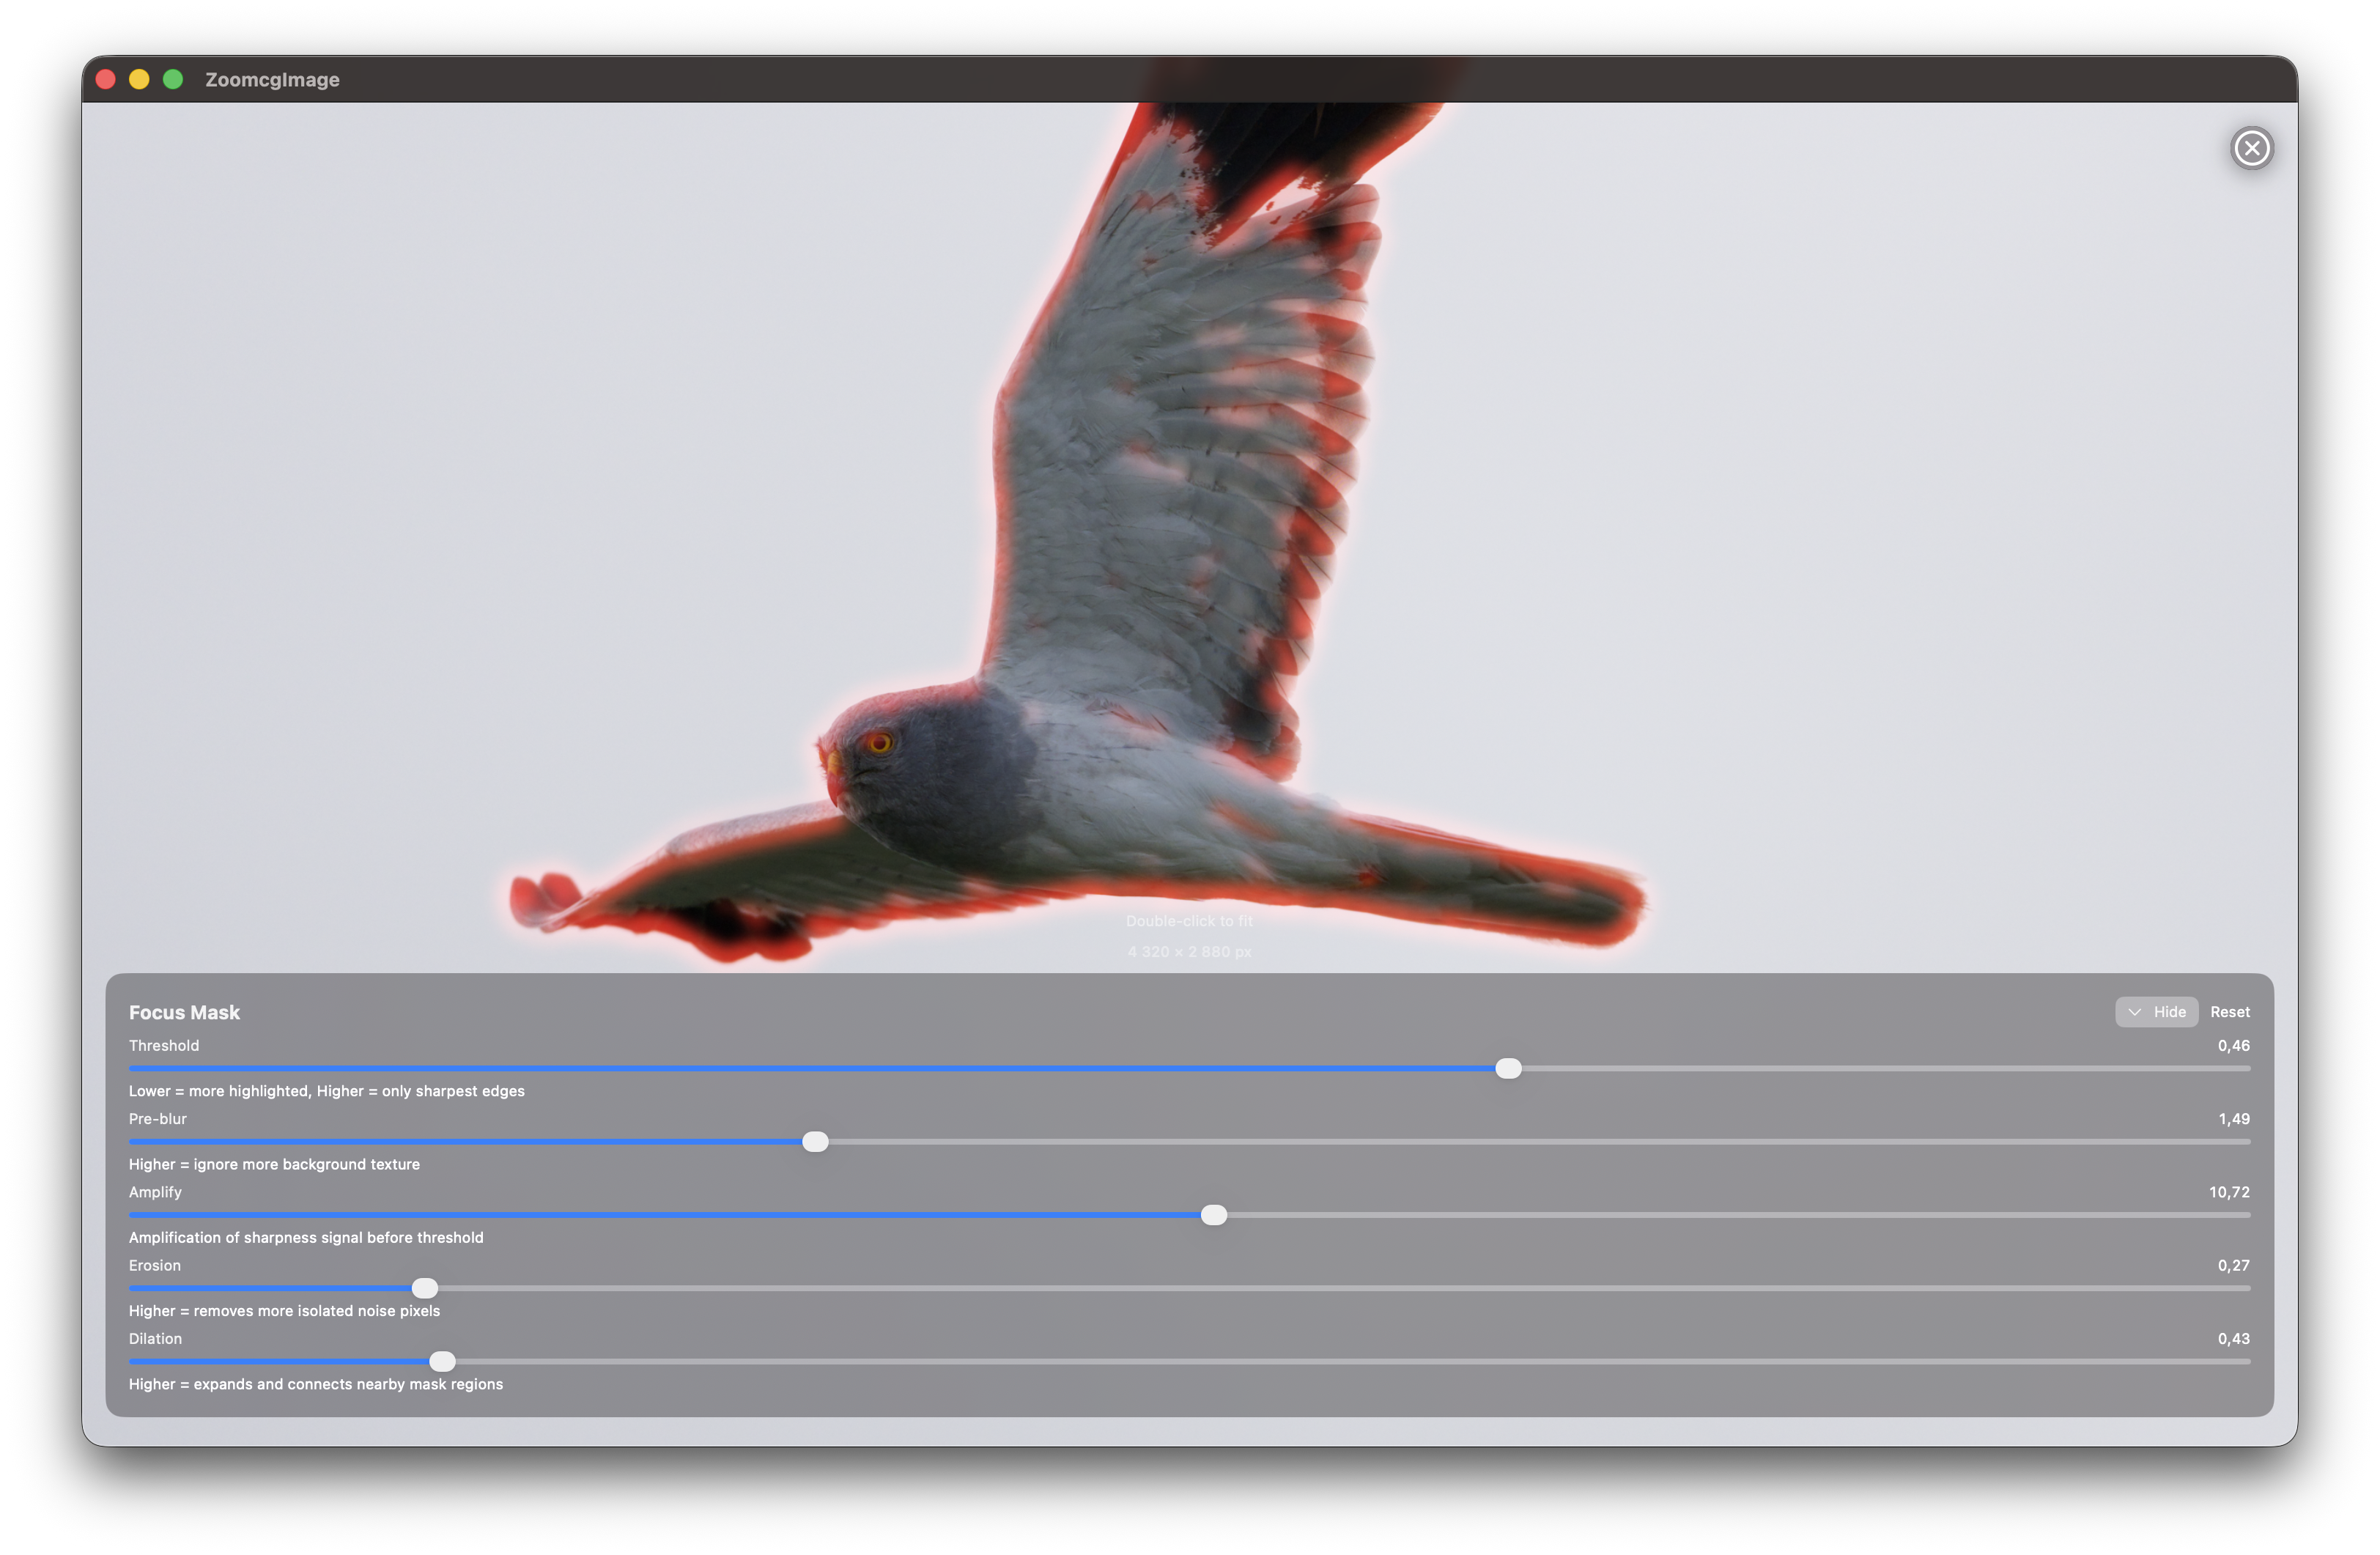
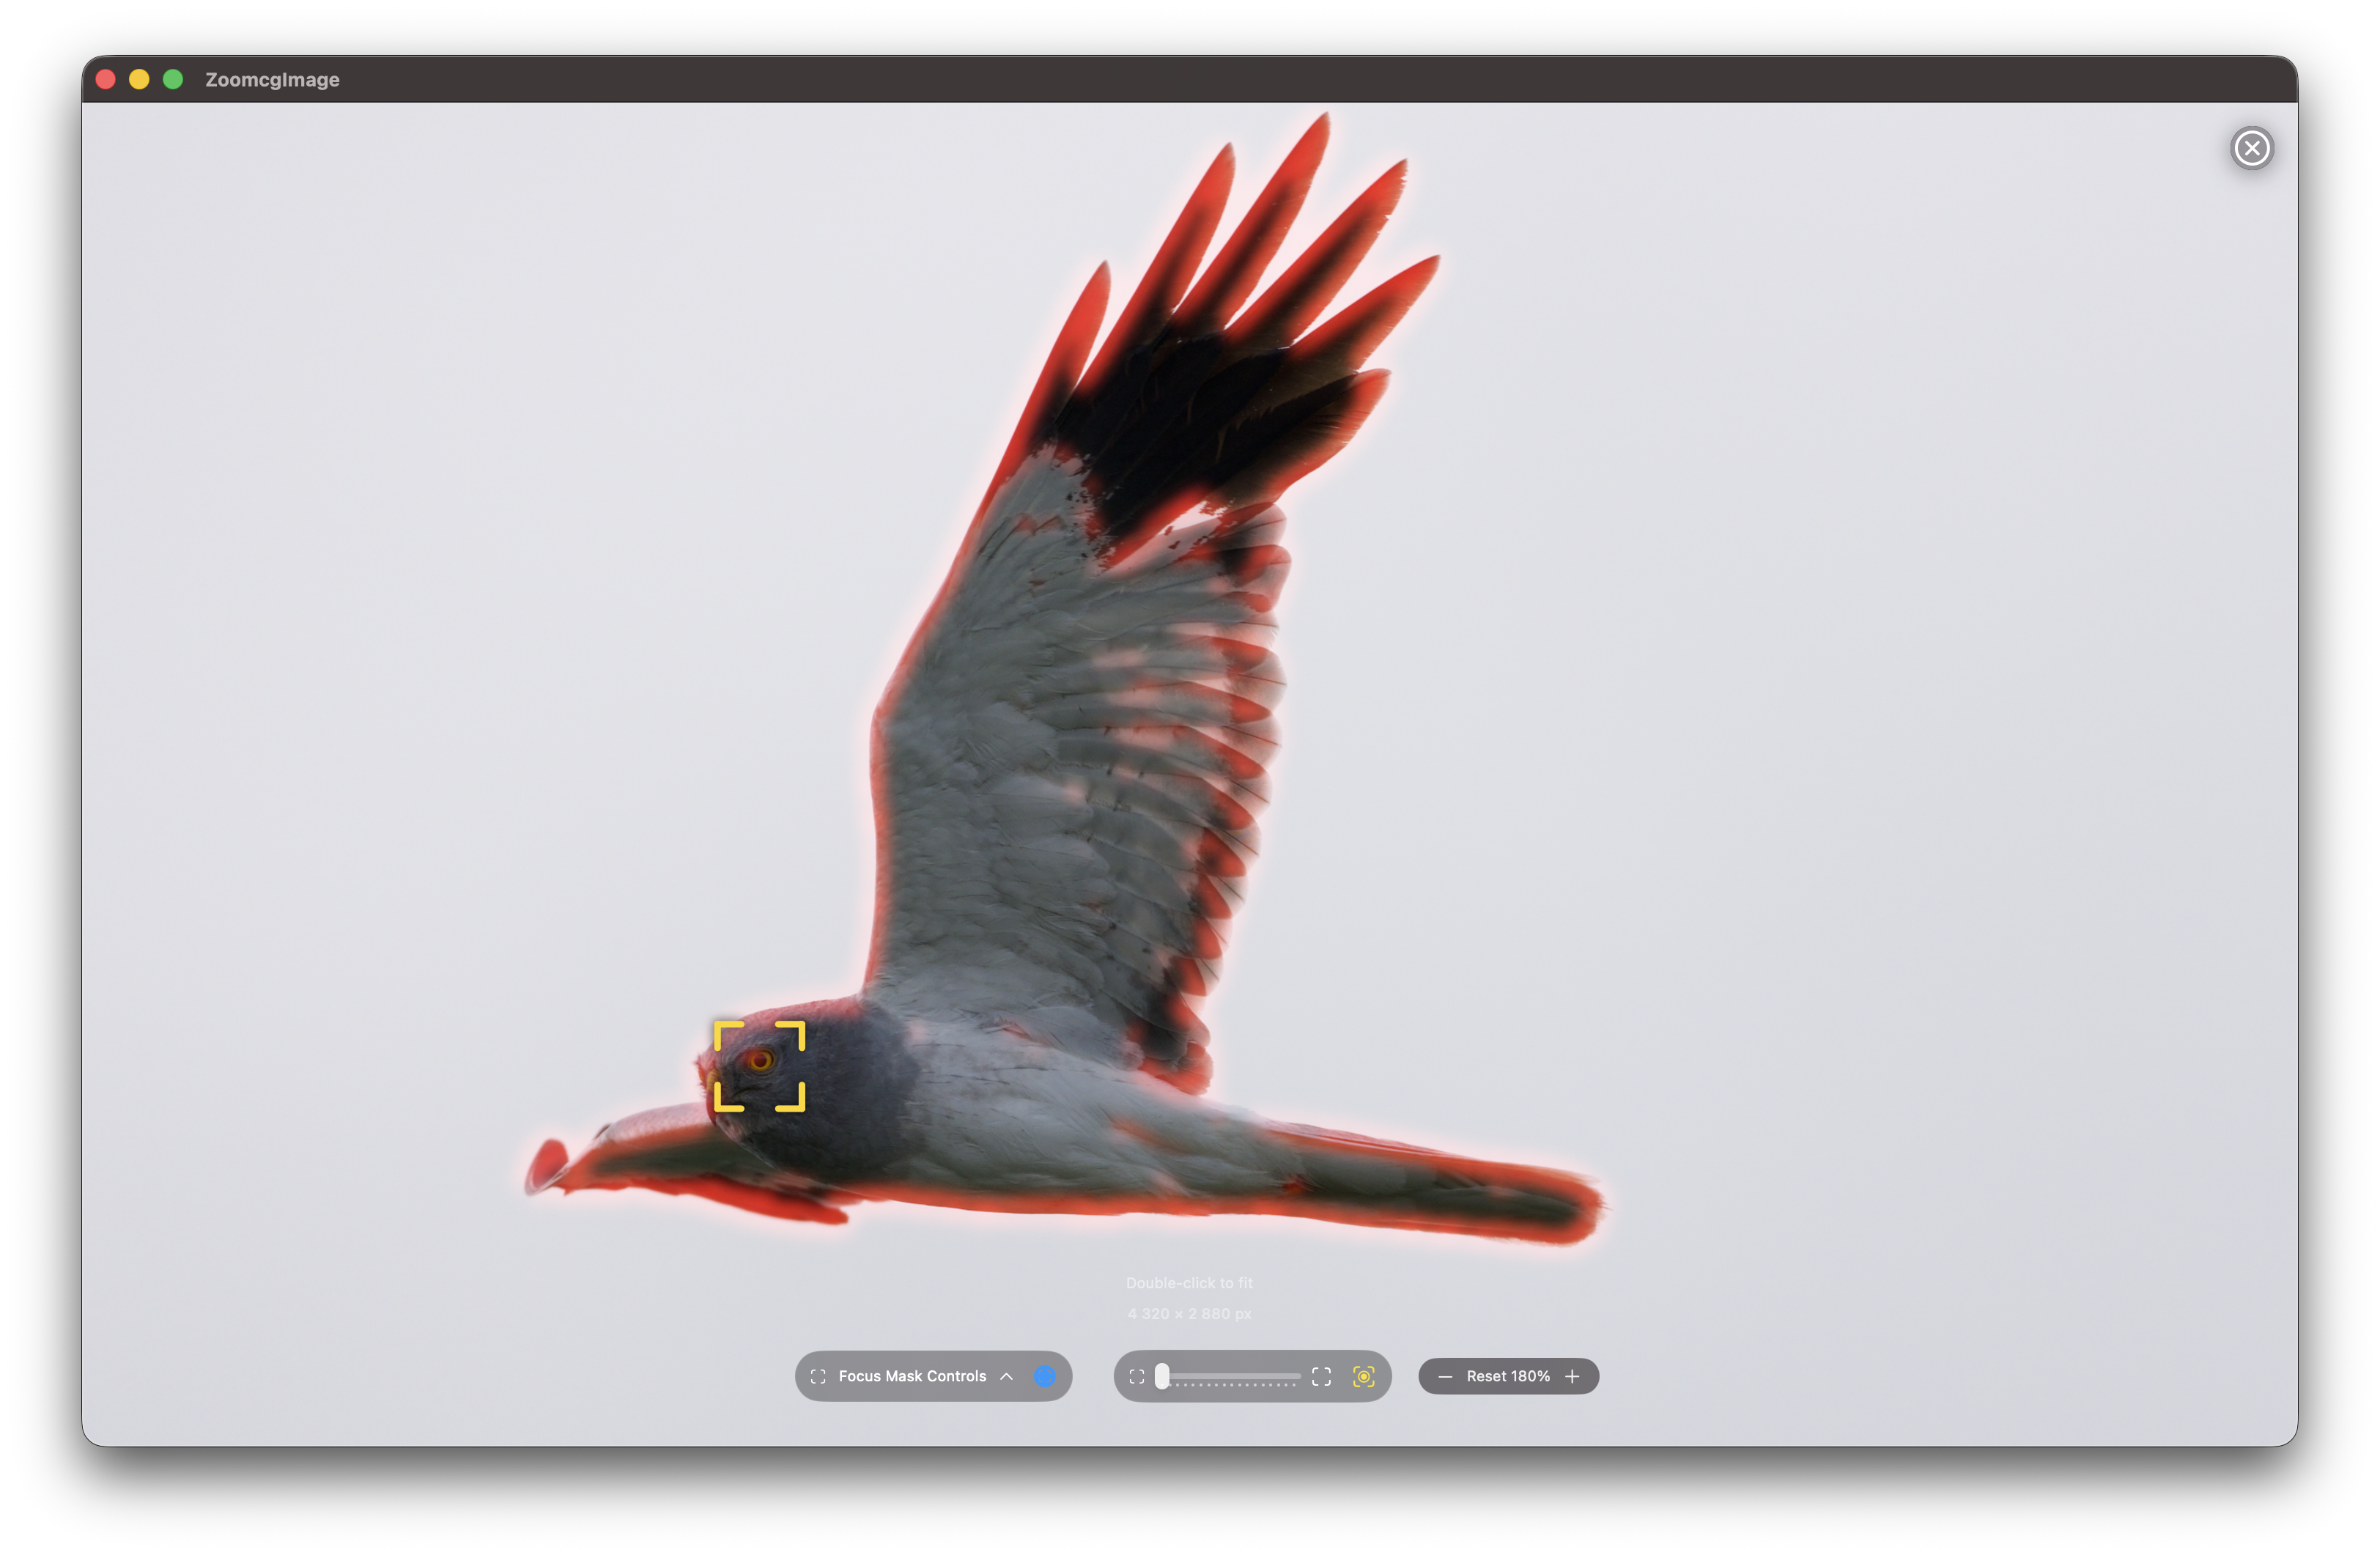
The Focus Mask Overlay
Focus Mask on a sharp frame: a tight red glow concentrated on feather edges.
Focus Mask on a soft frame: faint, diffuse glow with no sharp edge lines.
The Focus Mask overlay (toggle in the zoom window controls) renders the same Laplacian edge-detection output that the scorer uses, painted in red over the image. It is a direct visual representation of the score:
Tight, bright red lines on subject edges → high edge energy → high score.
Faint, blurred glow → low edge energy → low score.
Nothing visible on the background → subject isolation is working correctly.
The Focus Mask Controls panel (expand with the chevron next to the toggle) exposes the detection parameters.
Focus Mask Controls
Control
Effect
Pre-blur radius
Base Gaussian smoothing radius applied before edge detection. The effective radius is scaled automatically with ISO and image resolution — this sets the baseline. Increase for very noisy files or when false edges appear on smooth backgrounds.
Threshold
Minimum edge strength included in the mask — higher values show only the sharpest edges
Erosion radius
Morphological erosion applied before dilation — removes isolated speckle noise from the mask. Quantised to the nearest whole pixel.
Dilation radius
Morphological dilation — expands edge regions to fill small gaps and connect nearby edges. Quantised to the nearest whole pixel.
Laplacian strength
Amplification of the raw edge response — increase to separate sharp and soft frames more aggressively
Feather radius
Gaussian softening applied to the final mask edge — visual only, does not affect the score
Border inset
Fraction of the image dimension excluded from each edge when computing the full-frame score (default 4 %). Prevents Gaussian pre-blur edge artifacts from inflating the score on wide or open scenes.
Salient weight
How much the subject-region score drives the final result versus the full-frame score (default 75 %). Set to 0 for full-frame only; set to 1 for subject region only.
Subject size factor
Proportional bonus applied to the score based on how much of the frame the subject fills (default 0.1). Kept very low so a large-but-blurry subject cannot outscore a small-but-sharp one.
Subject classification
When enabled, runs an additional Apple Vision pass to identify the subject category (bird, person, animal, etc.) and display it as a badge on each thumbnail. Disable for faster re-scores when the label is not needed.
Show raw Laplacian
Displays the unthresholded Laplacian output — useful for diagnosing tuning or calibration issues
Any change to these controls is picked up by the next scoring run, so you can tune the sensitivity for a particular focal length or subject type and then re-score.
Understanding Low Scores
A low score (red badge) typically means one of the following:
Motion blur — the shutter speed was too slow to freeze the subject. Common with fast-moving birds at the end of a burst. The Focus Mask will show a diffuse halo rather than sharp feather lines.
Missed or soft focus — the autofocus tracked the background, a wing tip, or the wrong subject in a multi-bird frame. The Focus Mask will show strong edges somewhere other than the subject centre.
Small or distant subject — the scorer accepts a salient region when it covers more than 3 % of the frame or when Vision’s confidence is ≥ 0.9, so clearly identifiable small subjects are still scored against their own region. If Vision cannot detect any salient region the scorer falls back to the full frame, which dilutes the score with background. If scores feel unexpectedly low for distant subjects, consider re-scoring with the salient weight reduced toward the full-frame end.
High ISO noise — extreme noise can temporarily boost the score by adding false edges. Increasing the blur radius in Focus Mask Controls before re-scoring reduces this effect.
Tips
Score after culling for exposure — sharpness scoring works independently of exposure. Culling badly exposed frames first keeps the catalog clean and makes the normalised scale more meaningful.
Re-score with the aperture filter active — if you only want to compare your telephoto wildlife shots, set the filter to Wide first, then score. The 100 baseline will be the sharpest frame within that aperture range.
Use the Focus Mask to validate scores — before discarding a yellow or red frame, open the zoom window and enable the Focus Mask. Sometimes a compositionally strong frame has a lower score only because the subject was slightly smaller and the scoring area included soft background. Trust your eye on borderline cases.
Scores reset when you open a new catalog — each catalog has its own relative scale. A score of 80 in one session says nothing about a score of 80 in a different session.
4 - Focus Peaking
Focus Peaking: The Laplacian of Gaussian Method
Note: To obtain the most optimal results in Focus Peak view (extract), it is recommended to extract the JPG file from the ARW file. While it is possible to view Focus Peek by creating thumbnails, the mask is more effective when applied to JPGs. To access Focus Peek, double-click on the image in main view. In the Settings menu, Thumbnails tab, disable the “Use Thumbnail for Zoom” to use JPGs as base for Focus Peak.
What Is Focus Peaking?
Focus peaking is a visual aid that highlights which areas of a photograph are in sharp focus. Rather than relying on your eye alone to judge sharpness, focus peaking overlays a red highlight on pixels where edge detail and contrast are strongest. Those highlighted pixels are the ones in sharpest focus — everything else stays unchanged.
The Focus Peak is computed by the GPU on your Mac, making it a fast process even when the mask is generated on the fly.
Focus Peak off:
Focus Peak on:
Both the Focus Point and the Focus Peak can be applied simultaneously.
Why the Laplacian of Gaussian?
Several mathematical approaches can measure local sharpness, but the Laplacian of Gaussian (LoG) is one of the most effective for focus peaking because it combines two complementary operations.
The Gaussian blur is applied first, suppressing sensor noise and low-amplitude out-of-focus texture — water ripples, skin, smooth backgrounds — before sharpness detection runs. Without this step, the Laplacian would flag noise and soft texture as “sharp.”
The Laplacian then computes, for each pixel, how much its intensity differs from its immediate neighbours. In a blurry region those differences are small and smooth. At a sharply rendered edge they spike. The key insight is that the Laplacian measures second-order intensity change — it responds to genuine focus-induced contrast spikes rather than gradual gradients, which blurred regions produce even when they have visible texture.
The Kernel
Rather than the classic 4-neighbour approximation, RawCull uses a full 8-neighbour kernel computed on the GPU via Metal:
L = 8 × center − (N + S + E + W + NE + NW + SE + SW)
This 3×3 formulation is more isotropic than the 4-neighbour version — it responds equally to edges in all directions, including diagonals, which matters for natural subjects like feathers and fur.
The sharpness energy at each pixel is then computed as a luminance-weighted magnitude:
This preserves perceptual weighting — the green channel contributes most, matching human sensitivity to luminance detail.
Step-by-Step: How It Works
1. Downscale. The image is reduced to 1024 pixels wide before processing. The algorithm operates on pixel neighbourhoods, so full resolution is unnecessary and the performance gain is significant.
2. Pre-blur (Gaussian). A Gaussian blur is applied to the downscaled image. This suppresses out-of-focus texture and sensor noise before the Laplacian runs, preventing false highlights in blurred regions. The blur radius is adaptive: the base value set in the Focus Peak controls is scaled upward automatically — by up to 3× — based on the image’s ISO value (higher ISO → more noise → larger radius) and the image resolution (larger images → radius scaled by √(width/512) to maintain consistent edge selectivity). CIGaussianBlur accepts a maximum radius of 100; the effective radius is clamped to that limit.
3. Laplacian kernel (Metal GPU). The 8-neighbour kernel runs on every pixel in parallel on the GPU, computing the second-order derivative of brightness across all channels.
4. Energy and amplification. The per-pixel result is converted to a single luminance-weighted sharpness energy value and amplified. The amplification factor is user-adjustable.
5. Threshold. Any pixel below the threshold is discarded (black). Only genuinely sharp pixels survive. The threshold is the primary control — lower values highlight more of the image, higher values restrict highlights to only the sharpest edges.
6. Erosion. A morphological erosion pass removes isolated speckle pixels that survive the threshold but are too small to represent genuine edges. The erosion radius is quantised to the nearest whole pixel (a radius of 0 skips this pass). This cleans up the mask before it is expanded.
7. Dilation. Surviving pixels are expanded morphologically, turning scattered dots into solid readable regions without introducing false edges. The dilation radius is likewise quantised to whole pixels.
8. Border inset. The outer 4 % of each edge is zeroed out before the mask is composited. This matches the same inset used by the sharpness scorer and prevents Gaussian pre-blur edge artifacts — a thin blurry fringe that forms where the blur kernel reaches past the image border — from appearing as false focus highlights around the frame edge.
9. Red overlay. Surviving pixels are colourised red and composited over the original photograph using a screen blend mode. Black (non-sharp) areas are transparent in screen blending, so only the red sharpness regions show through over the photo.
10. Feather. A final Gaussian blur softens the edges of the red overlay, giving the mask a smooth, natural appearance rather than a hard pixelated boundary.
Tunable Parameters
RawCull exposes the following controls in the Focus Peak panel:
Control
Effect
Pre-blur
Base Gaussian blur radius applied before edge detection. The effective radius is scaled automatically with the image’s ISO value and resolution — this control sets the baseline from which adaptive scaling is applied. Higher values suppress background texture and high-ISO noise more aggressively.
Threshold
Primary sharpness cutoff. Raise to restrict highlights to only the sharpest edges; lower to highlight more of the image. Default 0.46.
Erosion radius
Morphological erosion applied after thresholding. Removes isolated speckle noise before dilation. Quantised to whole pixels — set to 0 to skip. Default 1 px.
Dilation radius
Morphological expansion applied after erosion. Widens edge regions into solid, readable patches — increase for small or fine-detailed subjects. Quantised to whole pixels — set to 0 to skip. Default 1 px.
Amplify
Multiplier applied to the raw sharpness signal. Higher values make weak edges more visible; too high reintroduces noise.
Feather
Gaussian softening applied to the final mask edges. Visual only — does not affect the underlying score.
Show raw Laplacian
Replaces the thresholded overlay with the unprocessed Laplacian output. Useful for diagnosing tuning or calibration issues.
A Reset button returns all values to their defaults.
Practical Considerations
Threshold tuning is the most important variable. Too low and nearly the entire image lights up. Too high and only the absolute sharpest micro-contrast registers. The default of 0.46 suits most sessions well; adjust up or down from there based on the scene.
Pre-blur is your noise lever — but it adapts automatically. The effective pre-blur radius is scaled by the image’s EXIF ISO value (√(ISO/400), capped at 3×) and by the image width (√(width/512), capped at 3×), so high-ISO files and larger images automatically receive more pre-smoothing without manual intervention. The slider sets the baseline; adjust it upward for scenes with particularly prominent out-of-focus texture — water, foliage, bokeh — or downward for very clean, low-ISO files where you want maximum edge sensitivity.
Subject texture matters. Smooth, low-contrast surfaces — clear sky, still water, skin — produce a weak Laplacian response even when perfectly focused, because there is little edge detail to detect. Focus peaking works best on subjects with natural texture: feathers, fur, foliage, fabric.
RAW vs JPG. The mask is more effective when applied to extracted JPGs rather than thumbnails. Thumbnails are heavily processed and downscaled before RawCull sees them, which reduces the fine edge detail the Laplacian depends on.
Summary
RawCull’s Focus Peaking runs a Laplacian of Gaussian pipeline entirely on the GPU via Metal. An ISO- and resolution-adaptive Gaussian pre-blur suppresses noise and out-of-focus texture; an 8-neighbour Laplacian kernel detects genuine sharpness spikes; thresholding followed by morphological erosion and dilation (both quantised to whole pixels) produces a clean, solid mask; a 4 % border inset removes pre-blur edge artifacts; a final feather pass softens the overlay edges; and screen blending composites the red overlay non-destructively over the original image. The result is a fast, accurate, and visually interpretable sharpness map that makes focus assessment immediate — particularly valuable when reviewing large numbers of action or wildlife shots where critical focus on a small moving subject is difficult to judge from the image alone.
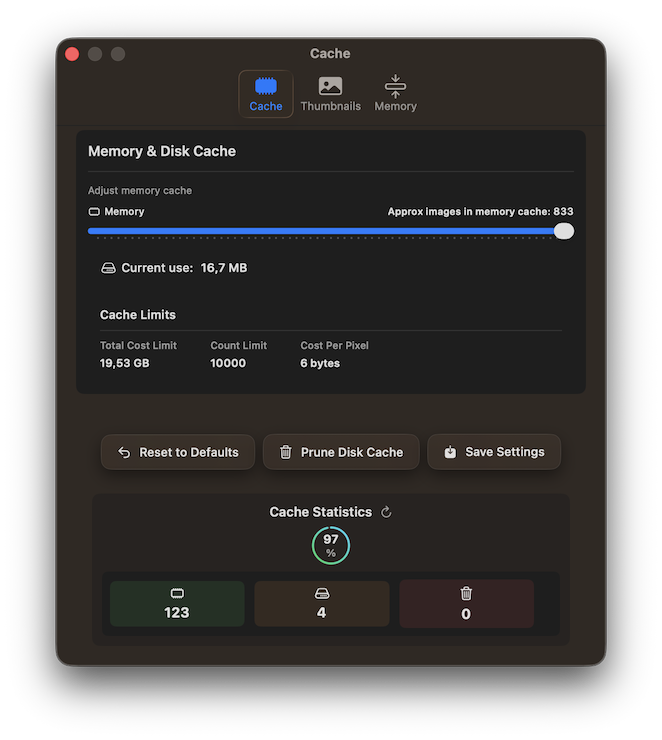
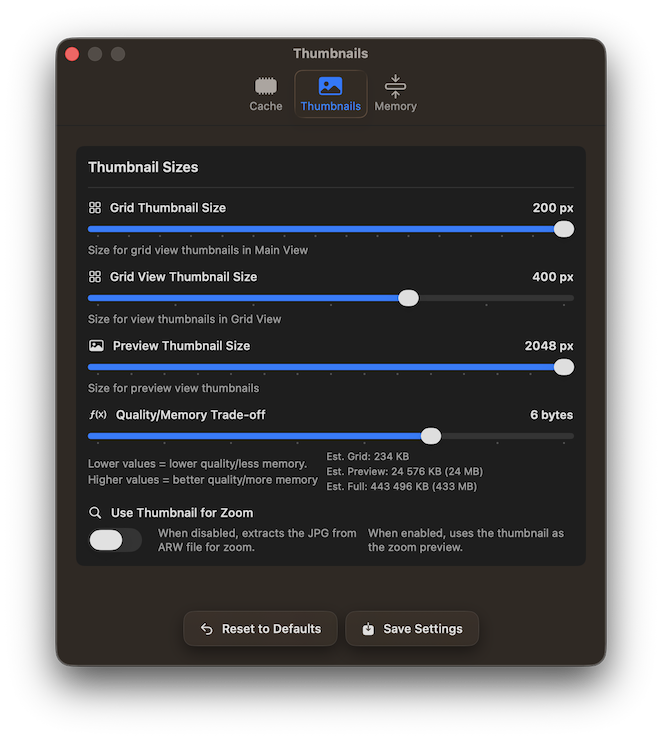
5 - Settings
Settings view
RawCull provides settings to customize your culling experience and optimize performance:
Cache Management: Control thumbnail cache location and size to balance performance with disk space usage
Thumbnail Quality: Adjust thumbnail generation settings to optimize preview quality and loading speed
Memory Settings: Configure memory allocation for handling large photo catalogs efficiently
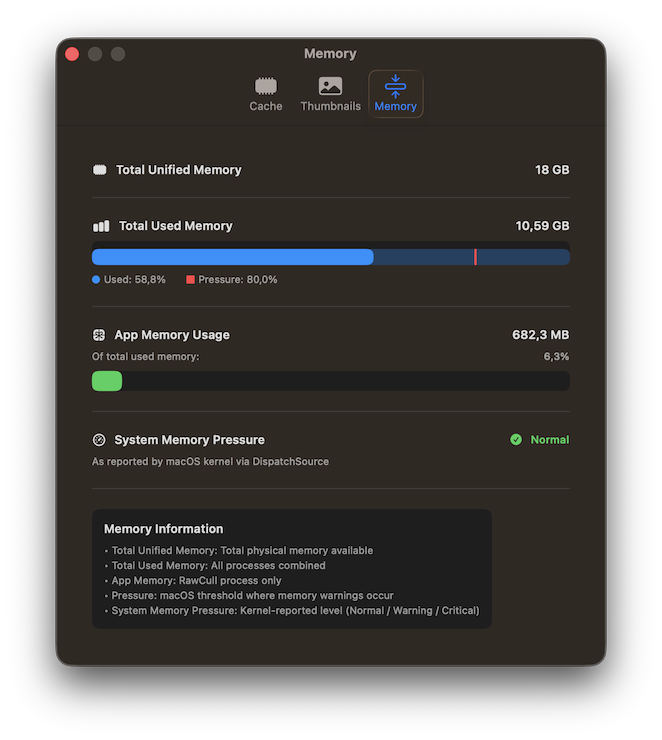
Access these settings via RawCull → Settings to fine-tune RawCull for your specific needs and system configuration. The cache statistics present the memory hit-rate when viewing photos.
The memory tab displays the memory utilized, the total memory capacity, and a memory-pressure warning.
6 - Focus Points
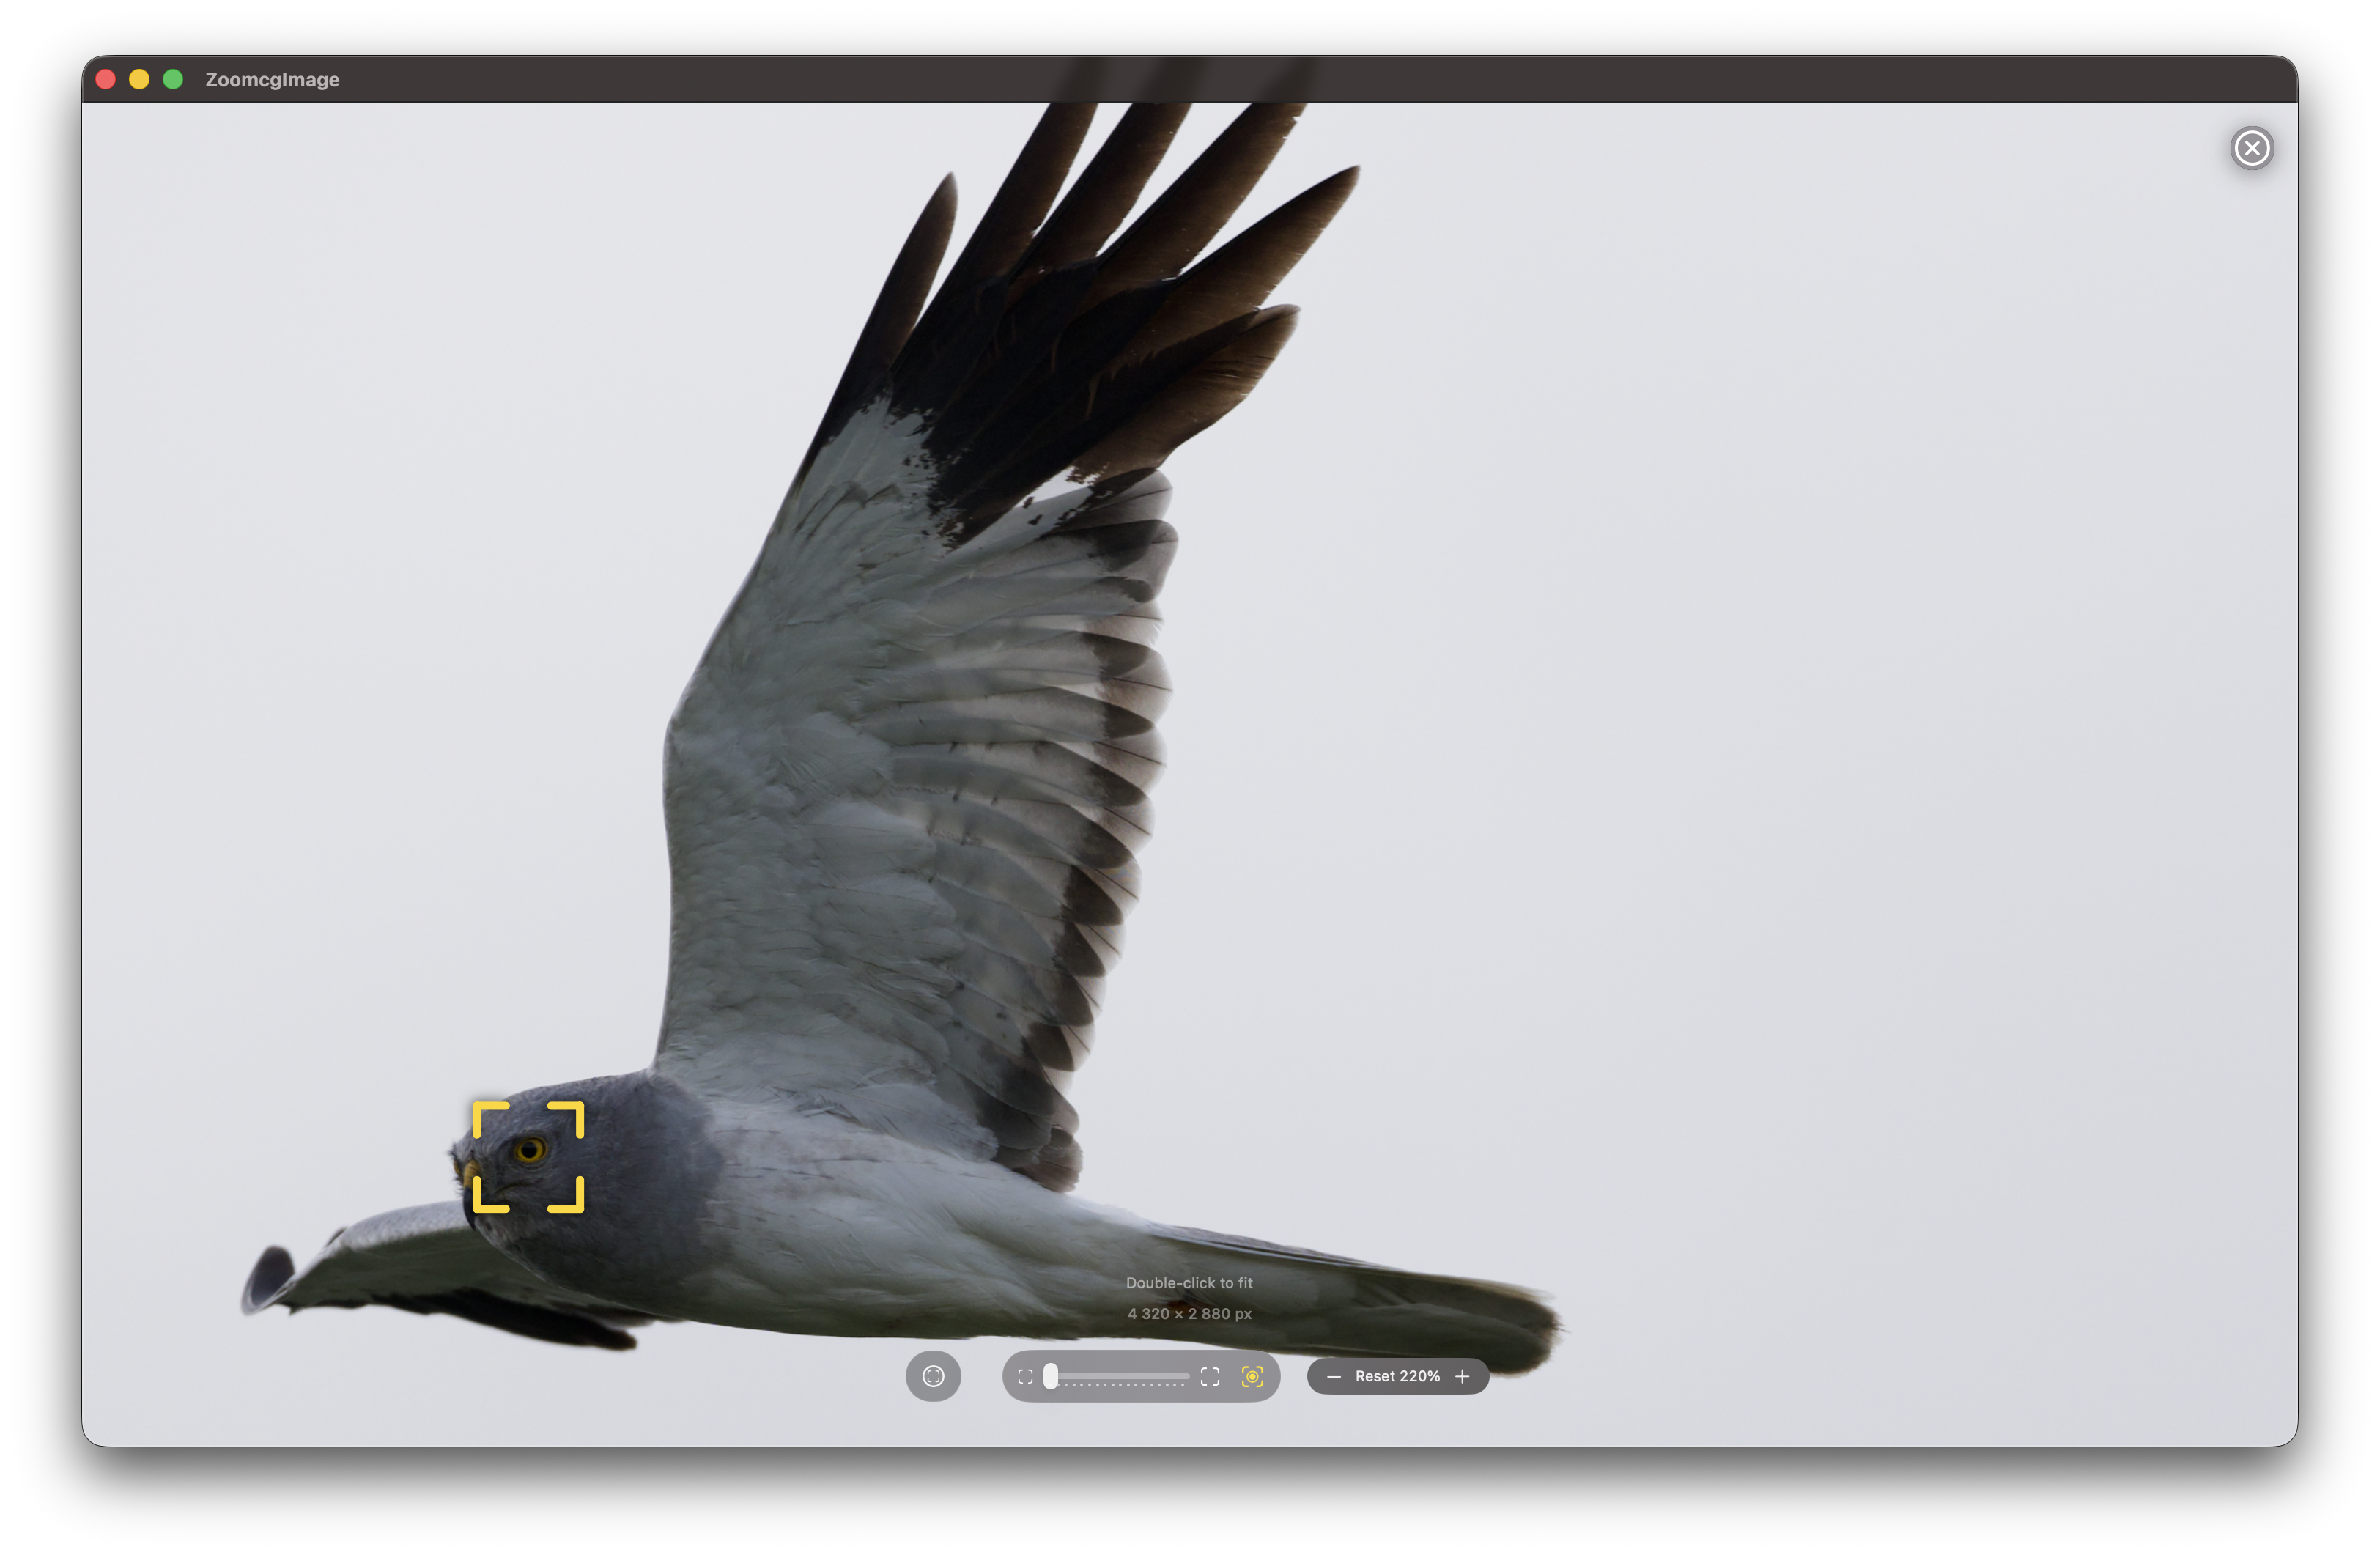
RawCull facilitates native extraction of Focus Points from Sony A1 ARW files. Users have the option to activate or deactivate the Focus Points feature in both the primary thumbnail view and the extracted zoom views.
Focus Point off:
Focus Point on:
Both the Focus Point and the Focus Peak can be applied simultaneously.